The front bumper plays a crucial role in both the functionality and aesthetics of the Mitsubishi Outlander. For business owners, ensuring that this essential component is up to par can impact not only safety but also brand image. Whether considering a repair for fleet vehicles or contemplating an upgrade for enhanced performance, understanding the nuances of bumper replacement is vital. This article will break down the requirements, materials, installation processes, and aftermarket options available for the Mitsubishi Outlander, providing business owners with the clarity needed to make informed decisions.
Front Bumper Replacement for Mitsubishi Outlander: A Practical Guide
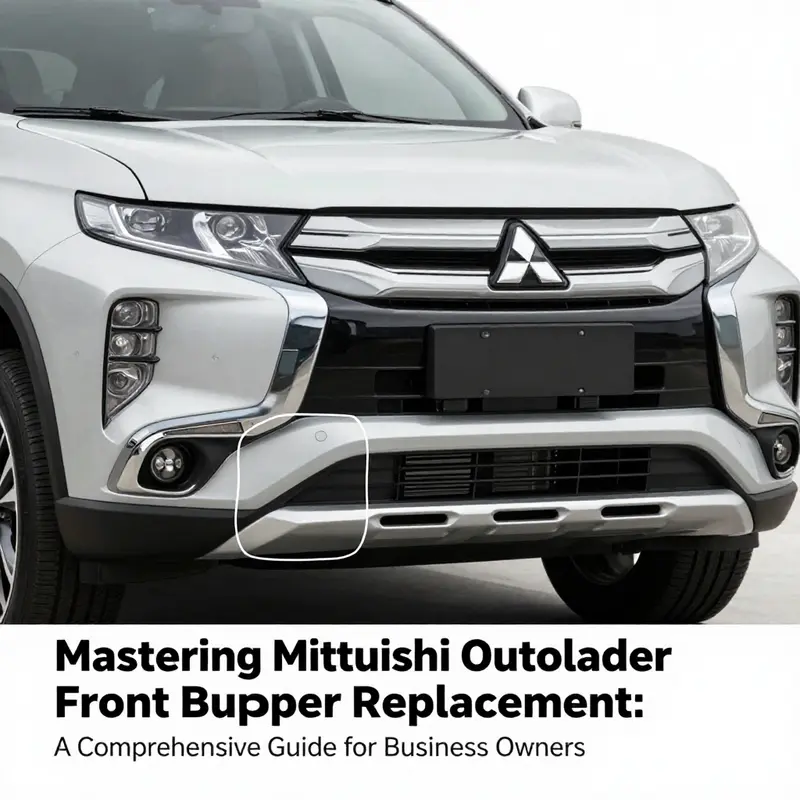
The front bumper on a Mitsubishi Outlander is a safety-critical assembly that blends energy management, mounting hardware, sensors, and aerodynamics. When damaged, replacement requires attention to alignment, sensor calibration, and finish quality. This chapter outlines the essential elements of replacement—what is protected, what is replaced, and how to approach the task with care so the result is aligned, secure, and visually coherent with the rest of the vehicle.\n\nThe reinforcement behind the bumper, typically a steel or aluminum structure, absorbs impact and protects critical components such as the radiator and engine bay. Replacing the reinforcement preserves safety performance and structural integrity but can add cost and weight.\n\nThe bumper cover, usually made from durable plastics or composites, must fit OEM specifications to avoid gaps that affect aerodynamics and sensor operation. Accurate fitment ensures proper sealing and paint results.\n\nMounting hardware and brackets connect the cover to the reinforcement and chassis. Correct bracket alignment influences repeatable fit and ride quietness; misalignment can cause rubbing and premature wear.\n\nThe installation sequence generally follows: remove obstructing components (wheel well liners, lower fasteners), disconnect electrical connectors for sensors and lights, detach from mounting points, position the new cover, and secure with brackets and fasteners in the correct torque sequence. Reinstallation is the reverse of removal, with attention to sensor and harness routing to avoid pinching or damage.\n\nPart selection should match exact vehicle specification (year, trim, VIN). OEM-equivalent kits that include reinforcement, cover, and mounting hardware simplify installation and help maintain factory geometry and sensor alignment. If choosing aftermarket parts, verify fitment, finish, and hardware inclusion.\n\nConsult model-specific repair manuals or authorized service centers for torque specs, sequencing, and cautions about sensor alignment or air-bypass concerns. Official documentation helps preserve safety, warranty, and reliability.\n\nIn short, a proper bumper replacement restores crash protection, visual cohesion, and sensor functionality while offering the opportunity to refresh the front-end appearance.
Frame to Finish: The Role of Materials and Design in a Safe, Sleek Mitsubishi Outlander Front Bumper

The front bumper on the Mitsubishi Outlander serves as both shield and statement. Beyond aesthetics, it is an engineered energy-absorbing system that protects critical components and supports ADAS sensors. Replacing the bumper is a decision that depends on model year, trim, and the integration of surrounding systems. The outer cover is typically lightweight, formable ABS plastic that accepts paint and resists weathering, while the reinforcement behind it provides crash energy management and precise mounting for sensors, brackets, and weather seals.
Choosing a bumper involves ensuring model-specific fit, compatibility with fog lamps and radars, and alignment with the hood and grille. In the aftermarket, CAPA-certified options and primed-to-paint covers help achieve OEM-like color match without sacrificing fit. Proper installation includes checking sensor recalibration when required and verifying that mounting points are torqued to spec to maintain alignment over time.
In short, a bumper replacement blends materials science, mechanical fit, and software integration to preserve safety performance and the vehicle’s appearance. When sourced carefully, a replacement can restore the Outlander front end to its original look and protective function, while supporting future maintenance and ADAS reliability.
Securing the Front Line: A Cohesive Guide to Replacing the Mitsubishi Outlander Front Bumper
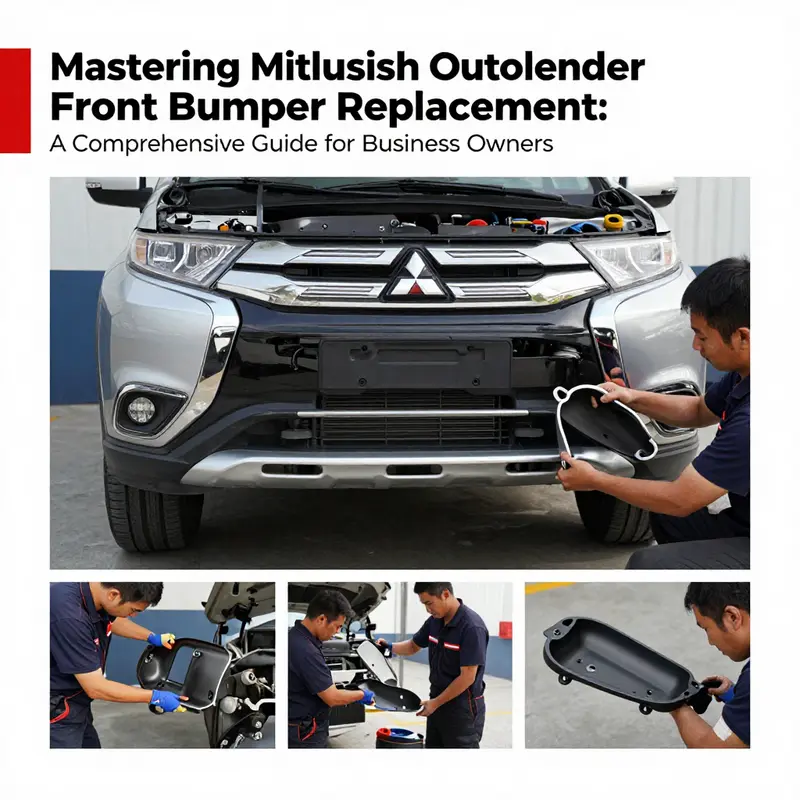
The front bumper is more than a cosmetic face for the Mitsubishi Outlander; it is a carefully engineered safety feature that acts as the first line of energy absorption in low-speed impacts, while also supporting aero efficiency and the overall symmetry of the vehicle’s front end. Replacing it is not merely a matter of snapping a new cover into place. It requires understanding how the bumper, its reinforcement structure, and its fasteners work together to preserve alignment, maintain sensor and lighting integrity, and keep the vehicle’s appearance clean and integrated with the rest of the bodywork. In many ways, the bumper replacement is a craft that blends mechanical precision with a respect for the vehicle’s safety architecture. The process begins with the essential step of choosing the right part for your exact model year and trim, because bumpers do vary across generations. An Outlander from one era may share a silhouette with its siblings, but the component’s mounting points, reinforcement geometry, and integrated features can differ significantly from year to year. This is not a detail to overlook, because a mismatch can lead to misalignment, gaps along the fenders, or impaired function of fog lights, sensors, or parking aids. The correct part anchors the work in reliability from the first bolt to the last clip. Material composition also matters. Modern Outlander bumpers typically pair a steel reinforcement frame with a plastic or composite outer cover. The steel backbone provides structural integrity and energy absorption during moderate collisions, while the lighter plastic skin allows for sleek styling and easier repair after minor scratches or dings. This combination is chosen to balance crash performance, corrosion resistance, and ease of service. For drivers in harsher climates or on roads that demand off-road capability, aftermarket concepts sometimes lean on reinforced or corrosion-resistant metals and advanced composites to extend longevity. The key consideration is not just appearance, but how the bumper behaves under real-world stresses, including the mission-critical interface with sensors and safety systems that are increasingly common on modern Outlanders. The preparation phase, therefore, begins with a careful assessment of compatibility, followed by a plan for disassembly that preserves the surrounding panels and wiring harnesses. It is important to respect the interplay between the bumper cover, the reinforcement, and the brackets that mount the assembly to the chassis. Bumper brackets, often overlooked, are small but essential components. They can be plastic or reinforced metal, designed to hold the bumper cover in proper alignment with the frame, reduce vibration, and minimize squeaks or rattles at speed. Upgrading brackets or selecting options with enhanced stiffness can pay dividends in the long run by supporting long-term stability and trim integrity. When contemplating upgrades or cosmetic tweaks, owners are offered a menu of customization options that can be applied without replacing the entire assembly. Carbon fiber finishes, matte or satin metallic effects, or colored accents on trim strips are common ways to personalize the front profile. These choices can be installed as standalone accessories and coordinated with other exterior updates to keep the appearance cohesive and tasteful. The practical route, though, begins with the mechanics: securing the vehicle, disconnecting electrical systems, and removing the fog lights or sensors that are integrated into the bumper. Preparation is not a perfunctory step; it is the foundation that protects electrical connectors, prevents short circuits, and keeps the vehicle’s safety features aligned with the new part. Before you even touch a tool, set the stage. Position the Outlander on a lift or jacks stands so you have ample room to work at the front end. This is not a job for a driveway without height support; access to the bumper’s fastener points is crucial for a clean removal. With the vehicle stable, the next move is to disconnect the battery’s negative terminal. This simple action safeguards the electrical circuits during the removal process and reduces the risk of accidental shorts when clips and connectors are manipulated. The tool kit you gather should be robust but specific to the job. You will want a range of wrenches and sockets, screwdrivers of both flathead and Phillips varieties, plastic trim tools to avoid scratching, and gloves and eye protection for safety. The initial door opening, in this context, is the hood. Lifting and propping the hood provides access to fasteners that are often tucked along the top edge and within the upper corners of the bumper area. The outer trim and inner fender wells hide additional fasteners that can be screws, bolts, or plastic clips. The clips, in particular, demand a delicate touch; using a plastic pry tool to release them helps prevent damage to adjacent panels. If the bumper includes integrated components such as fog lights or proximity sensors, you must disengage their electrical connections before attempting to remove the bumper completely. This step is essential to avoid yanking on wiring and to ensure you can install the new bumper without tearing a connector or damaging a harness. Once all fasteners are free, the bumper cover can be separated from the reinforcement bar and any mounting brackets. The reinforcement bar is typically a high-strength steel or aluminum member that forms the structural backbone of the bumper assembly. It is a reminder that what you see as the bumper cover is only the visible skin; the real workhorse sits behind it. Handling the reinforcement bar calls for care to avoid misalignment upon reinstall. A solid grasp and a gentle approach are your best tools here. When you have effectively removed the old bumper, you then turn to fitting the new piece. Start with clean mounting surfaces. Old adhesive residues, dirt, or corrosion at the contact points can hamper precise alignment. A clean plane on the frame and mounting brackets ensures the new bumper will sit flush and maintain consistent gaps with the rest of the body lines. Position the new bumper so that the outer edges align with the fenders and the top edge sits evenly along the hood line. It is a moment where precision matters—the kind that comes from slow, methodical placement rather than a hurried press to snap things into place. Brackets and supports are then reattached in the correct sequence to mimic the original geometry. Start with the lower supports and work upward, tightening fasteners to the manufacturer’s recommended torque settings. The torque is not arbitrary; it controls clamp load, minimizes the risk of warping, and ensures the bumper’s skin doesn’t bow or separate from the reinforcement during operation. If your installation involves lighting assemblies or sensors, reattach these components with care. Fog lights, parking sensors, and radar or camera units can be sensitive to alignment; a misaligned sensor can degrade performance or trigger warning lights. After the major hardware is secure, reinsert the remaining clips, screws, and fasteners in the order specified by the repair manual. The sequence matters because it guides the bumper cover into a natural, even fit against the reinforcement and the fenders. Take time to verify the bumper’s fit from several angles. Check that the panel gaps are uniform, that the bumper sits square with the chassis, and that there are no high spots or unusual gaps at the corners. A common issue after replacement is a slight misalignment at one or both edges, which can be corrected by small adjustments to the mounting brackets or a re-tightening of the fasteners in a deliberate, incremental manner. Once the bumper is snug and aligned, the visual and functional checks begin. Reconnect all electrical connectors for lights and sensors, and ensure no wires are pinched in the edges as you close the hood and drive surfaces. It is worth performing a visual inspection to confirm that the bumper is flush with the rest of the bodywork and that there are no loose parts that could rattle at highway speeds. A short test drive is a pragmatic step. Pay attention to any unusual noises, vibrations, or misfiring of the lighting system. If radar-based driver assistance features are present, verify their operation in real-world conditions, as a misaligned bumper can simply throw off the sensor readings or trigger false alerts. The process, while detailed, becomes a familiar rhythm once you have faced it a few times. The Outlander’s front end varies by year and trim, and the exact point where you detach a clip or reconnect a harness can shift. This diversity reinforces the importance of consulting the vehicle’s service manual for model-specific steps and torque specifications. The manual is a reliable compass that helps you navigate the particularities of your exact configuration. In practice, many owners find it helpful to view the replacement as an integrated operation rather than a sequence of isolated tasks. You start with compatibility, move through meticulous disassembly, and finish with alignment, reassembly, and functional verification. The aim is a seamless front profile that mirrors the original geometry, preserves sensor calibrations, and sustains the integrity of the lighting and safety systems. With the mechanical basics in place, there is room for practical considerations that can influence your approach. For example, some owners opt for upgraded brackets to improve long-term stability, particularly if the vehicle has a heavy bumper skin or if the climate is corrosive. Others may choose to match or contrast trim accents on the bumper cover to achieve a personal style that still respects the vehicle’s original design language. Even if you decide to upgrade aesthetics, the underlying mounting strategy remains the same: correct alignment, robust fastening, and careful handling of any integrated components. A well-executed replacement helps maintain the Outlander’s clean, cohesive front end while restoring its protective function. When selecting a replacement, it is prudent to verify compatibility beyond the broad model year. Bumpers can differ not only by generation but by trim level and even market-specific variations. A direct-fit option that aligns with performance expectations and safety requirements will reduce the chance of misfit and the need for rework. For owners who prefer a direct, plug-and-play approach, there are kits designed to fit a range of Outlander variants with minimal modification. Such kits typically include the bumper cover, reinforcement, and necessary brackets, along with the mounting hardware. In reviewing options, it is wise to consider the full assembly rather than a cosmetic skin alone, especially if the reinforcement structure shows signs of wear or corrosion or if the mounting points have been compromised in the prior accident. These considerations also extend to the wider components that interact with the bumper: the fog lights, parking sensors, and any active safety devices. Proper integration of these parts preserves the vehicle’s capability to detect obstacles and navigate traffic environments safely. In some cases, the repair process may reveal pre-existing damage that merits attention beyond the bumper itself. If the reinforcement bar shows bending, fatigue, or corrosion, addressing those issues alongside the bumper replacement protects the vehicle’s front-end integrity and ensures the safety systems continue to function as intended. An experienced technician may assess the overall front-end architecture to decide whether a simple bumper swap suffices or a more comprehensive front-end restoration is warranted. This assessment helps prevent future misalignment or premature wear on mounting points. The practical takeaway is straightforward: invest time in the preparation, verify compatibility early, and follow a disciplined sequence during removal and installation. The result is not only a restored front appearance but a restored confidence in the Outlander’s protective envelope. For readers who want to see how others approach the task, some owners opt for direct-fit bumper assemblies sourced from parts suppliers that specialize in the Outlander lineup. The possibility of a direct, precise fit reduces trial-and-error adjustments and speeds up the process, making it feasible to complete the replacement with a clear plan and the right tools. If you are considering a swap any time soon, you might explore a specific front bumper option tailored to the Outlander lineup and year. See the practical example at the following resource with a direct-path option for the Outlander front bumper: front-bumper-mitsubishi-outlander-19. This reference helps illustrate how a complete assembly, properly matched to your vehicle, can simplify the installation while preserving factory alignment and safety performance. As always, verify that the selected part corresponds to your exact model year, trim, and market specification to avoid misfit. Whether you are performing a DIY replacement or coordinating with a shop, the objective remains the same: a safe, accurately aligned front end that looks right and preserves the Outlander’s intended aerodynamics and protection. The bumper is just one piece of a broader system that includes the reinforcement, brackets, and any active safety components. Treating them as a single assembly during planning and execution yields the best long-term results. If you plan to pursue cosmetic upgrades, consider how those choices will interact with the mounting points and the edge aesthetics. Aesthetics can be enhanced with trim accents or finishes that do not compel you to replace the bumper cover again in the near term. But always ensure the upgrades are compatible with the underlying structure and that they do not interfere with the bumper’s safety role. In conclusion, the replacement process is a balanced blend of mechanical discipline, safety-minded handling, and attention to the vehicle’s architectural integrity. With the correct part, proper preparation, and a measured, careful installation, the Outlander’s front end regains its protective effectiveness and its cohesive appearance. The chapter that follows will expand on diagnostic checks after installation, offering guidance on sensor calibration, alignment verification, and feature validation that can be pivotal for preserving the vehicle’s advanced driver-assistance systems. For drivers who want additional guidance, consult trusted repair manuals or reputable automotive service sites to complement the hands-on steps described here. External resource: https://www.carinterior.com/how-to-replace-a-mitsubishi-outlander-front-bumper/
From Repair to Radiance: Guidance and Craft in Aftermarket Front Bumper Upgrades for the Mitsubishi Outlander
The front bumper is more than a face for the Mitsubishi Outlander; it is a functional shield, a precision energy absorber, and a canvas for personal expression. When damage knocks at the door, a bumper replacement becomes an opportunity to restore safety and drive feel while also elevating the vehicle’s presence on the road. Across model years, the options vary not just in color or finish but in the very approach to how the bumper is built, how it mounts, and how it interacts with the rest of the front end. In this chapter, we weave together the practical essentials of choosing a front bumper replacement with the broader world of aftermarket styling, all while keeping the concerns of fitment, safety, and maintenance front and center. The journey from a damaged corner to a refreshed, customized front end begins with a careful assessment of the exact model year and trim, then expands into a conversation about materials, mounting hardware, and the aesthetics that make a clean, cohesive look possible.
At the core, the bumper’s role as an energy-absorbing barrier is tied to a robust steel reinforcement or frame that provides structural integrity. The outer shell of the bumper, typically crafted from plastic or composite materials, is designed to be lightweight yet durable enough to withstand low-speed impacts and to maintain aerodynamic efficiency. In many Outlander applications, aftermarket options echo the same structural logic: a reinforced frame paired with a high-quality bumper cover. That pairing matters because it determines not only crash performance but the ease with which the piece integrates with the car’s geometry, sensors, and lighting schemes. When you replace the bumper, you are not simply swapping shells; you are reattaching a critical interface that involves a network of fasteners, brackets, and sometimes sensor housings. It is here that a thoughtful choice—whether you opt for a direct OEM-like replacement or a more aggressive aftermarket approach—begins to shape the ownership experience.
A practical pathway through this decision-making starts with compatibility. The Outlander has evolved across generations, and bumper designs have followed suit. The best starter rule is simple: confirm that the chosen bumper is designed for your exact model year, trim, and any options like fog lamps or sensors. This is not a cosmetic nuance but a fitment guarantee. A direct-fit option, often marketed as a complete front-end replacement kit, can simplify installation because it anticipates the mounting points and brackets you will reconnect. The included hardware—bumper brackets, reinforcement pieces, and sometimes the fog lamp housing—reduces the friction of a repair and helps preserve alignment. When in doubt, consult the product listing with a careful eye on the year and trim notes, then cross-check with the vehicle’s current mounting geometry. A precise swap minimizes gaps, prevents rattles, and keeps the front-end silhouette true to the vehicle’s original lines.
Beyond fitment, the material science of the bumper is a practical concern with far-reaching consequences. Modern Outlander bumpers come in a blend of steel reinforcement and plastic or composite outer shells. The steel frame provides the backbone for energy absorption during a collision, while the outer cover is responsible for aerodynamics, weight distribution, and the ease of repair after minor damage. In aftermarket ecosystems, you may encounter bumper covers made from ABS plastic or fiberglass. These choices carry distinct trade-offs. ABS is generally impact-tolerant, affordable, and easy to paint, making it a practical option for most street-driven Outlanders. Fiberglass offers stiffness and a different finish quality, but it can be more brittle if struck with a heavy impact. Some upgraded or aftermarket configurations push the envelope further with advanced composites or corrosion-resistant metal components for off-road use or harsher environments. The key is to balance durability, weight, and repairability in a way that suits your climate, driving style, and maintenance willingness.
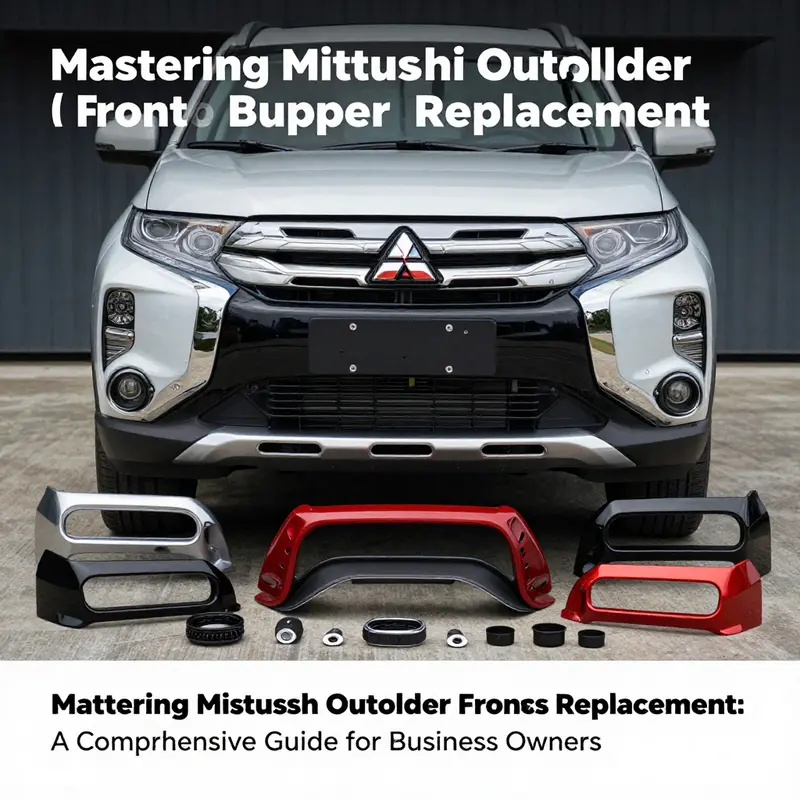
If aesthetics call loudly, it is easy to drift into the realm of cosmetic upgrades that still respect the underlying engineering. Aesthetic upgrades include carbon fiber textures applied to the bumper surface, matte finishes that diffuse glare, or subtle color-matching work that preserves the unit’s original mood while granting a refined edge. In addition to the bumper cover, the surrounding trim—the grille, the lower lip, and the side radii—are all places where the eye travels. The idea of a cohesive front fascia often involves more than the bumper alone. Many drivers opt for a body kit that integrates a front bumper with side skirts and a designed lower splitter. This approach can create a smoother visual flow from the air dam to the wheel arches, aiding perceived aerodynamics and giving the vehicle a more planted stance on the highway. Side skirts, when installed as part of a broader package, help close the visual gap between the bumper and the doors, making the front and rear ends feel as though they belong to a single, coordinated design language rather than two separate pieces.
On the trim and grille front, the customization ecosystem expands further. Chrome or premium trim pieces can be swapped to alter the light-forward impression of the fascia. Billet grilles—crafted from solid metal and finished with a machined look—offer a tactile and visual upgrade that speaks to a higher-end aesthetic. These elements are not essential to safety or function, yet they influence how the front of the Outlander communicates its character to the world. When integrating these components, it is important to preserve the balance between visual drama and the vehicle’s native design cues. The goal is a front end that looks integrated, not hurried, with each element supporting the next in a deliberate rhythm.
Safety and compatibility considerations rise again when you think about sensors, fog lights, and parking aids. Aftermarket or upgraded brackets can improve long-term stability, but any change to the bumper’s geometry requires attention to clearance, sensor alignment, and electrical connections. If your Outlander is equipped with parking sensors or adaptive features, verify that any replacement bumper accommodates the sensor housings and wiring harnesses in their original locations. This is not merely about avoiding an error message on a display; it is about maintaining the assurance of proximity alerts and the consistent performance of lighting and warning systems. In practice, this means checking the product documentation for sensor cutouts and fog light housings, and, if necessary, purchasing a kit that includes the appropriate mounting points and harness adapters. The safer route is to treat the installation as a small but important integration project rather than a cosmetic swap.
The installation process itself benefits from a measured, methodical approach. Start with a clean workspace, with the vehicle properly supported and the battery disconnected to avoid any accidental airbag or electrical triggers. Remove the damaged bumper carefully, taking care not to disturb nearby sensors or brackets. Compare the new bumper, brackets, and reinforcement pieces with the old assembly to confirm that all mounting holes align. A good-fit replacement kit should line up with factory holes and disengage with the same ease as the original. As you reattach, replace fasteners with the recommended hardware; used or damaged fasteners can introduce unwanted play or vibration. After the bumper is mounted, a fresh alignment check is wise. A minor adjustment to the fenders, hood gaps, or grille line can make a surprising difference in how the front end looks and how it seals against the elements. If the kit includes a new fog lamp housing or sensor connectors, install these with care, ensuring that the electrical connectors click securely and the weather seals are intact to prevent moisture ingress.
Of course, the aesthetic dimension deserves equal attention to the functional. Painting and finishing require surface preparation, primer, color-matching paint, and a clear coat that resists the sun and road chemicals. A well-prepared surface respects the paint film’s longevity and reduces the risk of peel or micro-scratches that can mar the gloss and the longevity of the bumper cover. When you decide to implement carbon fiber textures or high-gloss finishes, seek professional help if you are aiming for a flawless, durable result. Not every bumper shell is suited to every finish, and some textural effects can highlight flex or seam lines if the underlying reinforcement isn’t perfectly aligned. A thoughtfully chosen finish can preserve color stability through heat and sun exposure, which, in turn, protects the entire front-end appearance.
From a cost perspective, aftermarket options offer a spectrum that ranges from economy replacements to more elaborate aesthetic packages. The trade-off between price, weight, and finish quality is a personal balance. Some owners prefer to approach the project in stages, starting with a direct-fit bumper cover to restore function while keeping the original appearance, then returning later to refine the look with trim pieces, a matching grille, and a splitter that speaks to their driving personality. The decision process often involves a mental catalog of how the Outlander is used: daily commuting with occasional highway mileage, family trips that require robust protection for the bumper, or weekend warrior adventures where off-road exposure makes a tougher front end appealing.
In the larger ecosystem of components that surround the bumper, it is helpful to remember that you are not just buying a piece but selecting a platform for ongoing customization. The same bumper can be a gateway to a personal identity on wheels—an option to signal sophistication through a carbon texture, aggressiveness with a lower lip, or sophistication with refined chrome accents. It is not about chasing trend lines but about building a front end that communicates the owner’s relationship with the vehicle: practical, prepared, and personally styled. This mindset is important because it shapes how you choose sources, how you verify compatibility, and how you plan the installation sequence so that the final result is both safe and satisfying.
If you are drawn to the convenience of a plug-and-play kit that promises OEM-level alignment without dealership pricing, consider a direct-front-set option that includes necessary brackets and housing components. Such a package can simplify the process, reduce installation time, and lower the risk of misalignment that could compromise both aesthetics and function. For those who relish the idea of a more unique, customized front end, the world of accessories—such as chrome or matte trim strips, billet grilles, and textured finishes—opens doors to a personalized look that still maintains the fundamental safety and performance requirements. The right choice hinges on aligning your expectations with the realities of fitment and long-term maintenance. A well-chosen bumper, installed with care and finished with attention to protection against the elements, can sustain its appeal for years to come, while preserving the integrity of the Outlander’s design language as it ages gracefully on the road.
For readers seeking a concrete starting point on compatible options, one accessible path is to explore front bumper replacements designed specifically for the Outlander throughout model years. This path offers a direct route to a functional and visually integrated update without the guesswork that sometimes accompanies generic aftermarket parts. As you weigh the options, remember that the front bumper is the first line of defense, the visual anchor of the vehicle’s face, and a clear signal of how you intend to use and care for your Outlander in the years ahead. The careful choices you make now will influence both how your SUV drives and how it feels when you walk up to it each morning, a reminder that automotive upgrades can be as much about the daily experience as about any weekend thrill.
For readers who want a concrete reference on a direct-fit option aligned with the Outlander’s design intent, you can explore a dedicated front bumper replacement for the Outlander 19 model family. This option provides a streamlined path to a precise, plug-and-play installation that preserves the intended proportions of the vehicle while allowing room for tasteful finishes and trim enhancements. Front bumper Mitsubishi Outlander 19. This link serves as a practical placeholder for what a straightforward replacement can look like when it’s designed with the exact generation and trim in mind, underscoring the value of careful compatibility checks before committing to a full front-end swap.
In summary, the aftermarket landscape for the Mitsubishi Outlander front bumper replacement offers more than a repair option. It provides a platform for restoring confidence after damage and a canvas for personal expression through finish, trim, and integrated styling. The best path blends a clear understanding of model-year compatibility with a thoughtful approach to materials, mounting hardware, and finish choices. It is a balance between safety, performance, and aesthetics, realized through careful selection and precise installation. When done well, a bumper replacement becomes more than a fix; it becomes an intentional statement about how the vehicle is used, how it is cared for, and how its road presence is shaped for the miles ahead.
External resource: https://www.alibaba.com/product-detail/Mitsubishi-Outlander-Front-Bumpers-Durable-Stylish_1600784822308.html?spm=a2700.1.nav-1000000102.0.0.6d7c6a2aKqNjRZ
Final thoughts
Replacing the front bumper of a Mitsubishi Outlander is more than just a repair; it’s an opportunity for business owners to enhance both safety and aesthetics. Understanding the requirements, various materials involved, and the detailed installation process ensures that this task is handled with care. Additionally, the availability of aftermarket options allows for personalized aesthetics that can reflect your brand’s identity. As you consider your next steps in vehicle maintenance or fleet improvements, keep these insights in mind to make the most informed decisions for your operations.