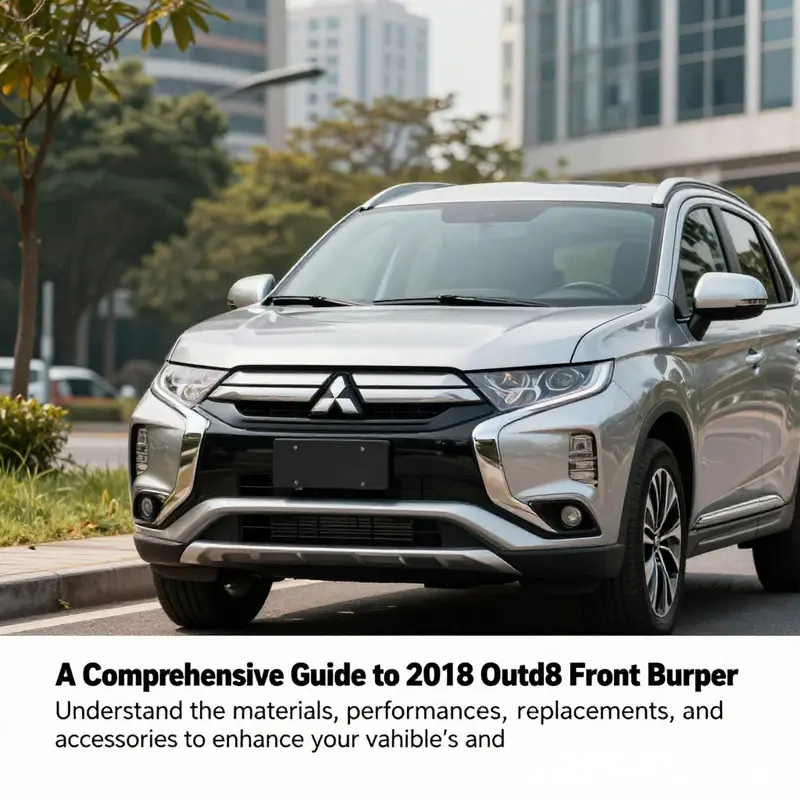
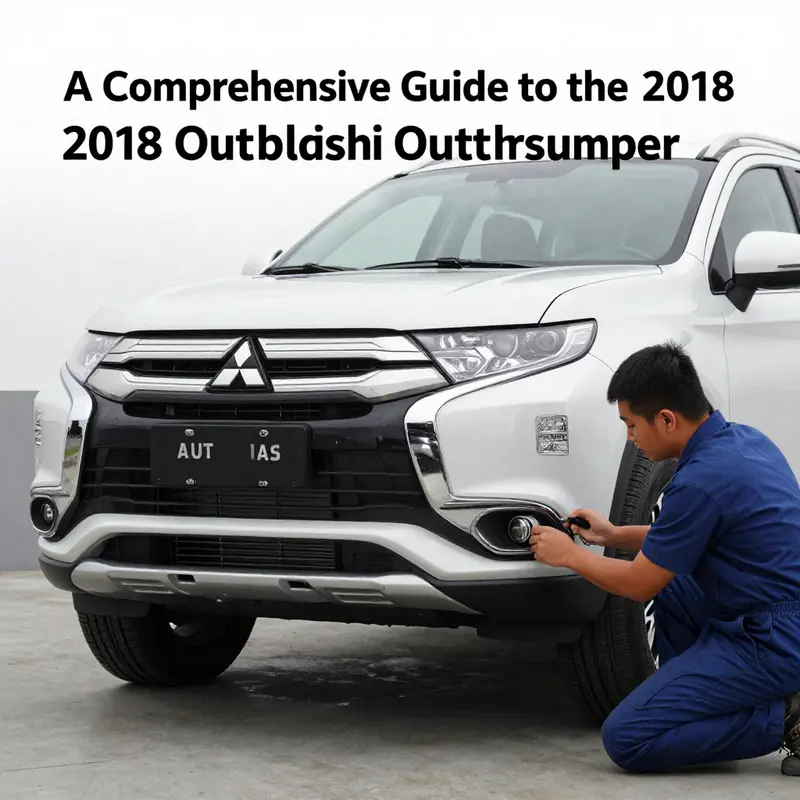
The 2018 Mitsubishi Outlander’s front bumper is much more than a cosmetic feature; it’s a crucial element for safety, aerodynamics, and vehicle functionality. With its innovative design, crafted from high-impact resistant materials, the front bumper not only absorbs shocks during minor collisions but also integrates seamlessly with advanced driver-assistance systems. Understanding its material composition, performance metrics, replacement options, and potential accessories is imperative for business owners looking to maintain or enhance their fleets. This article explores these aspects in detail, offering insights that will aid in informed decision-making when it comes to this essential vehicle component.
Under the Surface: The Material Truth Behind the 2018 Mitsubishi Outlander Front Bumper
The front bumper of the 2018 Mitsubishi Outlander functions as more than a visual frame for the vehicle’s snout. It is a purpose-built shield that blends energy-absorbing behavior with a lightweight footprint, a balance that supports both safety and efficiency. To understand how this component performs in daily use, it helps to look at the material choreography behind its two main roles: dampening impact forces in minor crashes and preserving the integrity of the vehicle’s more delicate systems beneath, including the sensors that power modern driver aids. The bumper’s outer skin is crafted from polypropylene (PP), a thermoplastic that has become a staple in contemporary automotive design for its combination of toughness and low weight. In the 2018 Outlander, the outer panel is typically formed from a customized PP compound that may incorporate reinforcing additives. These additives, often calcium carbonate or similar fillers, serve to improve rigidity and dimensional stability without turning the panel brittle. The result is a surface that can resist scuffs and minor dents while still absorbing impact energy when the front end encounters a low-speed collision. The polypropylene construction also plays nicely with the paint and clearcoat system, enabling a uniform finish that holds up to normal road wear without adding significant mass to the front end. The benefit is twofold: the weight saved translates into slightly better fuel economy, and the bumper remains easier to repair or replace than a metal equivalent when damage occurs at or near pedestrian-impact thresholds. Inside the bumper’s hollowed backbone lies the reinforced support beam, a critical counterweight to the soft, energy-absorbing skin on the outside. This beam, often referred to as an anti-intrusion bar, is typically made from high-strength steel. Cold-rolled steel or dual-phase steel variants are common choices because they deliver the right mix of strength and formability. When a low-speed collision transmits energy into the bumper, the outer PP skin deforms or compresses, while the steel beam resists excessive deformation and channels the force away from the vehicle’s critical zones. This structural duet – a compliant outer shell paired with a stiff inner spine – is what allows the Outlander to meet pedestrian safety norms and crash-test criteria without relying on a heavier, all-metal construction. The bumper’s performance is further refined by other materials scattered throughout the assembly. ABS resin, for example, appears in various trim components and bracketry. Aluminum may be used for specific brackets or surface accents on higher trims, chosen for corrosion resistance, a lighter touch, or a higher-end finish. While these components do not carry the same energy-absorption responsibilities as the PP skin or the steel bar, they contribute to overall durability and longevity. The inclusion of aluminum accents, in particular, can provide a premium feel and improved resistance to weathering, helping the bumper maintain its appearance across many seasons of use. Behind the visible shell lies integrated foam padding, a buffer of high-density material that cushions impact energy and mitigates the jolts felt by occupants in a gentle collision. This padding is usually a polymeric foam or a rubber-like compound that compresses predictably under load, distributing forces across a wider area and reducing the chance of localized damage to the front structure. In addition to softening impacts, the padding can play a role in pedestrian protection by absorbing a portion of the kinetic energy before it reaches the more fragile parts of the vehicle’s front end. The exact composition of the interior padding can vary, but the principle remains consistent: a well-timed cushion can change the difference between minor cosmetic damage and a more consequential front-end compromise. The manufacturing and assembly of these materials are calibrated to deliver repeatable results. The PP outer skin is typically produced through high-volume injection molding, a process that ensures consistent wall thickness and a smooth surface suitable for paint adhesion. The steel beam is formed through conventional metalworking methods, including stamping and bending, to achieve precise geometry that aligns with the bumper’s mounting points and impact zones. The trim pieces, whether ABS-based or aluminum, are selected not just for their look but for their fit and resistance to wear in exposure to sun, salt, and road grime. This careful material pairing is not incidental. It is a conscious design choice that supports an overall system intended to work in concert with other structural elements of the vehicle, including the grille, sensors, and bumper mounting hardware. The integration of sensors and hardware at the bumper level has become a defining feature of modern crossovers, and the 2018 Outlander is no exception. The bumper houses or anchors critical sensor components that feed data to the vehicle’s ADAS suite, including lane-keeping assist and adaptive cruise control. The bumper’s geometry and the exact positioning of its inner components influence how accurately those sensors perceive the car’s environment. Engineers therefore pay close attention to tolerances and fitment during production, ensuring that the outer shell, the steel beam, and any attached camera housings or radar or ultrasonic units sit in their designated planes. Any deviation can degrade sensor performance, triggering calibration needs and, in some cases, reprogramming or recalibration. This is a practical reminder that the bumper is not merely a cosmetic shell but a precision instrument that helps the car “see” what’s in front of it and respond accordingly. When owners consider replacing or upgrading the bumper, the material story becomes especially important. Original equipment manufacturer (OEM) parts are engineered to reproduce the exact fit, finish, and sensor alignment of the factory assembly, preserving the integrity of the ADAS configuration. Aftermarket options provide more cost-effective routes for those seeking a refreshed appearance or a minor performance boost, but they can introduce subtle mismatches if not carefully chosen. The relationship between bumper material and sensor calibration is not always obvious from a consumer’s perspective. A bumper that looks right may still conceal misaligned mounting points or slight variances in rearmost geometry that influence sensor alignment. That is why fitment compatibility and professional installation are essential when replacing the bumper, especially on a model with several ADAS features tied to the bumper’s position and sensor housings. For those who want to preserve or restore the factory look, an OEM center front cover or a complete bumper assembly offers a reliable path to preserve not just appearance but the precise sensor geometry behind the panels. It is also worth noting the decorative elements that accompany the bumper on many trims, such as chrome or metallic trim accents. These additions sit outside the primary load path and typically do not affect crash energy absorption or the bumper’s protective role, but they can influence the perceived value of the vehicle and its resistance to corrosion or wear. Any time a bumper is replaced or upgraded, it’s wise to verify that the chosen parts align with the model year’s design cues and sensor placements. Even minor differences in mounting holes, clip positions, or edge radii can create a cascade of issues that extend beyond appearance. If you are curious about how a specific bumper option fits a particular Outlander model year, consider exploring targeted fitment information and owner experiences. For instance, when researching replacements, one might note how the 2019 Outlander bumper arrangement compares in terms of sensor geometry and mounting points, given the subtle updates that occur between model years. The takeaway is that material selection, internal architecture, and sensor integration operate as a single system. The PP outer panel offers lightness and energy absorption, while the steel beam provides robust restraint. ABS and aluminum trim contribute to durability and aesthetics, and the foam padding cushions impact to protect both occupants and critical components. The overall construction philosophy emphasizes modularity and repairability, enabling both routine servicing and controlled upgrades without compromising safety. The careful balance of these elements underlines why the front bumper deserves as much engineering attention as any other part of the vehicle’s front end. When owners consider replacements or upgrades, the decision should rest on matching not just the exterior look but the functional architecture that supports ADAS performance and crash safety. To that end, sourcing parts that maintain the same material composition and structural geometry is a practical path to sustain the Outlander’s integrated protection system. If readers want a direct pointer to compatible bumper options, they can explore the Outlander front bumper resources that focus on model-year-specific fitment and sensor alignment, such as detailed guidance on the 2019 front bumper arrangement for the Outlander. This kind of targeted information helps ensure that the replacement preserves both the protective function and the sensor integrity that modern drivers rely on every day. In short, the 2018 Outlander front bumper embodies a thoughtful blend of plastics engineering, steel strength, and intelligent padding. It demonstrates how modern bumpers shoulder the dual burdens of shielding the car’s internals and supporting a suite of driver-assist technologies, all while offering homeowners a path to repair, refresh, and visual continuity with the vehicle’s design language. For readers who wish to delve further into specific fitment discussions, the following resource offers practical context on compatibility and installation considerations for Outlander front bumpers: Outlander front bumper for the 2019 model year.
Where Form Meets Function: Performance, Fit, and Upgrade Considerations for the 2018 Outlander Front Bumper
The front bumper of a 2018 Outlander is more than a polished face; it is an engineered interface that balances aesthetics, safety, and functionality. Designed to manage energy in low-speed impacts, protect components behind the fascia, and accommodate sensors and cameras, the bumper must perform reliably under everyday stresses like road debris, curb scrapes, and parking incidents. Its visual integration with the vehicle’s silhouette is matched by a responsibility to maintain sensor alignment and crash-energy behavior so that appearance and performance reinforce one another.
Material choice plays a central role in that balance. Modern bumpers use high-impact plastics such as polypropylene and ABS blends to deliver impact resistance, light weight, and the ability to recover from minor deformations. The internal structure, mounting points, and reinforcements are tuned to spread loads across the panel and protect sensor housings and delicate components. Even small deviations in hinge positions or clip fit when replacing a cover can affect camera framing or radar reflections, so precision and compatibility matter for both cosmetic and electronic subsystems.
Aerodynamic integration is another consideration that links form to performance. The bumper’s shape, lower valances, and air-management features help channel airflow to the radiator and brakes while minimizing turbulence and drag. Subtle details—how the leading edge meets the grille, how lower openings feed cooling channels, and how corners shed spray—affect high-speed stability, cooling efficiency, and even fuel economy in incremental ways. A properly fitted bumper therefore contributes to a coordinated front-end ecosystem rather than acting as an isolated cosmetic panel.
Compatibility is frequently overlooked by buyers but is essential: the 2018 Outlander bumper is intended to fit models produced from 2016 through 2018 across several trims, and mounting points, sensor cutouts, and fastener locations must align with the vehicle’s crash-energy structure and ADAS hardware. Aftermarket covers vary in fit and finish; some come primed and ready for paint, others require more finishing work. Cosmetic trim like chrome accents can enhance the look, but they should not compromise mounting integrity or sensor function. Gaps, wind noise, or moisture intrusion from a mismatched cover can undermine both appearance and performance.
When choosing between OEM and aftermarket parts, consider the trade-offs. OEM or factory-equivalent parts generally match factory tolerances and preserve intended aerodynamics and sensor geometry, reducing the likelihood of recalibration. Aftermarket options offer broader pricing and availability and can be a good choice where cost or customization is the priority, but they may require additional finishing and increase the chance of downstream sensor calibration. Many buyers mitigate fit issues by purchasing a complete front-end kit that includes the bumper cover and associated trim pieces to ensure a coordinated finish.
Practical buying guidance reduces risk: confirm exact model year and trim compatibility, review fitment notes in listings, and inspect photos of mounting points and edge conditions. Verify whether required mounting hardware and sensor cutouts are included, and look for reasonable return policies and warranties. If you select a primed aftermarket cover, plan for professional painting to ensure durable color and gloss. If sensor alignment matters, factor in the potential cost and time for calibration after installation.
For a direct reference on fitment and practical alignment considerations, consult the resource linked here: front-bumper-mitsubishi-outlander-19. Additional online listings and product pages can add sourcing perspective—for example, see product pages such as https://www.amazon.com/dp/B07XK5FQJZ for marketplace availability and options.
In closing, the 2018 Outlander front bumper reflects a design philosophy that must reconcile visual intent with structural protection and sensor accommodation. The best replacement or upgrade preserves that balance through careful compatibility checks, attention to mounting and sensor placement, and planning for any necessary recalibration. With prudent selection and professional installation as needed, a replaced bumper can restore factory poise and continue to protect the vehicle’s safety and efficiency.
Choosing and Sourcing Front Bumper Replacements for a 2018 Mitsubishi Outlander
Replacing the front bumper on a 2018 Mitsubishi Outlander is more than a cosmetic fix. It involves balancing safety, fitment, functionality, and budget. The bumper assembly protects core systems, houses sensors, and contributes to aerodynamics. When the original is damaged or you want an upgrade, understanding available replacement options and what each choice means in practice helps you make a confident decision that preserves vehicle performance and safety.
Most replacement strategies fall into a few broad approaches: a direct-fit cover that mimics factory appearance, an aftermarket upgrade that changes styling or durability, and the supporting hardware and components needed for a proper reinstall. Each approach carries trade-offs. A direct-fit replacement aims for precise alignment with factory mounting points and sensor apertures, offering a quick return to original appearance. Aftermarket upgrades can add visual flair or reinforcement but may need adaptations for sensors or brackets. Replacing only individual trim pieces or fasteners can be economical for minor repairs and preserve original structural parts.
New primed bumper covers are a popular choice for owners who want a factory-like finish without the cost of painted OEM parts. These covers arrive pre-primed, ready for paint, which simplifies color matching when you take the part to a body shop. They are built to fit a range of trims and often list compatibility across model years that share the same fascia design. Primed covers are typically injection-molded from high-impact thermoplastic; they are lightweight, resilient, and designed to accept paint and clearcoat reliably. When ordering a primed cover, verify the listed trim compatibility, confirm whether fog light or sensor cutouts are present, and ask about pre-installed mounting clips or reinforcements. Some listings include an estimated ship time that is useful if you need a quick turnaround.
Aftermarket upgrades offer a broad spectrum of choices, from sportier facias to reinforced, off-road-ready designs. These parts may use the same base materials as factory covers, or they may incorporate thicker sections, added ribs, or aesthetic elements like integrated diffusers and more aggressive air intakes. An upgraded bumper can change the vehicle’s stance and presence while sometimes improving airflow management. However, aftermarket designs occasionally require trimming, additional brackets, or filler panels to achieve a gap-free fit. Importantly, if your Outlander is equipped with driver-assistance systems that rely on front-facing sensors, you must confirm whether the aftermarket piece supports those sensors or if adapters and recalibration will be required. Improper sensor placement can impair features like adaptive cruise control or lane-keeping assist.
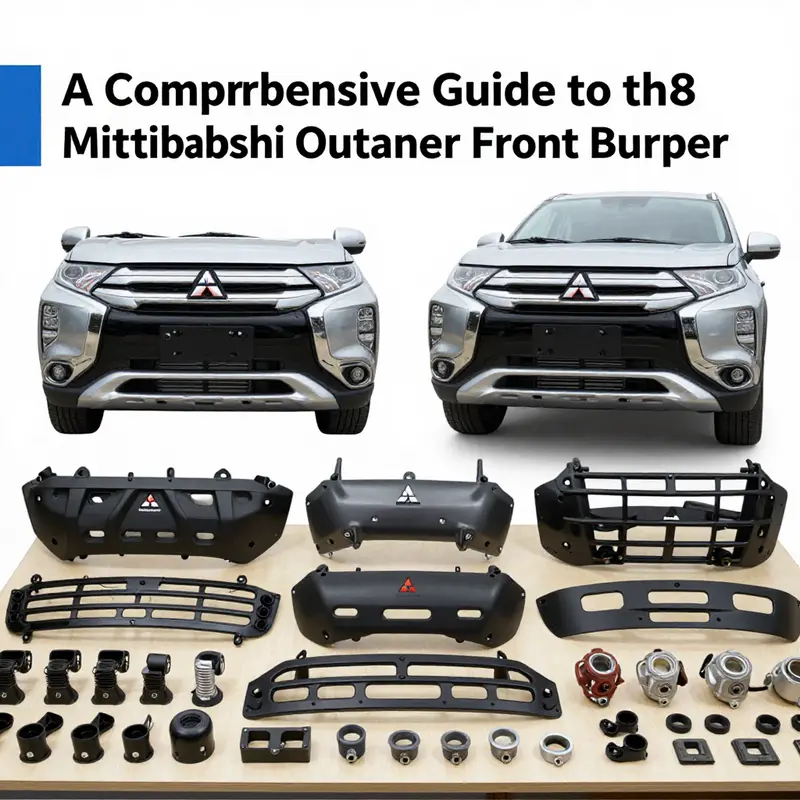
Beyond the cover itself, the hardware that secures the bumper is crucial. Bracketry, reinforcements, and fasteners determine alignment, reduce vibration, and keep load paths intact in a minor impact. Bumper brackets come in a range of materials—high-strength plastics where weight savings are a priority, or reinforced metal where structural connection points must bear greater loads. Fasteners and clips tend to be inexpensive, but skipping them or using incorrect replacements leads to rattles, misalignment, and accelerated wear. For collision repairs, replacing damaged brackets and reinforcements is often necessary to restore the bumper’s energy absorption and attachment points. When sourcing brackets, prioritize part compatibility with your exact model and trim level.
Paint and finishing are often underestimated costs. A primed cover saves time, but achieving a color match across panels requires skill. Modern paints are applied in layers—basecoat, midcoats for metallic or mica effects, and clearcoat—and color matching relies on both paint code and application technique. If your Outlander has subtle metallic mica or pearl finishes, ask the painter about blending adjacent panels to avoid a visible difference at seams. Opting for factory color-matched paint from an experienced shop reduces the chances of mismatched gloss or hue. Some owners prefer to change the vehicle color entirely with a carefully chosen paint scheme, which can hide minor fitment differences and result in a refreshed look.
Sensor integration deserves special attention. The 2018 Outlander may have front sensors for adaptive systems that depend on precise mounting positions and angles. When you replace the bumper cover, ensure sensor mounting brackets are present and correctly oriented. Some replacement covers come with sensor cutouts and pre-installed housings, while others require transferring sensors and brackets from the old bumper. After installation, sensor alignment and electronic recalibration may be necessary for reliable ADAS operation. If a cover or upgrade alters the sensor plane, consult a technician experienced with ADAS recalibration to avoid degraded sensor performance.
Cost considerations should weigh parts, paint, labor, and any additional components like brackets, reinforcements, or ADAS recalibration. A primed cover is an economical entry point, but painting and labor can bring the total cost closer to that of a painted OEM cover. Aftermarket upgrades can range from cost-neutral swaps to premium-priced specialty pieces. Factor in shipping time and return policies when ordering online; some aftermarket suppliers and distributors offer faster shipping or local pickup that reduces downtime.
Installation complexity varies. A straightforward cover swap on a healthy vehicle can be done in a modestly equipped garage by someone with mechanical experience. However, if the reinforcement bar, brackets, or crash absorbers are bent or cracked, professional installation is recommended. Professional shops will ensure proper torque on fasteners, alignment to factory gaps, and secure mounting of sensors and trim pieces. If you choose a performance-style or reinforced bumper, expect additional fitment work to reconcile changes in mounting geometry and to prevent interference with cooling or undercarriage components.
Sourcing parts requires careful verification of fitment and return policies. Online marketplaces and parts retailers provide pictures, fitment notes, and estimated shipping times, but listings vary in detail. When ordering, compare part numbers, confirm vehicle year and trim, and request photos of the actual item if possible. For peace of mind, choose suppliers with clear return windows and supportive customer service. If local availability is limited, some owners opt to use an online listing as a reference and then contact local body shops to source comparable parts through their networks.
If you are considering minor visual enhancements rather than full replacements, trim kits such as chrome accents provide an instant lift without changing the bumper’s structural role. These are bolt-on or clip-on accessories that preserve original mounting and sensor locations. They are good solutions when you want a refreshed look without risking ADAS misalignment.
Finally, keep documentation. Note part numbers, installation dates, and any recalibration performed on vehicle service records. That information helps future owners or technicians understand what was replaced and whether any non-factory components were used. Proper records also assist in warranty or insurance claims following future incidents.
For a practical example of a primed replacement listed with compatibility and shipping details, see this listing: https://www.ebay.com/itm/354789281999. For additional reading about bumper options and related accessories for Outlander models, consult this internal resource on front bumper fitment: https://mitsubishiautopartsshop.com/front-bumper-mitsubishi-outlander-19/.
Beyond the Skin: Aftermarket Options and Practical Considerations for the 2018 Outlander Front Bumper

The front bumper of a 2018 Mitsubishi Outlander is more than a cosmetic panel: it balances appearance, impact absorption, sensor integration, and aerodynamic function. When owners look beyond factory replacements, the aftermarket landscape offers a wide spectrum of choices — from straightforward cover swaps to reinforced beams and decorative trim. Understanding the trade-offs among materials, fitment, sensor compatibility, and installation requirements helps you choose an option that preserves safety while delivering the visual or functional change you want.
Most buyers start with replacement bumper covers because they deliver the biggest visual transformation at a relatively modest cost. Aftermarket covers are typically molded from high-impact thermoplastics similar to the original; common choices include polypropylene blends and ABS variants. These materials provide good impact resistance, light weight, and an economy of repair: small dings and scratches can often be repaired with heat and filler rather than whole-panel replacement. Covers come in primed and pre-painted finishes. Primed covers arrive ready for paint prep and matching to your vehicle’s color; they offer flexibility for custom finishes but require additional labor. Pre-painted covers save time but may vary slightly in shade or clearcoat depth; for best results, plan to inspect paint match under natural light before final installation.
Fitment quality is where aftermarket covers diverge most. High-quality alternatives are engineered to match factory mounting points and sensor apertures precisely, reducing installation time and alignment hassles. Lower-cost options sometimes have variance in snap-tab locations or gap tolerances, which can lead to visible misalignment, creasing, or supplemental trimming during installation. For the 2018 Outlander, confirm that any cover you consider is explicitly listed for your model year and trim level, and that it accounts for fog lights, tow-hook covers, and grille interfaces. Sellers often include fitment notes; use them, and ask for vehicle-specific photos if available.
Another popular, lower-impact upgrade is chrome trim molding and accent kits. These pieces add a premium look without changing structural behavior. Trim kits usually attach with adhesive backing or replaceable clips and are sold as single pieces or matching sets. Proper surface preparation is essential: clean the area thoroughly and use primer where adhesive manufacturers recommend it, especially in climates with temperature extremes or road salt. Trim is a good option if you want a distinctive front-end character without dealing with paint or major bodywork.
Under the cosmetic layer, bumper reinforcements and brackets are the safety-critical components. The reinforcement bar, often hidden behind the cover, is engineered to distribute collision forces away from the passenger compartment. After an impact, replacing the reinforcement and any damaged brackets is not optional; it restores the designed energy-absorption pathway. Aftermarket reinforcement bars and brackets come in metal and reinforced plastic variants. Choose replacements that match original specifications for bending characteristics and mounting geometry. Using a visually similar but structurally different reinforcement can change crumple behavior and compromise occupant protection.
Brackets and absorbers also ensure the bumper assembly aligns properly with fenders, grille, and headlights. Misaligned assemblies can introduce stress points, create increased wind noise, and change how the bumper behaves in low-speed collisions. For this reason, many repair facilities opt for direct-fit replacement brackets that restore OEM alignment. If a repair shop suggests trimming or adapting generic brackets, insist on a test fit and verify panel gaps before final fastening.
Performance or style-focused buyers sometimes look to sport and off-road bumpers. These are heavier-duty pieces, often featuring integrated skid plates, larger air intakes, or aggressive styling cues. Before choosing a sport-style or reinforced bumper, consider three key implications. First, weight: heavier bumpers change the vehicle’s front axle load and can impact fuel economy and handling. Second, sensor placement: many advanced driver-assistance systems rely on sensors mounted in the bumper area. Aftermarket bumpers may lack the correct mounting pockets or alignment for radar, ultrasonic, and camera units. Third, regulatory and insurance considerations: structural changes may have implications for crashworthiness and claims handling. If you choose a non-standard bumper, plan to have ADAS sensors recalibrated and keep documentation showing parts compatibility and installation quality.
Integration with driver-assistance features deserves extra attention. The 2018 Outlander may have adaptive cruise or lane-keeping systems whose forward-facing sensors are located in or behind the bumper. Aftermarket covers and trims that block or misalign these sensors can reduce functionality or trigger fault codes. When buying a cover, verify that sensor apertures match the OEM positions. If installing a sport or reinforced bumper, plan to have a qualified shop perform sensor recalibration using manufacturer-grade equipment. This step ensures systems operate within intended tolerances and helps avoid false warnings or disabled features.
Installation approach varies by accessory: simple trim pieces can be DIY projects for a confident owner with basic tools, while reinforcement and sensor work is best left to professionals. Properly mounting a cover involves aligning tabs, torquing fasteners to spec, and confirming hood-to-bumper gaps. Paint-ready covers require sanding, priming, color-matching, and clearcoating — ideally completed by a body shop for a seamless finish. Reinforcement replacement can require alignment jigs and torque-controlled fasteners; brackets are often made of plastic engineered to flex in specific ways. Replacing them with ill-fitting alternatives can reduce crash performance and increase repair costs down the road.
Cost is an important deciding factor. Aftermarket covers and trim kits are typically more economical than OEM parts. However, low up-front cost can be offset by additional paint work, fitment corrections, and sensor recalibration. When evaluating total cost, include the price of paint labor, calibration services, and any hardware that is not included with the part. Warranties differ too: many aftermarket suppliers offer limited warranties on fitment or material defects, while OEM components usually come with more comprehensive coverage through authorized dealers.
Sourcing affects both price and quality. Reliable sellers provide clear fitment details, return policies, and customer photos. When buying remotely, select vendors who share high-resolution product images and have transparent shipping and return terms. Inspect the part on arrival for hidden damage or manufacturing defects before committing to paint or permanent installation. If you find inconsistencies, document them immediately and contact the seller to avoid additional costs.
Maintenance and long-term concerns vary by material. Plastic covers are susceptible to UV degradation over many years; quality components include UV inhibitors in the resin to reduce fading and brittleness. Chrome trims can tarnish if the adhesive fails or if exposed to harsh chemicals; hand washing rather than automated high-pressure systems preserves adhesive bonds. Reinforcements and brackets made of metal should be inspected for corrosion in regions that use de-icing salts. Regularly check fasteners and clip integrity after winter seasons and following minor impacts.
For owners weighing DIY versus professional work, here are practical guidelines: choose DIY for simple adhesive-mounted trims and uncomplicated cover swaps when fitment is documented as direct-fit. Engage professionals for paint matching, reinforcement replacement, and any work touching ADAS sensors. If you opt for a sport or off-road bumper, plan for a pre-installation review of weight and sensor interfaces, and insist on post-installation system checks.
Finally, consider the resale and insurance angle. A well-documented, factory-style replacement or tasteful trim upgrade generally preserves resale value. Radical bumper swaps that alter front-end geometry or remove standard safety elements may require disclosure to insurers and buyers. Keep invoices, part numbers, and calibration receipts with the vehicle’s maintenance records to show correct installation and system restores.
For a practical starting point when shopping, review vendor listings that specify model-year compatibility, part construction, and sensor cutouts. If you want a visual reference for available aftermarket front bumpers and covers, consult a specialist listing for Outlander front bumper options: front bumper Outlander parts.
When researching external marketplace options and pricing trends, a broad search of aftermarket listings can reveal typical retail ranges and seller ratings. This helps set realistic expectations for cost and lead time: https://www.ebay.com/sch/i.html?_nkw=2018+mitsubishi+outlander+front+bumper
Aligning Safety and Style: Installing and Calibrating the 2018 Mitsubishi Outlander Front Bumper
Practical installation and calibration guidance for the 2018 Outlander front bumper
Replacing a front bumper on a 2018 Mitsubishi Outlander is more than cosmetic work. The bumper serves as the first line of defense in low-speed impacts, supports aerodynamic behavior, and often houses cameras and radar sensors critical to advanced driver-assistance systems. When a new bumper cover and grille assembly are fitted, the installation must preserve the original geometry of the front end and the precise positioning of any integrated sensors. Careful, deliberate steps during removal, trial fitting, fastening, and system recalibration will protect both appearance and functionality.
Begin with careful removal of the existing bumper. Work methodically and photograph each step. Release fasteners in the recommended sequence and keep track of clips, screws, and brackets. That record makes reassembly faster and prevents omitted parts from causing misalignment. Disconnect electrical connections to lighting and sensors only after noting their routing. Handle the factory clips and retainers gently; many are designed to be reusable but can become brittle with age. Where a fastener breaks, replace it with an equivalent factory-style piece rather than improvising. Using the right hardware preserves fit and reduces the chance of vibration or loosening.
Before final installation, verify fitment through dry runs. Mount the new bumper cover and grille loosely to check edge gaps and panel alignment. Small variances can often be corrected by adjusting mounting points or shims at bracket locations. Pay attention to hood and fender seams; a uniform gap across these edges is key to the vehicle’s finished look and to restoring the intended airflow paths. Poorly aligned panels can create pockets that trap debris, degrade aerodynamics, and increase wind noise. If the new component is a primed aftermarket piece, confirm that paint thickness and finish do not alter the way panels sit together after painting.
Secure each connection with factory-style fasteners and approved hardware. Tighten fasteners evenly and in sequence to avoid pulling the bumper out of alignment. Use the manufacturer’s recommendation for torque where provided, and avoid overtightening plastic components. Where brackets or reinforcement bars are reused, ensure their mounting surfaces are clean and free of corrosion. If any mounting tab was damaged in the original impact, replace it. Repairing broken tabs with adhesives or makeshift hardware risks long-term fitment problems and can compromise the bumper’s ability to absorb impact energy.
Clearance around sensor zones requires special attention. Parking sensors, forward-facing cameras, and radar units rely on unobstructed sightlines and specific mounting offsets. Even a millimeter of misplacement can alter detection cones and degrade system accuracy. When the bumper assembly includes sensor covers or target windows, make sure those openings align with the sensor housings beneath. Some assemblies nest sensors behind trim pieces; ensure those pieces are fully seated and clipped into place. Avoid adhesives or fillers that can obscure sensor lenses or interfere with radar reflections.
If the replacement bumper changes the fascia geometry, plan for ADAS recalibration. Camera-based systems need precise pitch, roll, and yaw alignment relative to the vehicle. Radar sensors require accurate horizontal and vertical orientation to measure distance and closing speed correctly. Recalibration is not simply a software reset; it often involves physical alignment checks, target placement at specified distances, and diagnostic tools that communicate with the vehicle modules. Professional shops equipped with OEM diagnostic equipment and calibration targets are best suited for this task, especially when multiple sensors are involved.
For owners tackling this work at home, there are practical checks to perform before driving. Verify that the forward camera can see the road without obstruction. Walk the vehicle to trigger parking sensors and confirm consistent beeping or display indications at known distances. Use the vehicle’s built-in system checks to confirm that no sensor warnings are present. If any alert remains, do not assume it is benign. Sensor errors can mask the system’s inability to operate when needed. In some jurisdictions, insurers may require documented calibration after front-end repairs; keeping receipts and calibration reports is prudent.
When choosing parts, prefer pieces that adhere to original equipment specifications. OE-spec bumpers are designed to match mounting locations, tab positions, and sensor openings exactly. Some aftermarket options are cost-effective and well-made, but they may require trimming or minor adjustments. Expect to spend extra time on trial fits with non-OE pieces. If a sport or reinforced bumper is chosen for style or off-road durability, confirm that any change in geometry will not interfere with sensor fields or cooling airflow to the radiator and condenser.
Paint and finish add another layer to consider. Primed covers are common and need professional paint to ensure a uniform cure and thickness. Paint thickness can subtly change panel fit, so if a bumper is painted before final fitment, recheck alignment afterward. Use paint booths and clearcoat processes that minimize surface tension and shrinkage. Allow adhesives and sealants used during installation to cure fully before testing sensors that might be affected by thermal changes or paint outgassing.
Testing after installation must be comprehensive. Begin with static checks: lights, grille attachment, and sensor self-tests. Move on to low-speed functional trials in a controlled environment. Test adaptive systems on open, safe roads where lane markings are visible and traffic is light. Confirm that lane-keeping, forward collision alerts, and adaptive cruise respond smoothly and consistently. Observe for false positives or failures to detect obstacles. If any system behaves erratically, return to the shop for diagnostic recalibration or mechanical adjustment.
Documentation and parts traceability matter for long-term service. Record part numbers and fitment notes, and keep a log of the fasteners used and any bracket modifications. This record will simplify future repairs and help technicians diagnose issues without needing to rediscover your installation history. If warranty coverage is a concern, check whether non-factory parts affect your vehicle’s protection. Some providers require proof of equivalent-spec replacement and calibration to maintain claims eligibility.
While many owners can complete the mechanical portion of a bumper replacement, calibration is often the inflection point between a DIY job and professional service. Certified technicians use diagnostic platforms and calibration targets to restore sensor performance to factory tolerances. They can also perform system-level checks that confirm electronic control units are communicating correctly. For peace of mind and to preserve safety features, plan to involve a professional for ADAS recalibration when sensors are present behind the bumper or grille.
A well-executed installation restores the Outlander to its designed appearance and safety function. The process is a balance of careful mechanical work, precision alignment, and informed decisions about parts and calibration. Taking the time to verify fit, protect sensor clearances, use correct fastening practices, and complete proper system recalibration yields reliable results. Your vehicle will not only look right, but it will also perform its protective and driver-assist roles as intended.
For parts specific to later model fits and options relevant to this work, see this internal resource on front bumper fitment for Outlander models: front-bumper-mitsubishi-outlander-19.
For official technical specifications and owner guidance on systems affected by front bumper replacement, consult the manufacturer’s owner’s manual and technical documents: https://www.mitsubishicars.com/owners/manuals/2018-outlander.html
Final thoughts
In summary, the front bumper of the 2018 Mitsubishi Outlander is an integral part that combines durability, safety, and aesthetic appeal. From understanding its material composition to exploring various replacement and upgrade options, business owners can ensure their vehicles remain safe and stylish. As you consider maintaining or enhancing your fleet with the right components, let this guide serve as a critical resource in your decision-making process. Prioritizing a high-quality bumper can lead to improved vehicle safety, functionality, and overall performance.