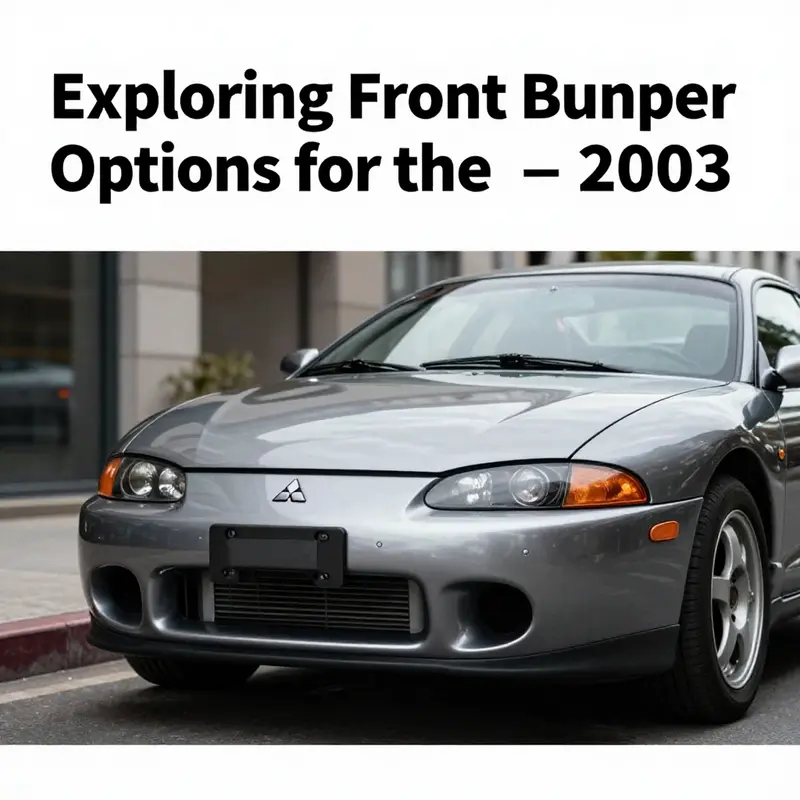
The 2003 Mitsubishi Eclipse is a vehicle cherished by enthusiasts and everyday drivers alike, often recognized for its sleek design and performance. One of the critical elements that contribute to both aesthetics and safety is the front bumper. Understanding the options available, installation considerations, and material quality can help business owners in the automotive industry better serve their clients, ensuring they find the right components for this iconic car. This article covers a variety of front bumper options tailored specifically for the 2003 Mitsubishi Eclipse, the essential aspects of installation, and insights into the materials and quality that should be prioritized when making purchasing decisions.
null
null
Front-Line Fit: The Art and Engineering of Installing a 2003 Mitsubishi Eclipse Front Bumper
When a 2003 Mitsubishi Eclipse meets the road, the first impression comes from more than the headlights and grille. It comes from the clean line of the front end, the way the bumper interlocks with the crumple zones behind it, and how smoothly the air flows into the radiator and intercooler compartments. Replacing this piece is not simply about aesthetics; it is about preserving the car’s structural integrity, maintaining sensor alignments if the model is equipped with radar or camera features, and ensuring the bumper performs as intended in daily driving, at highway speeds, and in the occasional fender-bender. The journey from choosing a bumper to installing it on a 2003 Eclipse is a careful choreography that balances fit, material performance, finish, and functional integration. In many ways, the bumper acts as a bridge between the vehicle’s engineering and its everyday practicality, a bridge you must cross with method rather than momentum to avoid later misalignment, rattles, or premature wear.
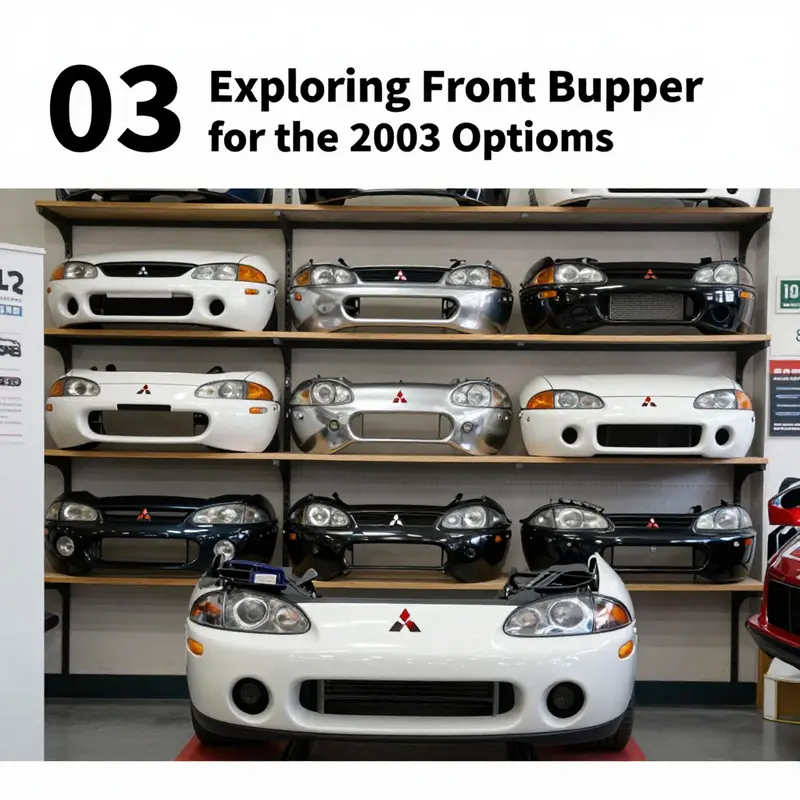
A thoughtful sourcing strategy begins with precise compatibility. For a car of this vintage, there are multiple routes a shopper can take: genuine OEM parts that promise exact fit and a factory-like finish, aftermarket options that may lower cost while still delivering solid fitment, and upgraded or modified versions designed to sharpen the vehicle’s appearance or aerodynamics. The first step is to confirm that the chosen bumper is specified for the 2003 Eclipse’s exact body style and market region. The more closely a bumper conforms to the original geometry, mounting holes, and bracket locations, the less time you waste wrestling with alignment during install and the more confidence you gain during road testing. A bumper that does not align with the vehicle’s mounting points or interferes with fog-light housings, grille trim, or sensor mounts can force you into door-bottom or fender-edge concessions that compromise both look and function. Even a slight misalignment can skew the sensors’ fields of view, distort the intended airflow pattern, or alter the car’s crash energy management—issues no owner wants to experience after a lot of effort and expense.
Material choice matters almost as much as the fit itself. The bumper’s core material shapes how it behaves in daily use and during impacts, how well it accepts paint, and how durable it remains under various climates. In the marketplace for a 2003 Eclipse bumper, you will encounter a spectrum of materials. Fiberglass is common and affordable, which makes it appealing for cosmetic upgrades or show cars where weight and stiffness are less critical. However, fiberglass can be brittle and prone to cracking if subjected to sharp impacts or rough handling during installation. Polyurethane sits in the middle of the spectrum; it offers greater flexibility and impact resistance, which translates to better resistance to daily scrapes and minor collisions. It also tolerates a wider range of temperatures without deforming. For owners who crave a premium aesthetic or a high-end look, some upgrade options may incorporate metal grille inserts or reinforced frames, though these are more about styling than core structural support and are typically used to elevate appearance rather than to provide additional crash protection. When selecting material, it is essential to read the product description carefully, understand the supplier’s material composition, and verify whether the bumper includes any integrated components such as fog-light housings or guide rails. The choice should align with how the car is used and the owner’s tolerance for maintenance, heat cycling, and potential repairs after damage.
The question of finish is rarely glamorous but always practical. The final appearance depends on how thoroughly the bumper surface is prepared before painting and how well the color is matched to the Eclipse’s existing body panels. Preparation matters: the surface must be clean, smooth, and free of dust. Priming is essential, not optional, because it forms the adhesive baseline for both paint and clear coat. A proper primer helps ensure even coverage and long-lasting adhesion, particularly on plastics that can trap moisture or release plasticizers over time. Color matching is a nuanced art. Even with a perfect front-end alignment, a mismatch in shade can become conspicuous once the bumper sits next to adjacent panels. This is where professional color mixing and batch consistency pay off. A well-prepared paint job will resist peeling and fading under sun exposure and temperature swings, while a careful clear-coat layer protects the finish from UV degradation and minor contact with road grime. A note on finishing: if you plan to change the bumper’s appearance—from a factory look to a darker, sportier tone, or even a matte finish—consider the preparation steps and the compatibility of coatings with the bumper’s base material. Some plastics react differently to certain paints, so a test patch or consultation with a painter who understands automotive plastics can save time and avoid color drift.
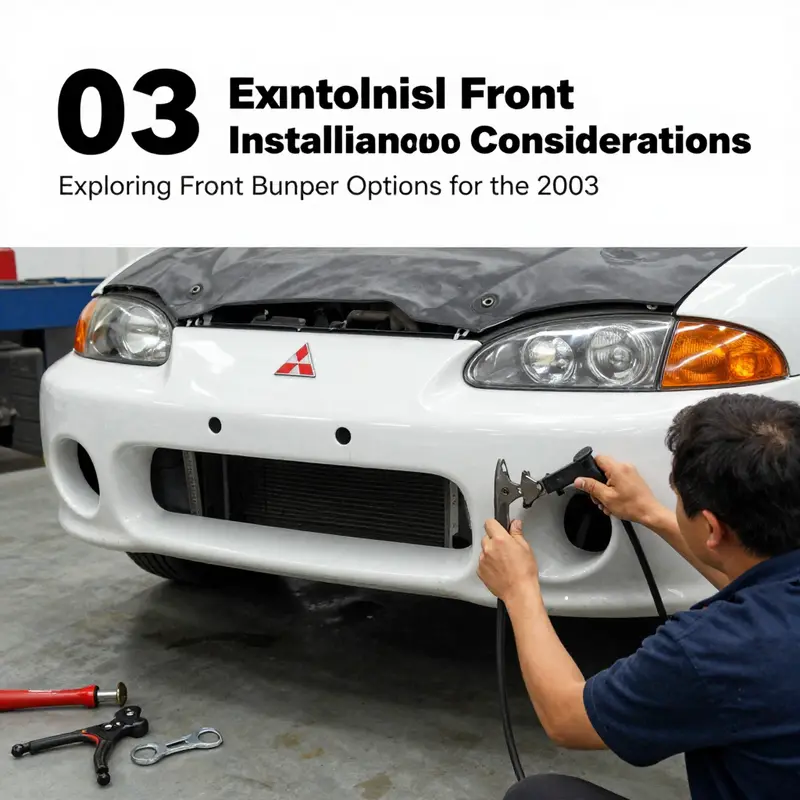
Installation is where the theoretical considerations become tangible. A well-fitting bumper should cradle the car’s front end without bending the underlying bumper beam or distorting the crash structure. The mounting process begins with a careful removal of the old bumper, which can be held in place by a combination of upper and lower fasteners, clips, and brackets. Salvageable hardware should be inspected for wear or corrosion, while damaged components must be replaced to ensure a secure fit. The installer should verify the bumper’s alignment by temporarily attaching it at a few key points before tightening mounting bolts. This practice allows tiny adjustments—perhaps a millimeter or two—that can make the difference between a seamless seam line and a noticeable gap along the fenders or the hood. As the bumper lines up with the grille and fog-light openings, the installer pays attention to the tolerances around the headlights, ensuring that the bumper does not obstruct beam patterns or introduce glare into the driver’s line of sight. If the Eclipse in question is equipped with advanced safety features—sensors, radar modules, or a backup camera integrated into the bumper area—recovery, rerouting, or recalibration may be necessary. The reality is that alignment is not a one-and-done task; it is an iterative process that benefits from patience, a level, a straight edge, and sometimes a second pair of hands to hold parts in place while bolts are started and tightened.
Hardware compatibility is a practical concern that can derail a project if neglected. Even if the bumper itself arrives with new mounts, brackets, and fasteners, the fit still hinges on the condition of the surrounding structure and the integrity of the mounting points. If original hardware is still in good condition, it can be reused, but this should be validated during the inspection phase. Missing or cross-threaded bolts can lead to unwanted movement, rattling, or even a loosening of the bumper during driving. When hardware is replaced, it is important to use corrosion-resistant fasteners and to torque them to the manufacturer’s specification. While torque specs for a 2003 Eclipse are not complex, adhering to them is essential for long-term reliability. The installer should also confirm that any integrated components—such as fog-light housings or the grille’s securing points—sit correctly, with no binding that would prevent full range of motion or proper sealing against weather.
Beyond the mechanical, there is a broader consideration: what you gain from a proper bumper installation extends into the vehicle’s daily behavior and safety. A bumper that sits correctly helps ensure that air is directed as designed toward the radiator and condenser, promoting stable engine temperatures and efficient cooling under varied driving conditions. It also helps preserve the intended aerodynamics of the car, contributing to predictable handling and fuel efficiency. If the bumper features modular elements—fog-light cutouts, air channels, or decorative vents—the installation must respect the exact geometry of those features to avoid misalignment that would look odd or interfere with lighting. The bumper is part of a system; it is not a stand-alone component. When you treat it as such, you reduce the risk of misalignment, vibration, or cosmetic flaws that can emerge months after a swap.
The practical pathway to a successful install thus unfolds through a sequence: verify compatibility with the model year and body style, choose a material that matches the owner’s goals for durability and aesthetics, plan a finish that respects the car’s color and the owner’s maintenance philosophy, and execute the installation with meticulous attention to alignment, hardware integrity, and system integration. It is a process that rewards preparation and patience as much as it rewards knowledge of the car’s front-end architecture. For readers who want a reference point while evaluating options, the choice to explore a bumper that aligns with the Eclipse’s original geometry can be particularly instructive. A bumper offering the same mounting hole pattern and bracket placements as the stock piece serves as a reliable baseline for the rest of the decisions—paint, material, and finish—without forcing the owner to compromise on fit.
As part of building that baseline, some owners look to established sources that catalog bumper options by model and year. These sources sometimes present comparative notes on fitment and install notes gleaned from user experiences, which can illuminate pitfalls and best practices. The value of such references lies not in replacing the hands-on work of a fit check but in guiding the planning stage, helping to anticipate what might go wrong and how to address it before the parts ever arrive. In the end, the 2003 Eclipse’s front bumper is more than a cover; it is a component that, when properly chosen and installed, reinforces the vehicle’s safety envelope, preserves its distinctive stance, and maintains the harmony of its front-end geometry. The durability of the finish, the fidelity of the color, and the smoothness of the seams all contribute to a finished appearance that looks right in daylight and remains resilient under the tire spray and road salt of winter driving.
For those who want to explore related options and see the kind of engineering logic behind mounting hardware and bracket compatibility, a widely recognized resource in the community offers a detailed look at front bumper assemblies for the Eclipse and similar models. This reference provides context on the mounting architecture and the kinds of adjustments that installers commonly encounter when switching to aftermarket or OEM-replacement bumpers. While the specific catalog numbers and availability shift over time, the core principles—alignment, interface with the crash structure, and the relationship to surrounding components—remain consistent across generations and body styles. These principles underpin the practical chapters that follow, guiding you through the steps of selection, preparation, and precise installation that keep the 2003 Eclipse front-end coherent and capable on today’s roads.
If you are exploring the practical steps of a complete bumper swap, one useful pointer is to examine the fitment characteristics of related bumper models within the same generation. By comparing how the bracket points line up on nearby year ranges or sibling body styles, you can infer the tolerances that govern a successful installation. The goal is not to force-fit a piece that does not belong but to identify a replacement that respects the original architecture, minimizes the reworking of adjacent panels, and reduces the risk of future rattling or misalignment. In the hands of a careful technician or a confident DIY enthusiast, the process becomes a disciplined routine: preliminary test-fit, iterative adjustments, secure mounting, and then a final quality check that includes door shuts, hood alignment, and a tactile scan of seam continuity along the entire width of the front end.
In closing, replacing the 2003 Eclipse front bumper is a chance to reassert the vehicle’s identity and to restore its intended performance envelope. It is not enough to find a part that looks right; it must fit right in relation to the car’s crash structure, its sensors and lighting, and its aerodynamic profile. It must also finish in a way that endures the seasons and the road conditions of daily driving. When these conditions are met, the new bumper does more than cover the front; it preserves the car’s integrity, maintains its character, and keeps the owner confident behind the wheel. For those navigating this task, the path is one of measurement, material understanding, and meticulous assembly—an approach that yields a front end that looks seamless, feels solid, and performs like it was designed to perform from day one. To further explore related mounting considerations and real-world fitment experiences, you can reference a closely related bumper model’s installation profile here: 2006-2008 Mitsubishi Eclipse front bumper.
External resource for broader context on material standards and integration: https://www.motortrend.com/cars/mitsubishi/eclipse-cross/android-auto-explained/
Built to Fit: Materials, Durability, and Quality of the 2003 Mitsubishi Eclipse Front Bumper
The front bumper on a 2003 Mitsubishi Eclipse serves more than appearance. It influences aerodynamics, impact absorption, mounting for lighting, and the look of the entire nose. Understanding the materials used and what defines quality will help you choose the right replacement or upgrade. This chapter explains the construction, the trade-offs between OEM and aftermarket pieces, fitment and sensor compatibility, repairability and paint preparation, and practical checks to ensure the bumper you buy will perform and fit as expected.
Materials and the logic behind them
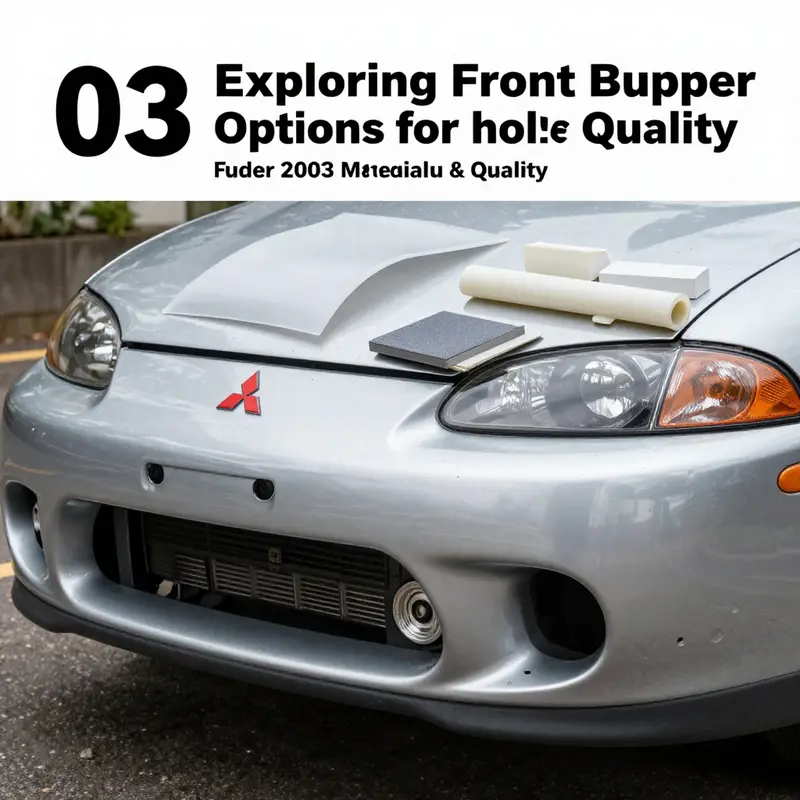
Most front bumpers for the 2003–2005 Eclipse are made from a primed thermoplastic. This material is selected for several practical reasons. It is light, which helps preserve handling and fuel economy. It resists corrosion, so it won’t rust where metal would. It molds easily into complex shapes, allowing for the Eclipse’s sculpted contours and integrated openings. It also offers enough flexibility to take minor impacts without cracking immediately.
Thermoplastics used in original assemblies typically fall into common categories like polypropylene and related blends. These resins combine impact resistance with formability. Manufacturers often apply a primer coat to the finished molded bumper cover. That primer does two jobs: it improves paint adhesion and provides a uniform surface that hides minor molding imperfections. Buying a unit described as ‘‘primed’’ means less pre-painting prep at installation, provided the primer is applied evenly and to appropriate thickness.
Why OEM-style thermoplastic remains the standard
The original equipment approach favors thermoplastic because it balances cost, function, and manufacturability. OEM bumpers are designed around crash energy management. They are part of a system: the bumper cover, internal reinforcement bar, foam energy absorber, brackets, and mounting hardware together control how forces transfer during low-speed collisions. A properly designed thermoplastic cover deforms where expected, then returns where appropriate, reducing repair bills for minor fender‑benders.
Replacements that mirror OEM materials usually replicate the original geometry and attachment points. When fitment is precise, body panel gaps remain consistent and alignment with headlights, fenders, and hood is straightforward. If you’re aiming for a like-for-like restoration, high-quality replacement covers made from the same primed thermoplastic are the safest choice.
Aftermarket variations and reinforced options
Aftermarket options vary in material and finish. Some replicate the OEM thermoplastic exactly. Others use reinforced composites or integrate a more rigid internal frame for improved stiffness. There are also lighter-weight and performance-oriented alternatives that use composite or fiber materials for cosmetic upgrades.
A reinforced design may use a metal or composite support behind the cover. This can improve the bumper’s shape stability at high speeds and after paintwork. However, increased rigidity changes how impact forces distribute. A stiffer assembly can transfer more force to adjacent structures during a collision. That may mean higher repair costs to underlying components. Always weigh the aesthetic or stiffness benefits against potential safety and repair implications.
Fitment, mounting points, and the importance of exact matching
Precise matching to the 2003 Eclipse’s mounting pattern is critical. The cover must align with factory screw holes, clip locations, and bumper brackets. Even slight deviations make installation difficult. They also cause uneven panel gaps, which affect aerodynamics and visual symmetry.
A well-fitting bumper will have consistent gaps at the hood, fenders, and headlights. It will accept the factory fasteners without modification. It will also provide correct support for fog light housings and grilles. If your vehicle has integrated sensors or specific fog light cutouts, confirm compatibility before purchase. Some replacement units omit sensor-ready provisions, requiring additional cutting or bracket fabrication.
Sensor and lighting considerations
While a 2003 Eclipse is less likely to have advanced radar sensors, it may use fog lights and front lighting assemblies that attach to the bumper cover. High-quality replacements often include integrated fog light housing and grille pieces that match OEM fit. When those features are present, the cover enables a straightforward transfer of components from the old bumper. If you plan to reuse factory lights, be sure the new cover’s openings align precisely with the lamp units and mounting tabs.
If a replacement bumper does not include fog light housings or grille inserts, you will need to transfer those parts. That transfer is simple when the new cover mirrors the original design. When it doesn’t, expect cutting, reinforcing, or purchasing additional adapters.
Primed finishes: what to expect and how to prepare
Primed bumpers save time in painting, but the quality of the primer matters. A uniform, factory-applied primer will sit well under the topcoat. It helps hide minor surface irregularities and creates a proper bond. Poorly applied primer can peel, orange-peel, or show through after paint. When buying a primed bumper, look for images that show a smooth, consistent finish. Ask about the primer type and the curing method if possible.
Preparation for paint still requires care. Clean the surface to remove mold release agents. Lightly scuff with recommended grit sandpaper to promote adhesion of base and clear coats. Use adhesion promoters if the paint system requires them. Match the paint code from the vehicle, and allow adequate drying and curing times. If you lack painting resources, consider a professional who knows modern automotive refinishing techniques.
Repairability and durability after installation
Thermoplastic bumpers are repairable in many scenarios. Small cracks can be welded with plastic welding tools or repaired with reinforced adhesive and backing plates. Deeper impact zones may be better replaced. Repairability is influenced by the specific resin used and the thickness of the molded sections.
Check the bumper for even wall thickness and reinforcements near mounting tabs. These factors affect how a repair will hold up. Aftermarket pieces that mimic OEM wall thickness and include reinforced tab areas give better long-term results. Avoid thin, undersized covers that save cost but compromise durability.
Quality control, testing, and supplier credibility
Quality varies widely among replacement parts. Reputable suppliers adhere to manufacturing specifications and perform quality control. They confirm dimensions, verify material composition, and test for coating adhesion. Lower-cost units may bypass thorough checks, which leads to fitment problems and inferior finish.
When evaluating a supplier, request dimensional tolerances and inquire about the manufacturing process. Injection-molded parts that undergo consistent cycle control and cooling will have fewer warp issues. Suppliers that present detailed fitment charts and clear return policies indicate higher reliability.
Visual cues during inspection
When you receive a bumper, inspect it immediately before installation. Check for warping or twist by placing it near the vehicle and looking at the gaps. Inspect mounting tabs for fractures or thin spots. Look at the primer for runs, pooling, or thinly covered areas. Verify openings for grilles and fog lights match the factory part.
Also check the internal surfaces. Many covers have ribs and internal supports. These elements add strength. Missing ribs or hollowed sections may save weight but reduce structural integrity. Note any signs of poor molding, such as sink marks near thick sections or flashlines around mating surfaces.
Shipping and packaging considerations
Bumpers travel long distances in many supply chains. Proper packaging reduces risk of damage. A quality seller will ship the bumper in a reinforced box with foam and corner protection. They should place protective film over painted or primed surfaces to prevent abrasion. Inspect for shipping damage immediately and photograph any issues before signing for the package.
Installation tips that preserve fit and function
Install carefully to avoid damaging mounting tabs. Use the factory hardware where possible. If the replacement includes new clips or screws, compare them to factory parts. Sometimes slight hardware differences require adapters to achieve the correct angle or tension.
When aligning the bumper, fit it loosely first. Verify alignment with adjacent panels and with lighting housings. Once alignment is correct, tighten fasteners in a cross pattern to avoid pulling the cover out of shape. If minor gaps exist, check the underlying brackets and adjust as necessary. A misaligned bumper is often a bracket or fastener issue rather than a bad cover.
Aesthetic upgrades and the cost-quality trade-off
Upgrading to a sportier aftermarket fascia or a different finish can enhance appearance. However, bold cosmetic designs sometimes sacrifice original mounting geometry. If aesthetics are your priority, choose a piece that balances look with careful engineering. Custom or specialty covers that use carbon-like materials may look great but can complicate repairs and change how impacts transfer to the chassis.
Keep in mind the cost-quality trade-off. A cheaper cover may lower upfront expense, but poor fit or early damage can quickly erase savings. Spending a bit more for a well-made replacement often saves time and frustration during installation.
Regulatory and safety considerations
Front bumpers are part of the vehicle’s safety system. Changes to material stiffness or geometry can affect pedestrian protection and how energy disperses during collisions. While the 2003 Eclipse predates some modern active safety systems, responsible replacement still preserves original energy management characteristics. If the vehicle is subject to inspection standards, ensure the replacement meets local regulations.
Long-term care and expected lifespan
A properly installed thermoplastic bumper can last many years. Exposure to sunlight and chemicals degrades the surface over time. Apply UV-resistant clear coat when repainting to protect the finish. Avoid harsh solvents and rough cleaning tools. Treat chips and scratches early to prevent further damage.
If you live in a region with significant road debris, consider protective films or clear bra applications on vulnerable leading edges. These sacrificial layers reduce paint chipping and preserve the surface for easier maintenance.
Checklist for choosing a high-quality 2003 Eclipse front bumper
- Confirm exact compatibility with the 2003 model year and body variant.
- Verify the material is a primed thermoplastic or equivalent with OEM-style properties.
- Inspect primer quality in photos or on arrival for uniform coverage.
- Ensure all mounting points, fog lamp openings, and grille cutouts match factory geometry.
- Ask about wall thickness and internal ribbing to assess durability.
- Request clear return, warranty, and shipping damage policies.
- Prefer suppliers who provide dimensional tolerances and QC documentation.
A final note on sourcing related parts
If you are also considering different model years or other parts, there are resources that list compatible panels for adjacent model ranges. For instance, information on front bumpers for later Eclipse models can help when comparing design changes or sourcing alternate brackets. If you need a reference for a different model year bumper, see this page about the 2006-2008 Mitsubishi Eclipse front bumper for comparison: 2006-2008 Mitsubishi Eclipse front bumper.
For technical details about material composition and original specifications, consult the manufacturer’s technical documentation or trusted automotive parts references. One useful external overview of replacement bumper covers and their typical construction is available here: https://www.motortrend.com/cars/2002-2005-mitsubishi-eclipse-front-bumper-cover/
This discussion aims to give a practical understanding of materials and quality considerations for a 2003 Mitsubishi Eclipse front bumper. By focusing on proper material selection, exact fitment, and verified supplier quality, you can choose a replacement that restores appearance and preserves performance without unexpected trade-offs.
Final thoughts
Choosing the right front bumper for the 2003 Mitsubishi Eclipse is not only about style but also about function and safety. In this article, we explored several options available in the market, outlined important installation guidelines, and examined the quality of materials that ensure durability and performance. Whether your business focuses on classic repairs, custom modifications, or automotive retail, understanding these facets will empower you to make informed decisions. By prioritizing compatibility, functionality, and quality, you can enhance customer satisfaction and solidify your reputation in the automotive industry.