Understanding check engine lights is crucial for business owners operating fleets or managing vehicles. The Check Engine Light (CEL) not only signals potential issues but can also lead to costly repairs if not addressed promptly. Advance Auto Parts offers valuable diagnostic services that enable business owners to assess these alerts efficiently. This article delves into a comprehensive overview of how Advance Auto Parts addresses check engine lights, from service offerings and diagnostic processes to interpreting codes and planning next steps. Each chapter will guide readers through the importance of these services and provide actionable insights for effective vehicle management.
Unraveling the Check Engine Light: A Guided Journey from Code to Clarity with Diagnostic Scans

The moment the check engine light flickers on a car’s dashboard, a small seed of worry takes root in the driver’s mind. Yet that blinking or steady amber glow is not a verdict of doom; it is a careful heads-up from the vehicle’s onboard diagnostics system. Since 1996, every car sold in the United States has been required to use OBD-II, a standardized interface that allows the Engine Control Unit to monitor hundreds of sensors and systems. When a sensor reads outside acceptable parameters, the ECU logs a Diagnostic Trouble Code and triggers the check engine light. It is a diagnostic spray of alarms all rolled into one red and amber signal. The goal is preventive maintenance rather than a sudden, dramatic failure. Still, interpreting that warning correctly is where many drivers stumble, because a lit CEL can point to anything from a loose gas cap to a failing sensor that could alter emissions, fuel economy, or engine performance. The challenge—and the opportunity—lies in translating the codes into meaningful steps toward safe, economical repair rather than a cascade of unnecessary fixes.
A sudden warning can provoke a mix of reactions. Some drivers panic, imagining the worst possible fate for a high-mileage vehicle. Others ignore it, hoping the light will go away on its own. Both paths risk turning a problem that begins as a simple maintenance tweak into a more expensive repair. The first, calm and informed response is a diagnostic scan. This is where the conversation with a service professional begins, and it is often a free step offered by many U.S. auto parts retailers at the point of sale. The diagnostic scan is not a repair, but a guided glimpse into what the car’s computer has detected. A trained technician will connect a hand-held scanner to the vehicle’s OBD-II port—usually located under the steering column—and retrieve the stored codes. Those codes are standardized strings, usually five characters long, that encode a general fault area and a more specific fault description. Reading the codes gives you a map of where to start.
Crucially, a scan is just that—a map, not a verdict. The presence of a DTC (Diagnostic Trouble Code) confirms something is amiss, but it does not reveal the exact root cause, nor does it imply the vehicle is unsafe to drive in the meantime. The codes can point to an array of possibilities within broad families such as emissions control, fuel delivery, ignition, or sensors. Some issues are minor and quick to fix; others can escalate if left unaddressed. A well-handled scan then becomes a conversation about next steps: Is this a loose gas cap? Is a faulty sensor triggering a cascade of related faults? Or does the code hint at a more serious mechanical problem that requires a thorough inspection by a mechanic? The diagnostic process helps you decide which path to take next, balancing time, cost, and safety.
When you schedule or walk into a location offering a free diagnostic scan, you should expect a straightforward, transparent experience. The technician will explain what the scanner retrieved, translating the codes into plain language. They may outline the likely causes associated with each code and indicate whether the issue is something simple to fix in minutes or something that warrants a deeper investigation. This explanation matters because it empowers you to make informed decisions. For many drivers, the simplest fixes are often the right ones—such as tightening a loose gas cap or replacing a worn spark plug—while others require professional diagnostic work and, eventually, repair. Importantly, a diagnostic scan will rarely tell you a complete repair plan. It is a critical first step that anchors any subsequent action in a clear, evidence-based understanding of what happened and what is likely to follow if left untreated.
The path from scan to solution hinges on the codes themselves and on the car’s broader status. Emissions-related codes, for example, frequently involve sensors that monitor how effectively the exhaust system processes gases. A faulty oxygen sensor or a drifting fuel trim can trigger codes that, if ignored, may degrade fuel economy or emissions performance. Misfire-related codes point to ignition or fuel delivery concerns that can cause rough running, reduced power, and higher emissions, with a risk of damaging the catalytic converter if left unresolved. Other codes may relate to evaporative system leaks, which can be as simple as a loose gas cap or as complex as a cracked hose or defective purge valve. Even codes that seem daunting at first can surface from a relatively harmless initial condition if not addressed quickly. The important thing is to interpret them in context: do you notice drivability issues, erratic idle, decreased fuel efficiency, or unusual noises? The diagnostic scan helps you answer these questions, but it also sets expectations about what kind of follow-up may be required.
In practice, the diagnostic scan offered by many retailers is designed to be an accessible, low-friction first stop. The technician will typically read the DTCs and then provide a plain-English explanation of what those codes suggest. They may discuss the potential severity and whether the codes are current or pending. A pending code means the issue is not yet producing a fault that the ECU considers active, but it could become active if the condition worsens. This nuance is essential because a code that is not currently active may still warrant attention. The technician will often propose a plan based on the codes: sometimes a simple re-tightening of a cap or a battery reset can clear the light if the root cause was a temporary fault. Other times, they may recommend more extensive diagnostic work by a qualified mechanic to confirm the issue and develop a repair strategy. The objective is not to upsell but to ensure you have a reliable understanding of what the vehicle is communicating and what would reasonably fix it.
Beyond interpretation, a service visit at the point of diagnostic scan frequently connects you with practical options for addressing the root cause. For example, if the codes point toward a sensor or ignition component, you may be directed to replace the faulty part and then re-test the system to confirm the fix. If the problem lies in the fuel or emissions system, further inspection might be advised to identify any leaks, blockages, or electrical faults that require professional attention. The value here goes beyond the diagnostic data: you are gaining a realistic sense of what it will take to restore normal operation and meet any applicable emissions standards. This is the moment when experience matters. A knowledgeable advisor can help you distinguish between a fix that is appropriate to attempt yourself—if you have the tools and know-how—and a repair that should be performed by a licensed technician with a more comprehensive diagnostic approach.
At its core, the diagnostic scan helps you triage. A common scenario involves a code that indicates a minor fault—perhaps a small vapor leak or a sensor reading that briefly deviated from normal without affecting performance. In such cases, the advice may be to drive conservatively and monitor the situation, knowing that a corrective action like tightening a cap can suffice. In other cases, the scan reveals a more persistent problem that could degrade engine performance, fuel economy, or emissions control if ignored. The guidance then shifts toward scheduling a thorough inspection and repair. The key is to treat the CEL as a signal to gather information rather than a signal that the vehicle is immediately unsafe to operate. The scan provides that information with clarity, reducing guesswork and unnecessary detours into costly, irrelevant repairs.
For those who are curious about the broader support ecosystem around a CEL, the diagnostic experience often sits within a larger framework of maintenance and parts supply. While the scan itself identifies issues, the subsequent steps may involve parts replacement or specialized service. The experience is designed to be patient-centered: you learn what is needed, why it is needed, and how it helps your vehicle perform as intended. The aim is not merely to fix a light but to restore reliability and protect the car’s longevity. In this sense, a free diagnostic scan acts as a trusted starting point in a journey toward informed decision-making. It respects your time and budget while acknowledging the vehicle’s own diagnostic language and the expertise required to translate it into practical, effective action.
If you decide to take action after the scan, consider the broader context of maintenance. A routine, well-planned maintenance schedule can reduce the likelihood that the CEL will light up again due to preventable reasons. Regular inspections, timely replacement of consumables, and adherence to recommended service intervals are all part of a proactive approach that aligns with how modern vehicles manage emissions and performance. The diagnostic scan is a reminder that you do not need to navigate these complexities alone. It provides a clear starting point for conversation, helping you decide whether a simple fix will suffice or if a deeper diagnostic is warranted. In many cases, drivers find that addressing a root cause early preserves performance, saves fuel, and minimizes the risk of unexpected breakdowns. When the problem is more complex, the scan still serves as a compass, guiding you toward a professional assessment with confidence and as little downtime as possible.
As you reflect on the value of this service, remember that the lights on the dashboard are not an endpoint but an invitation to a proactive maintenance mindset. A check engine light belongs to a system that is constantly listening and adjusting, and your role is to respond with information and prudence. The diagnostic scan, especially when offered for free, is a practical and empowering first step. It respects your time, helps you separate whim from worry, and clarifies the path forward. If you choose to explore this step, you’ll find that the conversation often begins with the most accessible question: What codes are stored in the ECU, and what do they mean for my car’s performance and reliability?
For readers seeking official resources and further guidance, the next step is to visit the familiar home base for automotive parts and services. There you can explore how a diagnostic scan fits into broader maintenance plans, including how to select replacement parts when repairs are needed and how to gauge the long-term cost of ownership after a CEL event. The road from code to confidence is paved with clear communication, cautious interpretation of codes, and a practical sense of what the vehicle needs to stay reliable and efficient over time. In the end, the light is not a warning to panic but a prompt to engage with your car’s technology in an informed, careful way. With the right approach, a simple free scan can transform a moment of uncertainty into a plan for safer driving and smarter maintenance.
If you want to learn more about the diagnostic service and how to navigate the next steps after a scan, you can explore the official resource linked below. It provides additional context on how a diagnostic scan fits into practical maintenance and how to approach repairs with a grounded understanding of the codes involved. For reliable, up-to-date information on check engine light causes and solutions, visit the external resource: https://www.advanceautoparts.com.
Inside a Free Advance Auto Parts Check Engine Scan: What Happens, What You’ll Learn, and What to Do Next
How the free scan unfolds and why it matters
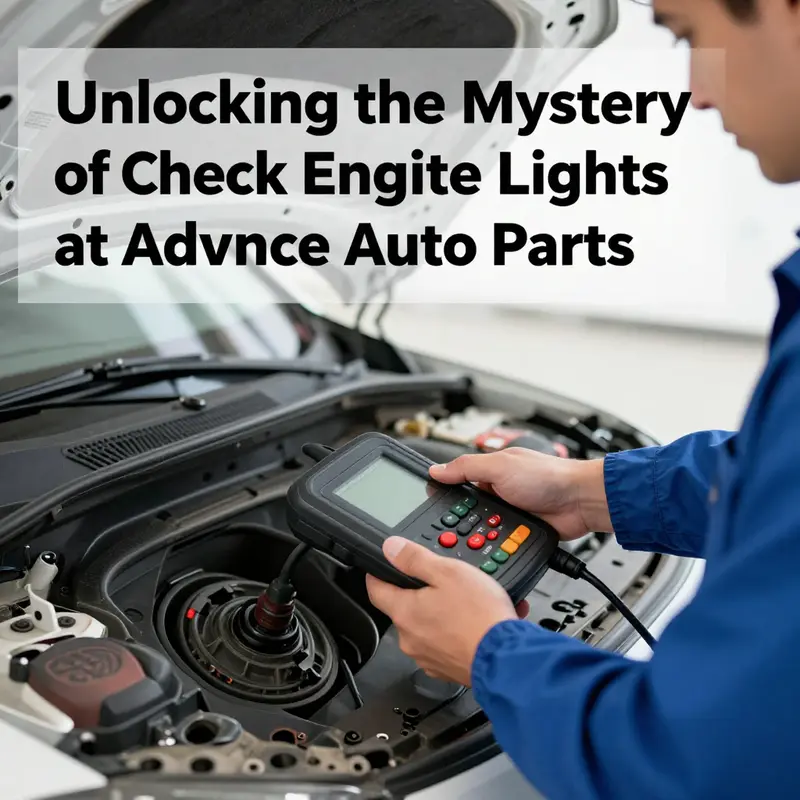
When the Check Engine Light (CEL) comes on, the first practical step is information. A free diagnostic scan at Advance Auto Parts is designed to deliver that information quickly. The process is straightforward: you drive to a store, an associate connects a scanner to your car’s OBD-II port, and you leave with a set of trouble codes and a plain-language explanation. That simple sequence removes guesswork and gives you a clear starting point for decisions about repairs, parts, or further diagnosis.
An associate will usually ask a few quick questions when you arrive. They want to know which light is illuminated, whether it’s steady or flashing, and whether the vehicle exhibits unusual symptoms. A flashing CEL often means a severe condition that requires immediate attention. If the light is steady, it may indicate a less urgent but still important issue. These short questions help the associate prioritize the scan and offer immediate advice about safety or whether you should avoid driving the vehicle.
Next, the technician connects a diagnostic scanner to the vehicle’s OBD-II port. That port is typically under the dash on the driver’s side. The scanner reads data from the vehicle’s onboard computer and retrieves stored Diagnostic Trouble Codes (DTCs). Most vehicles built since 1996 follow the same basic code structure. The codes point to systems or components that the computer detected as operating outside expected parameters. For example, codes might relate to fuel trim, oxygen sensors, catalytic converter efficiency, or misfires.
The output you receive is a code or a set of codes, plus a short description. An associate will explain these in plain language. They clarify whether the codes indicate a specific failed part or a system-level issue that needs more testing. Often, codes disclose a symptom rather than a root cause. For instance, a code indicating catalytic converter inefficiency might be caused by a failing oxygen sensor, engine misfires, or exhaust leaks. The value of the scan is that it narrows the field of possible causes.
It is important to understand the scan’s limits. The service identifies which circuits or systems have triggered a fault. It does not perform a full diagnostic teardown or component-level testing. Advanced diagnostics may require smoke testing, pressure checks, live-data analysis, or visual inspection by a qualified mechanic. The free scan is the clarity you need to choose the right next step, not a complete fix.
After the scan, you should receive a printout or a written note of the codes. Ask for it. A printed copy helps you research the code and get multiple opinions without repeating the initial scan. If you plan to shop for parts, a code printout ensures you look for components that match the specific system flagged by the vehicle.
If the codes point to parts you can replace yourself, the associate can often recommend suitable items and installation tips. In some locations, professional installation services are available for a fee. Where installation is not offered, staff can still provide guidance on parts compatibility, required tools, and common installation pitfalls. If you are unsure about DIY repair, take the code printout to a trusted mechanic for a full diagnosis and estimate.
The scan also identifies pending codes and readiness monitors. Pending codes indicate potential issues the computer has noted but not confirmed. Readiness monitors report whether emission systems have completed their self-tests. If monitors are incomplete, a recent battery disconnect or cleared codes could be why. Knowing this information helps you avoid unnecessary parts replacement and guides you on whether to drive the vehicle through a set of conditions that will complete the monitors.
A frequent customer question is whether a store will clear codes. Associates can clear codes at your request, but it’s usually better not to clear them immediately. Clearing removes the stored data that helps technicians identify intermittent or developing faults. It also resets readiness monitors. If you clear codes and the problem recurs, the vehicle will need to run through drive cycles before new codes and readiness results become meaningful.
Interpreting a code often requires context. For example, a misfire code could point to a spark plug, ignition coil, fuel injector, compression issue, or vacuum leak. A code for a lean condition might indicate a vacuum leak, weak fuel pump, clogged injector, or a faulty mass airflow sensor. The free scan gives diagnostic direction; only follow-up tests establish the precise cause. If multiple codes appear, mention any running symptoms—stumble, rough idle, decreased fuel economy, or loss of power. Those details narrow the likely culprits.
There are practical steps you can take before visiting. Note when the light came on, the driving conditions at the time, and any recent work or battery changes. If the CEL started after maintenance or a new part, bring that history to the associate. Also, check simple items like the gas cap. A loose or damaged gas cap can trigger an emission-related code and is an easy fix.
Respect a few etiquette and safety points. Park in a clear area so the associate can access the OBD-II port and, if needed, inspect under the vehicle. Keep the keys and registration accessible. If you need more time for discussion after the scan, ask whether you should wait in the store or return later. A friendly, concise exchange usually gets the best assistance.
If the codes indicate a part you want to buy from the store, staff can help verify fitment. They can also advise whether it’s a common DIY replacement or better left to a shop. If you plan to purchase an engine or major component, a code printout is still a valuable reference. For sourcing specific replacement engines or major parts, you might consult listings of low-mileage engines and assemblies. One such listing provides detailed information for certain engines that are often sought for repair or replacement: genuine JDM low-mileage 4G63T engine listing.
After the scan, you will face three basic options. First, perform a DIY repair if you have the skill and the code points to a straightforward part. Second, buy parts and ask a professional installer to do the work. Third, take the code printout to a repair shop for a thorough diagnosis and repair estimate. Your decision should weigh cost, confidence in the repair, and risk of driving with the current fault.
If the CEL is flashing, err on the side of safety and stop driving. A flashing light typically signals an active misfire and risks catalytic converter damage. In that case, have the vehicle towed to a repair facility. If the light is steady and the vehicle runs normally, a calm, methodical approach is acceptable.
Finally, use the diagnostic scan as a control point rather than a final judgment. Codes guide, but they do not always tell the whole story. A thoughtful next step often involves testing related systems, reviewing vehicle history, and prioritizing repairs that affect safety or emissions. Keep the code printout; it is a small document that saves time, reduces unnecessary purchases, and leads to better repair choices.
For stores and services, you can find specific details about the diagnostic scan program and locate a participating store through the official diagnostic scan service information page: https://www.advanceautoparts.com/diagnostic-scan-service
Reading the CEL Roadmap: How Free Scans at a Nearby Auto Parts Chain Help You Move from Warning Light to Next Steps
When the check engine light (CEL) comes on, the first step is not a repair but a information gathering moment. Many large retailers offer a free CEL scan at the counter, using an OBD-II compatible scanner to read stored diagnostic trouble codes (DTCs) from the car’s computer. The codes indicate which subsystem was flagged—powertrain codes in the P family, body (B), chassis (C), or network/communication (U)—and often point toward a likely area to inspect. The scan does not diagnose the root cause; it provides a map of where the problem might reside and helps you decide what to do next.
The process is typically quick. You park, check in, and a technician connects the scanner to the OBD-II port. In most cases, you will see a list of codes along with short plain-language explanations and sometimes a basic severity indication. The technician can translate the codes into practical next steps, such as inspecting a dirty sensor, testing a wiring harness, or performing a targeted component test. Many codes require further diagnostic work beyond what a free scan can provide.
Why request a free scan? It can save time and money by focusing the conversation with a shop and highlighting safety-related concerns. It also helps you decide whether a repair is urgent or something to handle during a routine service visit. Keep in mind that the scan is not a guarantee of the root cause and it may be followed by diagnostic charges if you proceed with repairs at the shop.
What should you do after the scan? Note the codes and any explanations, ask for an itemized estimate, and decide whether to pursue a repair with the same retailer or visit your trusted mechanic. If you plan to DIY, use the codes as a starting point to research the most likely failure modes, while recognizing that some issues require professional testing and specialized tools.
In short, a free CEL scan is a practical first step that can help you understand what the car’s computer has detected, frame the next steps, and avoid surprises when you move from warning light to repair.
What to Do After a Check Engine Light Scan at Advance Auto Parts: Practical Next Steps and Smart Decisions

Immediate assessment and what the code actually means
When a technician at a parts store reads your vehicle’s check engine light, they give you a crucial piece of information: one or more diagnostic trouble codes (DTCs). Those codes are short, standardized clues from your car’s onboard computer. They don’t tell you the whole story, but they narrow the field. Treat the code as a compass, not a map. That approach will keep your decisions efficient and cost-effective.
First, assess urgency. If the check engine light is flashing, stop driving. A flashing light most often signals a misfire that can permanently damage the catalytic converter. Towing is the safest option. If the light is steady, the issue is usually less urgent. You can drive carefully to a trusted shop, but do so without delay. Avoid heavy loads, sustained high speeds, and towing anything until the problem is diagnosed and fixed.
Next, review the code itself. The store scan will return a code such as P0440 or P0302. Each code targets a system or component — emissions, ignition, fuel, sensors, and so on. Use reliable code references to translate the meaning and list common causes. That knowledge helps you decide whether to try simple, safe checks yourself or book professional service. Keep in mind: a single code can have multiple root causes, and accurate repair often requires layered testing.
Smart, safe preliminary checks you can do right away
Before buying parts or scheduling expensive work, do a few straightforward checks if you are comfortable working near the vehicle. Start with the gas cap. A loose or damaged gas cap is a frequent and inexpensive source of an illuminated check engine light. Tighten the cap until it clicks, or replace it if the seal is compromised. After that, the vehicle may reset itself after several drive cycles.
Visually inspect obvious components: look for disconnected vacuum hoses, broken or chafed wiring near sensors, or loose connectors under the intake. Check fluid levels. If you detect burning smells, smoke, or coolant loss, stop driving and seek immediate professional help. These simple inspections often reveal minor problems you can resolve quickly; they also prevent unnecessary parts purchases.
If the code points to ignition or fuel issues, a quick check of spark plugs and ignition wires can be revealing. Worn plugs or fouled plugs can create misfires and trigger codes. For certain fuel or airflow codes, replacing an inexpensive air filter or checking for obvious intake leaks can be useful. If these tasks make you uneasy, skip them and get professional help.
Using the parts store resources to move forward
A parts retailer scan does more than list codes. Staff can explain the code in plain terms, point out likely causes, and recommend parts if replacement is appropriate. Use the retailer’s mobile app or website to match parts precisely to your vehicle’s year, make, model, and VIN. This reduces the chance of ordering an incompatible item.
If your diagnosis suggests a specific part — for example, an oxygen sensor, purge valve, or mass airflow sensor — you can often order it online and pick it up the same day. The store’s app typically includes part fitment tools and basic how-to guides. Those resources help confident DIYers complete straightforward repairs and save labor costs. If a battery test or simple part installation is offered at the location, take advantage of it; those services can eliminate common, inexpensive causes.
Keep in mind that not all repairs should be DIY. Complex problems such as transmission faults, head gasket failures, or intermittent misfires that need scope testing require a professional with diagnostic equipment.
When to repair yourself and when to consult a mechanic
Deciding whether to tackle a job yourself depends on complexity, safety, and tools. Replace a gas cap, oxygen sensor, or cabin air filter if you have basic tools and clear instructions. If a code points to a part that is inexpensive and easy to access, a DIY fix can be cost-effective.
However, if the code suggests internal engine issues, major fuel system repairs, or anything requiring the vehicle to be lifted or disassembled, choose a qualified mechanic. Also consult a pro if the light returns after your repair. Persistent or recurring codes indicate the initial fix did not address the root cause. Spend to diagnose properly instead of repeatedly swapping parts.
When you visit a repair shop, bring the code printout from the parts store, plus notes of any initial checks you performed. That information speeds up diagnosis and prevents duplicate testing. If a shop recommends replacing multiple parts at once, ask for a prioritized plan that targets the most likely cause first.
Towing, safety, and cost considerations
If a code indicates severe damage or if the vehicle runs poorly, arrange for towing. Driving a poorly performing car often causes secondary damage that increases repair costs. When deciding to tow or drive, weigh the risk of further damage against the immediate expense of a tow. A clear rule: when in doubt, tow.
Ask any repair shop for an initial estimate and a diagnostic fee breakdown. Many shops waive diagnostic fees if you authorize the recommended repair. Get a written estimate with parts, labor, and warranty details. Compare proposals before committing. A second opinion can be valuable for complex or costly repairs.
Documentation and patterns matter
Record every code, service visit, and repair. Keep dates, mileage, and the exact codes. This log helps technicians identify recurring issues and pinpoints conditions under which faults occur. Patterns often reveal intermittent problems, which demand different diagnostic techniques than constant faults.
If a code recurs after repair, present your log and the previous repair records. That history helps prevent unnecessary part replacements. For vehicles that will be traded or sold, records showing timely diagnosis and repair can preserve value.
When parts compatibility or supply matters
Ensure parts match your vehicle precisely. For older or rare models, parts availability can extend repair time. If the diagnosis points to a major, model-specific component, consider sourcing parts with known quality and fitment. In some cases, a low-mileage used component is a budget-friendly option. For example, listings for engines or transmission assemblies exist for older performance models. If you own an older performance car, you may find useful listings for compatible engines and assemblies.
If you decide to buy a used or reconditioned major component, research the seller’s warranty and return policy. Poorly matched or failing used components can lead to repeated downtime and added expense. A careful parts choice today avoids wasted money tomorrow. (See a listing for a low-mileage 4G63T engine for an example of available options.)
Plan a repair path and follow-up
After diagnosis, build a step-by-step repair plan. Prioritize safety and reliability. Start with inexpensive, high-probability fixes. If problems persist, move to more involved testing and repairs. Ask your mechanic to document each step and test results.
After a repair, verify the issue is resolved. Most faults clear after confirmed repair, but some systems require multiple drive cycles to reset. If the check engine light returns, document when it occurred and the conditions during the drive. Intermittent issues often hide under specific conditions and require targeted testing.
Cost control and warranty considerations
Ask about warranties on parts and labor before authorizing work. Warranties shift risk from you to the shop or part supplier. If a part fails early, a proper warranty prevents repeat charges. Keep receipts and warranty paperwork organized.
If you manage repairs yourself, retain invoices for parts and any professional diagnostics. Those records help if further work is needed or if you transfer the vehicle to a buyer.
Final practical advice
Treat the parts store scan as the starting point. Use it to classify the problem, perform safe, simple checks, and either complete a basic repair or move to professional diagnosis. Avoid knee-jerk part swapping. Instead, pair the code with targeted tests and good documentation. That approach saves money and ensures the correct fix the first time.
When in doubt about towing, safety, or the complexity of a repair, err on the side of professional help. A careful, methodical path from scan to repair prevents needless expense and reduces the chance of repeated visits.
For decoding and detailed descriptions of specific trouble codes, consult a reputable code reference online. It explains code definitions and common causes, helping you plan the next step: https://www.obd-codes.com/
Final thoughts
The role of check engine lights in vehicle maintenance is critical, especially for business owners who rely on smooth operations and timely repairs. Advance Auto Parts offers a valuable service that aids in diagnosing these alerts effectively. By understanding the diagnostic process, the meaning of error codes, and the recommended next steps, business owners can make informed decisions that enhance their fleet’s performance and minimize downtime. Investing the time to utilize these diagnostic services at Advance Auto Parts can lead to better vehicle management and ultimately save costs in the long run.