The headlights of the 1999 Mitsubishi 3000GT stand out not only for their striking design but also for their technical prowess. Known for their unique helmet-like shape, these headlights serve a dual purpose: enhancing the car’s aesthetic appeal and improving its aerodynamic efficiency. For business owners in the automotive aftermarket industry, understanding the nuances of these headlights can open new avenues in customer satisfaction and service offerings. This guide explores five key aspects of the 1999 Mitsubishi 3000GT headlights—design, technical specifications, market availability, installation compatibility, and regulatory considerations—to provide a comprehensive framework for leveraging this iconic automotive feature effectively.
Battle Helmets on the Front Line: The Design and Aerodynamics of the 1999 Mitsubishi 3000GT Headlights

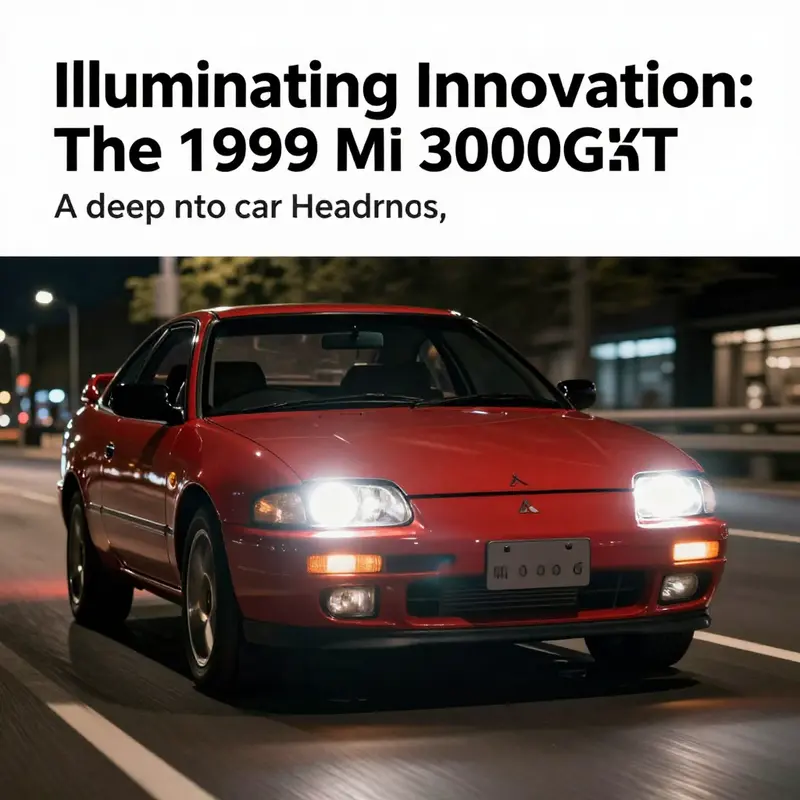
The headlights of the 1999 Mitsubishi 3000GT sit at the crossroads of form and function, where a helmet like silhouette announces performance intent before the engine wakes. In the late 1990s, sports car design favored aggressive geometry and forward motion over overly restrained styling. The 3000GT front end embodies that ethos: large angular assemblies cupped into the bumper, a wide lower intake, and a fascia that pulls air in with purposeful momentum. The headlights are not mere illumination; they are a defining element of the vehicle’s personality, a visual cue that the car belongs to a world where safety, speed, and technology intersect in a single stance. The 1999 update refined the headlamps to be even more integral to the car’s drama, resulting in a front end that looks carved from a single intention: to strike first with light, to hint at the performance behind it, and to settle into the road with the calm confidence of a well designed machine. Shape and presence matter at a glance. The headlight assemblies are large and angular, set behind a glassy shield that angles up slightly to meet the air. They sit with the front fascia’s architectural language—wide bumper intakes, a pronounced lower lip, and a silhouette that emphasizes width—creating a visual torque that makes the car read as ready to dive into a corner even when stationary. The design also integrates with the cooling ducts and aero strategy of the front end, balancing lighting, airflow, and the car’s stance. A distinctive feature in these years is a C shaped daytime running light along the outer edge of the housing, a cue that reinforces the high tech persona while providing daytime visibility. Although the 1999 model kept a fixed beam in this generation, the lens and reflector geometry conveyed a modern, mature aesthetic while preserving the drama enthusiasts expect. In practice, the headlight design contributes to aerodynamics and cooling, channeling air toward large intakes and helping manage the boundary layer so the front end remains stable at speed. The VR4 variant is noted for its bolder lower lip and cohesive front end, with the headlights acting as a single expressive element rather than separate components. For restorers, authenticity matters and OEM or period correct units are sought with careful attention to fitment, finish, and glare characteristics. The aftermarket landscape is active, but many builders aim to preserve the stock look to honor the era and its performance identity. The 1999 headlight design remains a touchstone in discussions about the model, linking the car to late 1990s sportscar culture where front end styling announced the performance underneath. In sum, the headlights show that lighting can frame a car’s character, contribute to its aerodynamic harmony, and anchor a design language that resonates with enthusiasts decades later.
Under the Helmet: Technical Specifications and Fitment Guide for 1999 Mitsubishi 3000GT Headlights
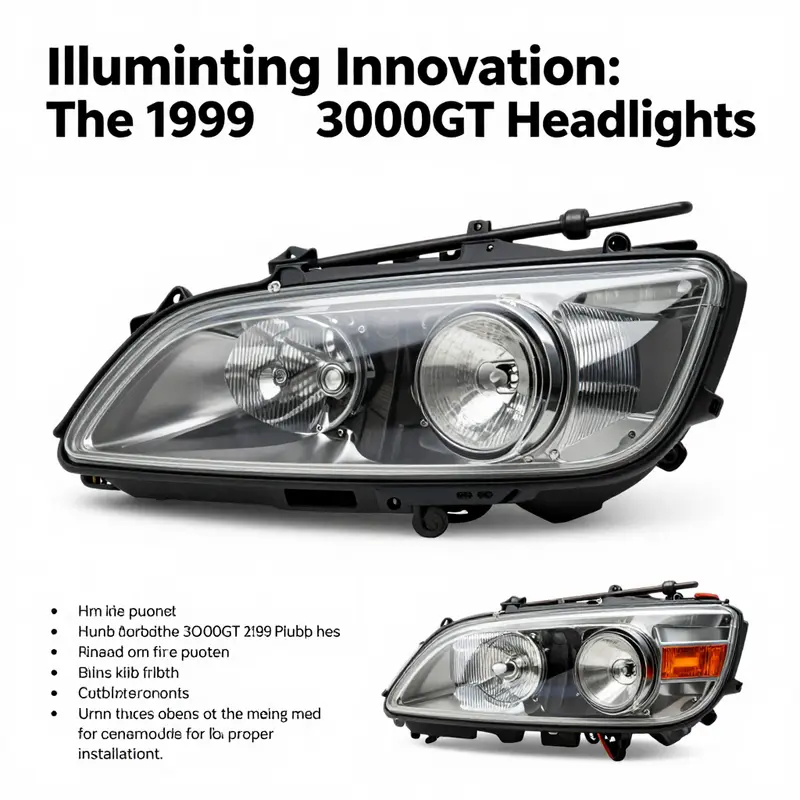
Design, optics, and fitment melded into one cohesive assembly
The 1999 Mitsubishi 3000GT headlights are more than illumination devices. They are a styling centerpiece, an aerodynamic element, and a safety-critical component. The assemblies carry the car’s signature helmet-like face. That shape defines the front-end silhouette and channels airflow across the bumper and into cooling ducts. For owners and technicians, understanding the technical specifications is essential. It ensures correct replacements, safe upgrades, and preserved aesthetics.
At factory spec, the 1999 3000GT uses sealed assemblies that house traditional filament bulbs. These units were engineered to cast a focused beam pattern across the road. They prioritize a controlled cutoff and lateral spread tailored for the vehicle’s height, bumper angle, and hood line. Depending on market and trim, the high and low beam functions are achieved within a single housing by dual-filament bulbs. Common bulb configurations match the vehicle era and include dual-function halogen types. Exact bulb references vary by market and trim. Consult the service manual for the precise designation.
Optical performance from the factory was balanced between comfort and compliance. The reflector geometry and lens curvature produce a beam that reduces glare to oncoming traffic while delivering usable range for higher speeds. This focus is especially important for the performance-oriented VR-4 trim. The VR-4’s broader bumper intakes and integrated fog lamps are matched by headlight aim points set to suit the track-minded chassis and higher average speeds. Those factory aim points support proper cooling and aerodynamic flow around the forward fascia.
Materials and sealing are practical for longevity. The stock housings are designed as sealed units. That means the primary light source, reflectors, and lenses form a single replaceable assembly. Sealing prevents water intrusion and helps preserve reflector finishes. However, over time seals can fail. When moisture or fogging appears, it degrades beam quality. Replacement glass or full assemblies restore optical clarity and maintain the headlight’s original helmet-like look. For owners seeking replacement glass or assemblies specific to 1995–1999 front ends, there are direct-fit panels and full housings that match the SL and VR-4 contours and mounting geometry. These parts retain the intended fit and finish.
Aftermarket options expand functionality, especially through modern light sources. Full LED conversion kits designed to fit older housings often advertise greater brightness and whiter color temperatures. When considering such upgrades, verify the conversion kit’s mechanical and thermal design. LED modules that do not dissipate heat effectively can cause premature failure and lead to lens fogging. Proper heat sinks and sealed interfaces matter. Look for kits with robust ingress protection ratings to ensure durability in wet conditions.
Color temperature matters not just for looks but for contrast and driver fatigue. Many modern upgrades are around a bright white range that improves perceived sharpness of roadside signs and lane markings. Yet color alone does not guarantee correct beam shape. Retrofit LEDs in housings intended for halogen sources can change how light interacts with reflectors. That may cause scattered light and glare to other drivers. Seek kits that explicitly state compatibility with the sealed housings used on this generation of the car, or opt for complete assemblies built for LEDs.
Mechanical fitment is about more than matching the headlamp shell. Mounting points, shroud contours, and connector types must align. Factory assemblies use specific tabs and bolt locations that register with the bumper and fender. When a replacement assembly reproduces those points precisely, it simplifies installation and preserves panel gaps. If you choose a retrofit kit, confirm the mounting adapter and the available clearance behind the housing. Some aftermarket solutions require small modifications to inner fenders or wiring harnesses.
Electrical compatibility matters and is often overlooked. Factory wiring feeds are sized for halogen bulb wattage and heat dissipation. Low-power LEDs reduce current draw, which can cause false fault codes or hyper-flash indicators on some vehicles. Resistive loads or specific LED drivers can address that, but they must be installed correctly. Conversely, if you consider higher-wattage halogen replacements, ensure the wiring and connectors are in good condition to prevent overheating. Fuse ratings, connector integrity, and relay presence should all be checked during installation.
Thermal management is a technical priority. Halogen bulbs produce heat at the filament, which the sealed housing handles differently than LED modules. LEDs produce concentrated heat at the base. Quality LED modules include heatsinks and, in many cases, active cooling. Poorly cooled modules risk shortening driver life and increasing internal moisture. Venting solutions integrated into the housing or properly sealed assemblies with moisture control features help maintain clarity and performance over time.
Beam aim and local regulations cannot be overlooked. Replacing bulbs or converting light sources changes luminous intensity and beam distribution. Proper aiming restores the intended cutoff and avoids blinding oncoming drivers. The vehicle’s service manual includes the approved aim procedure and reference points. After any headlight service or replacement, perform an aim check at the recommended distance and height.
Practical purchasing notes: authentic-fit replacements and direct-fit glass restore the original look and alignment. Marketplace listings for full sets often reflect the rarity and condition of these assemblies, and pricing varies accordingly. Shipping costs also add to the final expense. Prioritize assemblies that list fitment for the 1999 model year and that reproduce factory mounting points.
When choosing parts, the two guiding principles are compatibility and compliance. Compatibility ensures proper fit, electrical function, and thermal behavior. Compliance ensures the installation follows local road and vehicle lighting regulations. Keeping to factory specifications — or choosing aftermarket assemblies designed to match those specifications — preserves the car’s visual identity and its legal use on public roads.
For owners restoring the 3000GT’s signature front end, replacement glass and housings that match the 1995–1999 SL and VR-4 contours offer a close restoration path. One source for direct-fit glass replacements and related components is available here: 95-99 Mitsubishi 3000GT SL VR4 clear driver passenger side headlights glass.
Finally, always reference the factory service documentation for exact bulb designations, torque values for mounting bolts, and aim procedures. If you upgrade lighting technology, choose solutions engineered to suit the sealed housing architecture of the 1999 3000GT. That approach protects optics, preserves the car’s aggressive helmet-like front end, and delivers safe, legal illumination on the road.
Where to Find and What to Pay: Sourcing 1999 Mitsubishi 3000GT Headlights

Market reality and price expectations for 1999 Mitsubishi 3000GT headlights
Finding serviceable headlights for a 1999 Mitsubishi 3000GT requires patience and a clear sense of priorities. The car is a discontinued model, and demand among enthusiasts keeps certain parts valuable. That affects availability and price. Headlight assemblies are not as common as brake pads or filters. Expect listings to be a mix of original equipment, donor parts, and aftermarket reproductions. Each option carries trade-offs in cost, condition, and fit.
Original assemblies command the highest prices when they are in good condition. Clear lenses, intact brackets, and working adjusters are rare on older units. Prices for matched left and right sets often exceed what a casual searcher expects. Shipping costs add to the total, and sellers frequently list assembled pairs to avoid return hassles. Mid-range buyers will find units that need light restoration, such as polishing or gasket replacement. For restorers and collectors, fully functional, cosmetically sound OEM pairs remain the preferred choice because they preserve the car’s original front-end character.
Aftermarket alternatives provide a more affordable route. Reproduction shells and retrofit kits are available, but quality varies. Some reproductions adhere closely to factory dimensions and mounting points. Others require minor modifications during installation. For buyers on a tight budget, aftermarket assemblies can be a pragmatic choice when the goal is reliable lighting rather than strict originality. When choosing aftermarket parts, prioritize offerings that match factory specifications for brightness, beam pattern, and mounting geometry. That reduces the risk of alignment issues and helps maintain aerodynamic and cooling functions integral to the car’s front fascia.
Used parts markets are where most 3000GT headlights exchange hands. Listings are often labeled with model years and trim notes, including special variants. A used pair may be priced in the mid hundreds to low thousands, depending on condition and whether both sides are included. Sellers sometimes offer seller-provided fit guarantees to reduce buyer risk. These guarantees can be valuable, but read the fine print. A guarantee may cover only basic fit and not cosmetic defects or internal moisture issues.
Shipping can materially affect the final cost. Headlight assemblies are bulky and require secure packaging. Expect additional charges for expedited shipping or international delivery. Insurance for transit is recommended for higher-value parts. When a listing shows an assembly priced attractively but with a steep shipping fee, factor that cost into the comparison against closer seller listings or local salvage yards.
When evaluating any listing, ask for clear photographs. Request shots of mounting tabs, wiring harness connectors, adjuster mechanisms, and lens surfaces at multiple angles. Photos that reveal haze, hairline cracks, or damaged mounts are red flags. Haze and minor lens scratches are repairable through lens restoration. Cracks in mounting points or housing require more invasive repair or replacement of the entire assembly.
Consider the option of replacing only the lens or glass. For many 3000GT owners a cost-effective solution is to source replacement glass or clear lenses. This preserves original housings and reduces expense. A replacement lens should match the original curvature and sealing surfaces to avoid leaks and misalignment. If a set of housings is structurally sound, investing in new glass can be a smart restoration move. For those restoring a VR-4 or higher-spec trim, matching trim details is important for aesthetic continuity.
Verification of fit is essential. The 3000GT shares some components across model years, but subtle variations exist. Confirm the part number or get explicit confirmation from the seller that the assemblies fit the 1999 model. If a listing includes a part number, cross-check it against factory references or trusted parts catalogs. When part numbers are absent, rely on detailed photos and seller knowledge. Avoid purchases where the seller is uncertain about compatibility.
Return policies matter. Buy from sellers who accept returns or offer clear refund terms. A tight return window or restocking fees can complicate matters if the part turns out incompatible. If buying from a private seller, consider arranging local pickup when possible. Local transactions let you inspect the assemblies in person and remove shipping and return uncertainty.
Price negotiation is often possible. Sellers may accept offers, particularly on older or used assemblies that have been listed for a while. Be professional and factual in offers. Point out known defects, shipping realities, or the availability of replacement lenses as leverage. For higher-priced listings, a polite offer that recognizes the seller’s cost can result in a fair discount.
Installation considerations can also affect cost decisions. Some buyers underestimate the time and parts required for a clean fit. Expect to replace mounting grommets, seals, and perhaps adjuster screws. Wiring harness condition is worth inspecting. Corroded connectors or broken retaining clips increase labor time and parts cost. Factor in a possible alignment service after installation to ensure proper headlight aim and compliance with local road regulations.
Regulatory compliance is another factor. Headlights must meet local lighting standards. If a chosen assembly has been modified or uses non-standard bulbs, check local laws to avoid registration issues. Some reproduction assemblies alter beam patterns in ways that make them unsuitable for road use. Prioritize assemblies that maintain the factory beam pattern and reflector geometry.
For those seeking authenticity, tracking down OEM sets may involve searching through specialty shops, enthusiast forums, and larger salvage networks. Online marketplaces frequently list rare parts, but expect higher pricing. A used OEM pair with good optics is costlier than a set of aftermarket units but delivers authenticity and the correct aesthetic. If authenticity is the goal, consider the total restoration budget when evaluating whether to buy OEM or aftermarket.
Finally, remember that sourcing is a process. Set a realistic budget. Decide whether originality, cost, or readiness for use is most important. Use clear photos, part numbers, and seller guarantees to reduce risk. When a seller lists both units together with clear mounting and lens images, the listing often represents the best balance of convenience and reliability. If buying individual components, verify condition and compatibility before shipping.
For a practical starting point, consult the filtered online listings for 1999 Mitsubishi 3000GT headlight assemblies at the following resource: https://www.ebay.com/sch/i.html?nkw=1999+Mitsubishi+3000GT+Headlight+Assemblies&sacat=26141
If you prefer repairing rather than replacing, consider sourcing replacement glass for the 1995–1999 model range. A direct source of clear headlight glass for the 3000GT can simplify restoration and lower cost: 95-99 Mitsubishi 3000GT clear headlight glass.
Fitting the Look: Installing and Ensuring Compatibility for 1999 Mitsubishi 3000GT Headlights
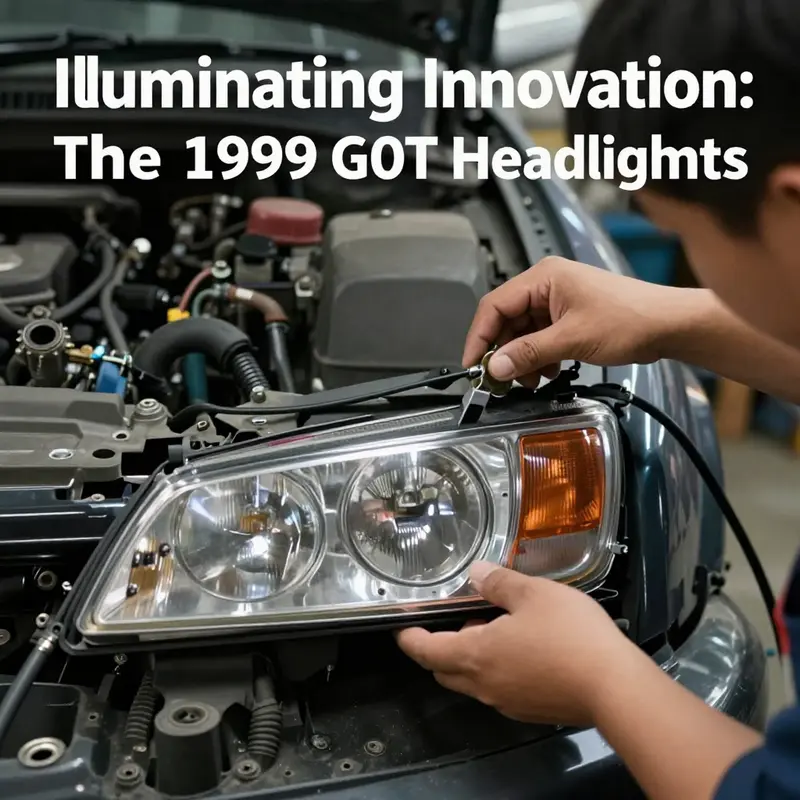
The 1999 Mitsubishi 3000GT’s headlights are more than visual statements. They shape the car’s face and influence airflow, cooling, and the vehicle’s aggressive stance. That creates two parallel demands when you replace or upgrade them. First, the assembly must physically fit and seal to preserve aerodynamics and weather protection. Second, the electrical and optical systems must match factory expectations to avoid faults and unsafe aiming. Understanding both sides keeps the car looking right and functioning safely.
Start with the basic compatibility facts. The low beam uses a 9006/HB4 bulb. The high beam takes a 9005/HB3 bulb. These are common halogen sizes with well-known socket types and reach. Using the correct bulb sizes prevents fitment problems and maintains the headlight’s designed beam pattern. The stock housings focus light in a specific way. Deviating from the specified lamp shape or filament position usually distorts that pattern and can cause glare for other drivers.
For owners seeking a modern look, conversion to LED is a popular route. LED kits improve lumen output and reduce power draw. However, LEDs differ from halogens in how they produce light. The light source location and spread can change beam focus. Some LED retrofit bulbs sit slightly differently in the socket. That can lead to fuzzy cutoffs and scatter. Choose kits specifically designed for the 1994–1999 model years. Those kits are typically engineered to match the original filament position and the 3000GT’s housing geometry.
Electrical compatibility is the next big concern. The 1999 3000GT’s wiring and circuitry expect certain load characteristics. Aftermarket LED kits may draw less current. That can trigger hyperflashing with turn signals, or cause dashboard warnings if the car monitors headlamp loads. In some cases you will need resistors or a load adapter to restore expected current draw. Resistive solutions add heat, so fit them in a ventilated area. Some LED kits include plug-and-play CANbus adapters. Even so, test each new setup before finalizing installation.
When replacing full headlight assemblies rather than bulbs, plan for additional steps. Complete assemblies include lenses, housings, and mounting points. They often require precise alignment. Proper aiming aligns the beam cutoff and prevents glare. Assemblies may need shims or slight bracket adjustments to stabilize the lens. If the new unit shifts even a few millimeters from the stock location, the beam will change direction. This matters most where regulations mandate cutoff lines and specific lux levels.
Sealing and condensation control deserve attention. A correct seal keeps moisture out and preserves reflector and lens integrity. Aftermarket assemblies sometimes use different venting strategies. Check vents and moisture traps. If the new housing lacks a proper vent, condensation develops. That fogging reduces light output and can corrode sockets. A tight rubber gasket and correct vent placement are simple ways to avoid this problem.
The 3000GT’s front fascia design integrates the headlamps with fog light housings and intake shapes. This means installation is not only about the lamps; it’s about the surrounding trim. When fitting aftermarket units, verify that surrounding clips and tabs match the bumper area. Mismatched tabs force modifications that compromise fit and look. For owners restoring a high-end variant with a distinct lower lip and wider intakes, matching the factory silhouette is essential to maintain the vehicle’s identity.
Alignment goes beyond pointing the beams. Aim affects how the headlight helps cooling and airflow around the front end. A misaligned assembly can alter the small flow passages designed to draw air into intercooler or brake ducts. That is particularly important for turbocharged variants, where cooling channels are critical. After installation, take the car for a short drive and inspect underhood temperatures. If anything looks off, re-check how the assembly mates to the fascia.
Installation tools are straightforward but necessary. Have a service manual or factory diagram handy. Use torque specifications for mounting bolts. Tightening too much can warp the housing or crack tabs. Too loose and the lens will vibrate, causing premature seal failure. For electrical work, clean connectors and use dielectric grease to prevent corrosion. If you splice wires, use proper solder or rated crimp connectors and heat-shrink tubing for weatherproofing.
If you buy a preassembled headlight, expect a higher price than bulb-only upgrades. Shipping costs can add to the total. Verify whether the seller offers a fitment guarantee. A match guarantee reduces the risk of returns and rework. When purchasing, confirm lens condition and whether the assembly is new, rebuilt, or aftermarket reproduction. New OEM-style assemblies are best for maintaining original optics and legal compliance.
Legal compliance is another practical consideration. Headlamp brightness, beam pattern, and color temperature can fall under regional regulations. Many authorities restrict certain color temperatures and aftermarket lighting modifications. For example, excessively blue or purple light can be noncompliant. Choose bulbs and kits that adhere to local standards. Keep documentation from the kit manufacturer or seller in the glovebox during inspections.
Aesthetics and preservation also guide choices. The 1999 update emphasized a helmet-like, battle-helmet look. Replacements that match factory contours preserve that design language. Clear glass replacements with correct inner reflectors retain original character. If you prefer a customized look, do it in a reversible way. That way, you can restore the factory appearance for a future sale or show.
For those who want direct replacement lens parts, there are supplier pages dedicated to clear driver and passenger side headlight glass for 1995–1999 models. These sources offer a way to refresh original housings without swapping assemblies. A refreshed lens clears yellowing and corrects light scatter while keeping the original reflectors. Consider this option if the housing and mount points remain sound.
Finally, test and verify after installation. Park on a level surface at the recommended distance from a wall. Check beam height and lateral aim. Inspect for leaks and vibration after a short drive. Confirm that dashboard indicators remain off and that turn signals behave normally. If any issues appear, diagnose them before driving at night.
Installing and ensuring compatibility for 1999 Mitsubishi 3000GT headlights blends mechanical fit, electrical harmony, and careful aesthetic choices. By respecting bulb specifications, using the right adapters, sealing assemblies properly, and verifying aim, you preserve the car’s design and safety. For a resource on compatible halogen options, see the reference link below. For replacement glass and lens options tailored to the 3000GT, consider the clear headlight glass resource linked here.
Reference: https://www.amazon.com/dp/B08NQJZ2P9
Further reading: 95-99 Mitsubishi 3000GT clear headlight glass
Beam and Law: Navigating Headlight Regulations for the 1999 Mitsubishi 3000GT

The interplay between design, safety, and law shapes how owners approach the headlights on a classic like the 1999 Mitsubishi 3000GT. The car’s distinctive helmet-like front lighting, already a defining feature of its bold styling, sits at the intersection of aesthetics and compliance. As with many late-90s classics, these headlights were engineered for the standards of their time, prioritizing form and aerodynamics as much as function. Today, that means any replacement or upgrade must balance preserving the car’s iconic look with meeting contemporary safety requirements. When you consider a retrofit or even a straightforward replacement, the most important questions extend beyond fit and price. Do the new components meet the relevant safety standards, and will they pass inspection where you drive? The answers hinge on how well the choice aligns with current federal guidelines and state-specific rules, not just with the factory specs etched into a brochure or remembered from a showroom floor.
The 1999 model occupies a transitional space in automotive regulations. It predates the broad adoption of modern OBD-II diagnostics in the sense that today’s emissions testing often relies on more stringent data streams and fault reporting than those vehicles originally designed for. This isn’t merely a footnote for collectors; it can influence how emissions testing panels evaluate a car during periodic inspections. Some states have built their inspection regimes around the latest on-board diagnostics capabilities, and vehicles that cannot demonstrate compatibility with those systems may encounter additional scrutiny. That reality underscores a practical truth for owners seeking to upgrade or replace headlights: compliance isn’t just about the lamps themselves. It’s about the whole system’s relationship to the vehicle’s regulatory profile, including how its electronic monitoring and its emissions controls are interpreted by inspectors.
In the realm of headlight replacements, a recurring theme is the tension between modern lighting technology and the standards that govern road use. LED bulbs, especially those designed to fit into older housings, have become popular for their brightness and efficiency. Yet for a car like the 3000GT, any LED swap—whether the common 9005 or 9006 types used in many headlight assemblies—must be DOT-approved and aligned with federal safety regulations. The Department of Transportation’s FMVSS standards govern how headlights must perform in real-world conditions, including beam pattern, intensity, color, and photometric consistency. If a retrofit or replacement fails to meet these requirements, it can throw off the intended beam pattern, causing glare for oncoming drivers and potentially creating unsafe lighting conditions. In practice, this means that an aftermarket LED upgrade should be selected with more scrutiny than a simple off-the-shelf choice. The goal is to maintain both the look of the original headlights and the safety functions they provide on the road.
The issue isn’t only about brightness; it’s about beam quality and control. A headlight system that no longer projects light in a compliant, well-defined pattern can create hotspots and uneven illumination that complicates nighttime visibility. In high-speed, low-light driving—conditions the 1999 GT can still evoke when its performance remains spirited—the last thing a driver wants is a beam that distracts instead of directs. For this reason, many states maintain rules about beam patterns and glare limits. Some high-intensity lighting options, especially certain HID or LED configurations, may not be street-legal unless they are specifically approved for use on public roads. That means a modification intended to increase visibility must also respect regulatory thresholds that govern color temperature, cutoff lines, and alignment. The one-size-fits-all approach that sometimes accompanies aftermarket upgrades is not a suitable mindset when the vehicle’s integrity and legal status are on the line.
Guidelines for compliance combine practical steps with a safety-first mindset. The first step is to verify that any replacement bulbs or retrofit kits carry the appropriate certifications. Look for DOT markings and evidence that the product adheres to FMVSS or SAE guidelines. A second step is to assess the impact on beam pattern. Even if a package promises “plug-and-play” convenience, the actual photometrics can drift, altering cutoff lines or reducing consistency across the beam. Third, ensure the installation is performed with proper aim and alignment. An out-of-adjustment headlight can compromise visibility and create glare that endangers others, and inspectors may flag misaligned systems even when the components themselves are compliant. Fourth, consider the color temperature and intensity in relation to local rules. Some jurisdictions impose limits on color temperature or require certain brightness levels to be achieved with equipment that has undergone formal approval processes. Finally, keep documentation. Receipts, certification papers, and installation notes may be requested during inspections, and having them on hand can smooth the path to compliance.
For owners seeking a concrete reference point on factory-style or period-accurate replacements, there is a practical resource that aligns with the 1995–1999 Mitsubishi 3000GT’s era of parts while anchoring you to compliant options. A relevant catalog entry offers a set of headlight assemblies designed to fit the model squarely within its original look while providing the reliability of a manufacturer-approved design. This approach helps preserve the vehicle’s visual identity—its distinctive silhouette and the battle-helmet aesthetic that many enthusiasts love—without compromising safety or regulatory compliance. For a direct example of a headlight option in this vein, you can explore the availability of classic-era replacement headlights described as suitable for the 1995–1999 Mitsubishi 3000GT. 1995–1999 Mitsubishi 3000GT headlights.
Another layer of due diligence involves understanding your state’s stance on lighting modifications. The regulatory landscape is not uniform across the United States. Some states take a permissive approach to certain upgrades when they are clearly street-legal and certified, while others enforce strict restrictions that effectively bar non-certified components from the road. This variability means that a decision rooted solely in aesthetics can backfire at the inspection station. The prudent path is to assume a cautious posture: select parts with formal approvals, verify compatibility with the vehicle’s electrical and diagnostic architecture, and confirm that the installation will not undermine the headlight’s original safety intent. If you are in a jurisdiction with particularly stringent rules, such as those that scrutinize aftermarket high-intensity lighting or retrofits for classic vehicles, it becomes even more important to engage with authoritative guidance and, when in doubt, consult a professional installer who understands both the vehicle’s heritage and the current regulatory environment.
In the end, the question is not only “Will this part fit?” but also “Will it meet the standards that keep drivers and pedestrians safe, while also passing the checks that protect your investment and your right to drive?” The 1999 Mitsubishi 3000GT’s headlight system is emblematic of a car that rewards careful attention to detail. Its iconic face is a reminder that performance cars are not just about speed and raw power; they are also about how their personalities shine through safety-compliant design. By prioritizing compliant components, accurate beam alignment, and solid documentation, an owner can maintain the car’s visual drama without crossing the line into unsafe or illegal territory. For enthusiasts who want to respect the era’s styling while embracing modern reliability, the path is clear: treat headlights as a critical safety system first, a design element second, and a potential upgrade only after confirming that every box—DOT approval, beam pattern integrity, regulatory clearance, and correct installation—has been checked.
External resources can offer broader regulatory context that complements the car-specific guidance. For a foundational overview of safety standards and how they apply to lighting, consult the official Federal Motor Vehicle Safety Standards information, and consider the state-specific guidance when planning a retrofit. A helpful starting point for state-level modification guidance is the California DMV, which provides comprehensive information on how lighting changes interact with local rules and inspections: https://www.dmv.ca.gov/portal/dmv/.
To summarize, navigating headlights on a classic sport coupe like the 1999 3000GT requires more than choosing a bright bulb. It demands a careful alignment of design intent with safety standards and legal requirements. By selecting compliant parts, ensuring accurate beam pattern and alignment, and maintaining thorough documentation, owners can keep the car’s signature look while preserving its integrity on today’s roads. The aim is a lighting system that shines with the original character of the vehicle—bright, focused, and lawful.
Final thoughts
Understanding the multifaceted nature of the 1999 Mitsubishi 3000GT headlights is crucial for business owners in the automotive field. From their distinctive design and technical specifications to available market options and compliance with local regulations, these factors play a vital role in meeting customer needs and enhancing vehicle performance. By investing in quality headlights and understanding installation requirements, businesses can achieve improved customer satisfaction and retain a competitive edge in the aftermarket.