The 1999 Mitsubishi 3000GT is a beloved icon, particularly recognized for its innovative pop-up headlights. As a business owner in the automotive sector, understanding how to navigate the complexities of replacing, upgrading, and maintaining these headlights is crucial. The headlights not only enhance the vehicle’s aesthetic but play a significant role in performance and safety. In the chapters that follow, we will delve into the available replacement options, the exciting potential of aftermarket upgrades, and essential maintenance practices. This comprehensive guide aims to provide business owners like you with valuable insights into maximizing the value and longevity of the 3000GT’s signature lighting system.
Guiding the Glow: Replacement Paths for the 1999 Mitsubishi 3000GT Headlights
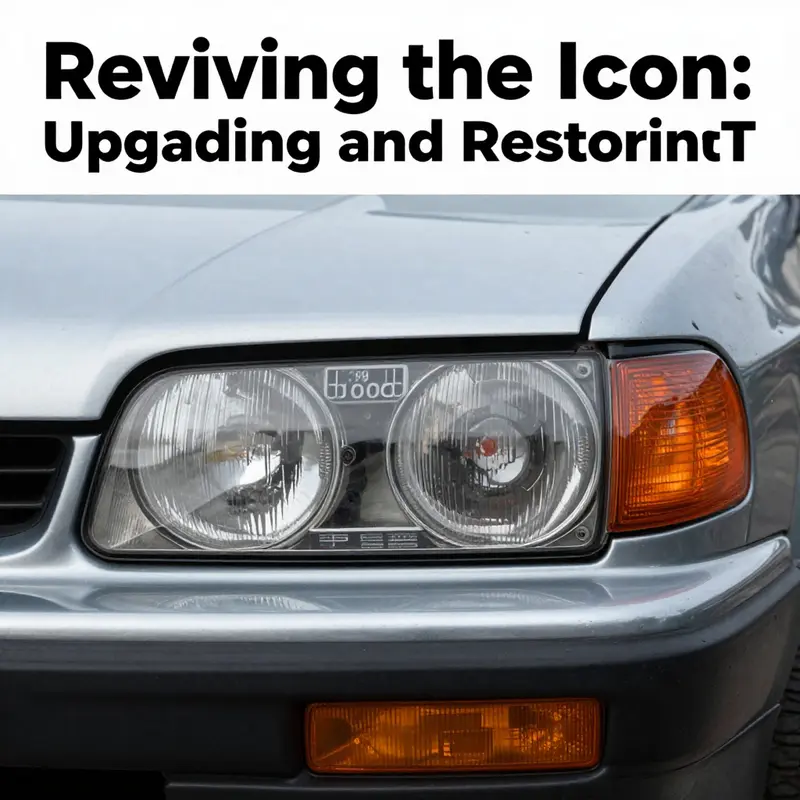
The headlights of the 1999 Mitsubishi 3000GT are not merely a functional feature; they are a defining element of the car’s character, a glare of behavior and design that tells passersby that this is a machine built at the tail end of an era when headlights could be as much a statement as a safety feature. The pop-up headlight system that defined the third-generation 3000GT was more than a mechanical mood ring. It was an integrated piece of the velocity-focused design language, a blend of aerodynamics, weight distribution, and lighting performance that reinforced the car’s silhouette at speed and at rest. By the end of the decade, the model had become a benchmark for how form and function could harmonize in a way that modern, fixed headlight assemblies often struggle to recapture. The 1999 facelift, with its subtle revisions to the front bumper, the shape of the lamps themselves, and the surrounding contours, reinforced this stance. The changes sharpened the aggressive look without abandoning the original contour that fans had grown to recognize. In the decades since, those headlights have continued to symbolize the car’s dual appeal: driving precision and classic, mid-90s style.
For owners who want to keep that identity intact, replacing or restoring the original headlight components is not simply a maintenance task; it is a decision about authenticity, performance, and long-term ownership experience. The market for 1999 3000GT headlight assemblies reflects a mix of nostalgia and practicality. Some collectors seek pristine OEM units to preserve originality, while others look for refurbished or aftermarket options that deliver more modern lighting performance or improved durability. Because the model is out of production, the available parts have become more scarce over time, and the landscape of replacement options has evolved. That evolution is driven by a combination of traditional channels and newer aftermarket ecosystems, including regional suppliers that have stepped in to fill gaps left by discontinued manufacturing.
The replacement landscape starts with the possibility of direct OEM replacement. An OEM approach promises a straightforward path: a headlight assembly designed for the 1994 to 1999 generation that matches the original mounting points, lens curvature, and internal geometry. In practice, this means a plug-and-play experience for many drivers, with the added reassurance that the beam pattern and color temperature align with what the car’s designers intended. The core of this option is simplicity. The assemblies are built to fit the third-generation platform, so the mounting tabs, seal surfaces, and wiring harness interfaces are compatible, reducing or eliminating the need for modifications to the surrounding structure. In terms of light sources, OEM units typically keep to the halogen standard that the car shipped with, using bulbs such as 9005 for high beam and 9006 for low beam. This preserves not only the look but also the light characteristics that drivers depend on when navigating rural roads or highways in the predawn or after dark.
The price landscape for direct OEM replacements, while variable, has historically hovered in a mid-range that reflects both rarity and the convenience of a factory match. Some buyers encounter listings where each headlight assembly sits in a price band around the high hundreds to low thousands per unit, underscoring that the benefit of exact factory-fit and finish comes with a premium. In the broader market, the offer emerges in the form of both new and refurbished units, with refurbished items often appealing to enthusiasts who want to balance cost with a restoration-minded approach. The appeal of OEM replacements lies in the confidence that the parts align with the car’s original tolerances, the finish remains consistent with the factory optics, and the warranty or seller support provides a degree of post-purchase assurance. For those who place a high value on staying true to the car’s factory appearance, OEM direct replacements remain a compelling option.
Beyond the OEM route lies a broader ecosystem that has grown up around classic and late-90s performance cars. Upgraded options welcome modernities such as LED or HID lighting sources, which can dramatically improve nighttime visibility and the perceived brightness of the front end. These upgrades can be implemented within the same headlight housing in many cases, but they often require some adjustment to the vehicle’s electrical system or the fitment of adapters. The engineering challenge here is twofold. First, the designer inside the headlight assembly must accommodate a light source that produces different heat patterns, luminance angles, and thermal management demands. Second, the new light source—especially LEDs—must be controlled to prevent glare for oncoming drivers and to ensure the beam pattern remains compliant with local traffic regulations. The risk, of course, is that an ill-planned upgrade can degrade visibility rather than enhance it. For many enthusiasts, the reward is a sharper, crisper white light with better cut-off and longer lifespan, all while preserving the car’s iconic silhouette and the classic pop-up mechanism that remains central to its appeal.
To pursue upgrades responsibly, one must consider the electrical system’s health and the vehicle’s existing harnesses. An upgrade might necessitate wiring adapters, ballast replacements, or feedback from the charging system to ensure stable operation. These changes are not merely cosmetic; they affect performance and reliability. A careful owner will map the electrical load, confirm that the alternator can handle any added demand, and ensure that the new components meet electrical codes and local regulations. In this sense, an upgrade becomes a careful negotiation between the car’s original design and the modern demands of today’s lighting technology. The decision often comes down to a risk-and-reward calculus: if you value maximum sensitivity and a white-blue hue with contemporary efficiency, an LED or HID conversion can deliver, but you should proceed with a plan that accounts for heat management, seal integrity, and beam alignment.
For those who want a fresh start without losing the original look, complete assembly options—whether refurbished or brand-new—offer a compelling middle ground. A complete headlight assembly includes the housing, lens, and internal components, all aligned to provide a consistent gallery of optics and fitment. This is particularly attractive when the original units have become hazy, cracked, or misaligned after years of exposure to sun, moisture, and temperature fluctuations. Purchasing a complete unit simplifies the process: you replace the entire module rather than swapping out individual parts and risking misalignment or improper fitment. The trade-off here is intellectual and practical: while you gain the assurance of a cohesive unit with properly sealed components, you may forgo some of the nostalgia associated with keeping the original, even if degraded, assemblies in place. Still, for heavily used show cars or daily drivers facing the elements, a complete assembly can deliver the reliability and consistency required for year-round driving.
In considering refurbished versus new, one must weigh branding and after-sales support. Refurbished units can offer a path to factory-like performance at a lower price point, but the quality varies depending on who performed the refurbishment, what parts were replaced, and whether the unit has consistent documentation. New units remove much of that ambiguity but may come with a longer lead time and a higher price. The market is replete with options produced by regional suppliers who rely on advanced manufacturing processes such as CNC machining, die casting, and precision assembly. These suppliers are often filling the vacuum left by aging inventories and the reality that original factory parts are scarce. The result is a pragmatic ecosystem in which enthusiasts can choose the balance of authenticity, performance, budget, and availability that suits their project goals. The quality of these replicas or improved headlight components can be high enough that they meet or exceed original performance while offering heavier durability and lower long-term maintenance costs, provided the buyer selects reputable brands and scrutinizes build quality, fit, and warranty terms.
The choice between OEM, upgraded, and complete-assembly options is also guided by the car’s aesthetic expectations. The 1999 front end, particularly after the facelift, has a distinctive aperture and lamp shape that give the car its aggressive visage. Any replacement must respect that facial geometry to avoid a mismatched look that erodes the car’s cohesive appearance. The pop-up mechanism itself is part of that identity; a replacement that preserves the original form, whether through a carefully restored housing or a faithful reproduction, helps maintain the sense that this is a machine from a specific moment in automotive history. At the same time, many owners rightly want improved lighting performance, especially for night driving in areas with limited street lighting. In those cases, a careful upgrade—one that respects the car’s geometry and keeps the hood and fender lines clean—can deliver both the safety benefits of brighter illumination and the aesthetic satisfaction of modern optics impressed into a retro silhouette. The result is not a single path but a spectrum of options tailored to the owner’s priorities: fidelity to the vintage look, performance gains, budget constraints, and the level of risk one is willing to tolerate in terms of fitment and regulatory compliance.
The practical steps to making a decision around replacement are neither mysterious nor trivial, yet they do require methodical thinking. Start with a clear understanding of how you plan to use the vehicle. If you’re preserving a weekend show car or restoring a collector’s item, the temptation to pursue an exact OEM replacement may be strong. If you’re seeking daily reliability and visibility through long winter nights, an upgrade that yields more lumens or a cooler color temperature may be more compelling. Budget is another decisive lever. OEM parts, especially in the classic-car sphere, tend to command higher prices, particularly when sourced through recognized channels. However, refurbished units and complete assemblies from reputable suppliers can deliver competitive performance at a more accessible price point while still maintaining a level of quality commensurate with the car’s age and usage. In all cases, buyers should verify the authenticity of the part or the trustworthiness of the supplier, confirm warranty terms, and request evidence of testing or quality checks before finalizing a purchase.
Installing or upgrading headlights on a 1999 3000GT also invites a broader reflection on how we engage with classic cars in an era of rapid lighting technology. The headlight upgrade conversation is about more than brightness; it is about maintaining a relationship with the vehicle’s original design while integrating improvements that enhance safety and usability in contemporary driving conditions. The balance is delicate. The car’s pop-up mechanism is a dramatic mechanical feature, but it requires careful alignment and calibration to produce the intended beam pattern. Even with a direct OEM replacement, the alignment must be checked and tuned after installation to guarantee that the light cut-off lines are consistent with the fenders and hood. If an upgrade includes different light sources, beam alignment becomes a more critical factor because the new lights may produce different keystone effects or cutoff lines that could impact nighttime visibility for both the driver and other road users. A thoughtful approach acknowledges both the engineering constraints of the headlight assembly and the evolving expectations of road safety standards.
From a historical perspective, the replacement options for the 1999 3000GT headlight assemblies reflect the car’s enduring appeal. The model’s popularity continues to drive demand not just for pristine OEM items but also for modernized components that let the car perform near the limits of today’s lighting technology while preserving its classic lines. This dual demand has encouraged a diverse marketplace in which well-made replicas, carefully engineered LED adapters, and complete assemblies coexist with genuine factory components. In practice, a well-chosen replacement can restore the car’s nighttime presence and safety without sacrificing the essence of what makes the 1999 3000GT such a recognizable icon on the road. Enthusiasts can pursue a restoration that preserves the car’s historic character while embracing the practical benefits of improved visibility. The best outcome is that the headlights continue to serve as a bridge between a storied past and a safer, more confident driving experience in the present day.
For readers who want to explore legacy headlight options that retain the classic glass and silhouette while offering modern clarity, a dedicated page detailing the 95-99 Mitsubishi 3000GT SL VR4 clear headlights glass can be a useful resource. This page provides a sense of how the vintage look can be preserved even as the components themselves are updated or replaced. You can learn more about this particular avenue here: 95-99 mitsubishi-3000gt-sl-vr4-clear-driver-passenger-side-headlights-glass.
The decision to replace or upgrade is never a one-off choice; it sets the tone for how a 1999 3000GT will be experienced on the road for years to come. By weighing the pros and cons of OEM direct replacements, upgraded lighting options, and complete assemblies, owners can tailor a pathway that respects the car’s heritage while delivering the practical benefits demanded by today’s driving environment. As with any classic car project, patience, thorough research, and attention to fitment and quality are essential. The headlights are more than a component; they are the eyes of the car, translating the energy of the powertrain into visibility on the road and a visual link to a design language that continues to captivate enthusiasts around the world.
External reference material can offer additional context on OEM headlight assemblies and compatibility, particularly for those who want to compare contemporary options with factory specifications. For a broader sense of how replacement headlight assemblies are presented in the market and to gauge typical pricing, an external resource provides useful real-world examples and buyer experiences. https://www.walmart.com/ip/Mitsubishi-3000-GT-Headlight-Assembly-210/1007724382
Illuminating Choices for the 1999 3000GT: Practical Aftermarket Headlight Upgrades

Illuminating Choices for the 1999 3000GT: Practical Aftermarket Headlight Upgrades
Upgrading the headlights on a 1999 3000GT is as much about preserving character as it is about improving visibility. The pop-up headlight system and sculpted front end define the car’s silhouette. Changes must respect that heritage. At the same time, later-night driving and modern road speeds demand better illumination than the stock halogen systems offer. This chapter walks a thoughtful owner through the realistic upgrade paths. It explains trade-offs, the engineering behind successful retrofits, and long-term maintenance considerations. The goal is practical clarity. The narrative avoids hype and focuses on choices that yield measurable gains without compromising safety or compliance.
Begin with a clear goal. Do you want more usable light on dark roads? Do you want a modern look while keeping the original pop-up function? Is the target a daily driver or a show car? Your answers narrow the options. Replacing bulbs alone is the least invasive path. Swapping to modern LED modules yields brighter, whiter light and lower power draw. LEDs last far longer than halogens. They also reduce heat inside the headlamp housing, which slows lens yellowing. Yet LEDs require attention to optics. Many early reflector housings were designed for point-source halogen bulbs. Dropping in a very different source can scatter light and create glare. Proper LED retrofits pair a light source to a compatible reflector or projector lens to maintain beam cutoff and pattern. If the original housing is worn, restoring or replacing the lens before fitting new light sources is smart. Clear lenses and good seals maximize the benefit of any bulb upgrade.
HID conversions offer a different balance. They produce a strong, penetrating beam that can transform long-range visibility. They also put demands on the system. HIDs need ballasts, a stable ignition circuit, and careful aiming. The beam pattern of an HID in an uncertified reflector can cause scatter and glare. Proper conversion installs a matched projector or a housing that is designed to use high-intensity sources. In short, HID retrofits work best when the optical system is purpose-built for them. If you pursue HIDs, budget for quality ballasts and professional alignment. Expect to verify the results against local lighting regulations.
Custom headlight assemblies represent the most flexible option. Aftermarket housings can modernize the front end while preserving the pop-up silhouette. Modern lens designs, integrated daytime running lights, and LED strips can be incorporated into housings built to replicate the factory outline. These assemblies remove many compromises because they marry optics and light source from the start. Look for assemblies that include proper seals and venting. Poor sealing leads to condensation, which ruins appearance and light output. Choose units with thermal management for high-output LEDs. Good assemblies will also include alignment points that match the vehicle, making installation smoother.
When the factory parts supply diminishes, manufacturing processes elsewhere step in. Reproductions made with CNC machining, die casting, and precision assembly can be very good. They often come with modern features not available in the original unit. But buyer vigilance matters. Check the fitment photos, ask about material grades, and confirm the presence of gaskets, mounting studs, and correct connectors. If reproduction housings require modifying the pop-up mechanism or the front fascia, walk away. The right part should bolt in without cutting or welding.
Electrical compatibility is a common stumbling block. The 1999 3000GT uses simple headlight circuits by modern standards, but modifications can change load characteristics. LEDs draw less power, which can confuse load-sensing circuits or cause flicker if not managed. Use resistor harnesses or dedicated drivers when needed. HIDs require ballasts and, sometimes, relay harnesses to protect the original wiring. Ballasts can cause interference with radio equipment if not shielded. If adaptive functions or headlight leveling motors are present, ensure the new assemblies support them. Otherwise, disable those features properly.
Aiming and beam pattern matter far more than raw lumen claims. A brighter lamp that throws light into the eyes of oncoming drivers is dangerous. Correct aiming yields the most effective illumination where you need it: the road surface, not the horizon. After any upgrade, aim the lights on a flat surface against a wall. Follow a methodical approach. Measure from the center of the lamp to the ground, mark the wall, and adjust until the cutoff and pattern align with recommended offsets. If you fit projector retrofits, confirm the sharp horizontal cutoff and the asymmetric pattern for right-hand or left-hand driving. If your region requires beam leveling, add an appropriate leveling kit or keep the old mechanism intact.
Heat management is a technical detail often overlooked. High-output LED modules require heatsinks or active cooling. In cramped pop-up housings, active fans can be noisy and may reduce reliability. Passive solutions with sufficiently large thermal paths are preferable. Ensure the replacement assembly has room for cooling fins and that vents prevent moisture ingress. For HID systems, heat is less of an issue for the bulb itself, but ballast location is important. Keep ballasts away from salt and moisture, and secure them to avoid vibration damage.
Lens restoration is a parallel path to consider. Many older units suffer from surface oxidation or cracking. Restored, clear lenses deliver more usable light than new bulbs in hazed housings. Lens polishing kits can remove oxidation and restore clarity for years. For badly damaged lenses, replacing the glass or polycarbonate element is often more cost-effective. Some suppliers offer exact-fit clear glass replacements for the 1994–1999 models. Those replacements can revive both appearance and optical performance. When replacement parts arrive, verify the sealing surfaces and use fresh gaskets or automotive-grade sealant to prevent future fogging.
Sealing and drainage are crucial to long-term performance. Condensation builds when warm air enters a cooler sealed space. Many aftermarket housing designs improve on factory venting. Ensure vents remain clear during installation and that anti-fog desiccant packets are used if moisture is a recurring issue. Replace rubber covers and grommets that have hardened. A one-time extra step of silicone grease on gaskets keeps them supple and effective.
A practical upgrade plan begins with diagnosis. Test the existing lights for aim, brightness, and mechanical soundness. Note any worn motors or damaged lifts. If the pop-up mechanism shows signs of binding or electrical weakness, address those first. Rebalanced mechanisms and fresh lubricants reduce stress on replacement assemblies and prevent unexpected failures. If the goal includes keeping the pop-up function, confirm clearances with any new housing or driver module. Some custom assemblies preserve the original pivot points and use the same mounting geometry.
Sourcing parts involves trade-offs between cost, shipping time, and quality assurance. Reproductions from overseas manufacturers can offer modern materials and features at lower prices. Look for vendors that disclose manufacturing techniques and materials. Ask about return policies and warranties. In some cases, an original but refurbished assembly will be the best compromise. Refurbished units that have been professionally re-sealed and fitted with modern bulbs can offer original fit with improved output. If you consider third-party sellers for glass replacements or housings, examine buyer reviews and request additional photos before purchase.
Installation touches several disciplines. Mechanical alignment, wiring, and weatherproofing all matter. Many kits aim to be plug-and-play, but others require splicing wires, adding relays, or fabricating brackets. If you lack basic wiring tools and experience, hire a professional. Poorly executed wiring leads to intermittent faults. Secure wiring away from heat sources and moving parts. Use dielectric grease on connectors to prevent corrosion. When adding ballasts or drivers, mount them on vibration-resistant surfaces and use protective sleeves for wires.
Legal compliance is non-negotiable. Local vehicle codes regulate color temperature, beam pattern, and brightness. A well-intended upgrade can violate rules if the beam is too blue, too bright, or misaligned. Check regulations before purchasing. Certified assemblies and bulbs designed to meet road standards reduce legal risk. If in doubt, choose a solution aimed at certified fitment rather than a purely aftermarket aesthetic.
Long-term maintenance is often simpler after a quality upgrade. LEDs generally require less hands-on care than older bulbs. Still, dust, moisture, and impact can degrade assemblies. Periodic inspection of seals, aiming, and mounting hardware prevents problems. Keep spare bulbs or a compact driver module handy for long trips. If you invest in projector retrofits, include a lens cleaning step in routine checks since projector lenses collect road grime differently than large reflectors.
Consider aesthetics and resale value together. Subtle upgrades that retain the original silhouette and function increase appeal to enthusiasts. Radical modifications that alter the front end drastically can limit buyer interest. If you plan to sell in the future, document the work. Keep receipts, photos, and specifications of installed components. Documentation reassures potential buyers about quality and legality.
Finally, adopt a balanced upgrade strategy. Start with improvements that provide the most immediate benefit for the least risk. A lens restoration and a matched LED module in a housing that supports the light source often give the best return. If you want more dramatic improvements, move to projectors or custom housings. Always plan electrical changes and mounting modifications before buying parts. That foresight prevents wasted time and reduces the chance of irreversible alterations.
If you want detailed technical guidance beyond this chapter, refer to an industry overview on modern headlight systems. That resource explains LED grades, technical specifications, and application uses. For practical fitting of modern sources into classic housings, it is a useful complement: https://www.bentley.com/en/vehicles/continental-gt/technical-specifications#headlights.
For owners seeking replacement glass for older 3000GT models, a direct-fit option is available for the 1995–1999 front lamps. Review the part details and fitment notes before purchase to ensure it matches your model year and variant. The vendor page for original-style clear headlight glass is a helpful place to start: 95-99 Mitsubishi 3000GT clear driver passenger side headlights glass.
Careful planning turns a headlight upgrade into a meaningful investment. The right set of choices enhances night driving and preserves the car’s identity. Respect the original design where it matters. Improve the rest with a clear engineering mindset. The result keeps the 3000GT both true to its era and safer after dark.
The Quiet Precision of Pop-Up Lighting: Maintenance and Repair for the 1999 Headlight System
The headlights of the late 1990s era carried more than the simple function of illumination; they embodied a philosophy of performance, aerodynamics, and technological edge. In the 1999 headlight system, the glow was not only about reaching the road ahead but about shaping the silhouette of the car itself. The pop-up design, a hallmark of the era, fused form with function in a way that rewarded both the eye and the wheel. When one considers the duty of headlights on a high-mileage classic, the challenge becomes clear: to preserve the original mechanism’s elegance while ensuring modern reliability and safety. Maintaining and repairing the 1999 headlight system is thus less about replacing a component and more about sustaining a precise balance between historical authenticity and practical usability. The procedure calls for a nuanced approach that respects the original engineering, acknowledges the realities of aging, and recognizes the expanding world of aftermarket options that enthusiasts increasingly rely on to keep these iconic units working as intended.
The 1999 model year marked a refinement in the front end, where the bumper shape, lamp contour, and rear spoiler interplay created a more aggressive stance while preserving the characteristic lines that defined the period. Those lines are not merely cosmetic; they reflect a carefully engineered optical pathway designed to minimize drag and maximize light distribution. The headlights themselves are a complex assembly, potentially integrating elements such as fog lights, daytime running lights, and sophisticated ballast and control circuitry for HID sources. Even for a dedicated connoisseur of mechanical perfection, the complexity can be daunting: bulbs, lenses, housings, wiring harnesses, seals, and the delicate alignment mechanisms all must perform in harmony. This is especially true in models that have spent years outside of production, where factory parts become scarce and the aftermarket universe grows more varied with every passing season.
As with any aging automotive luminaire system, care begins with understanding the vulnerabilities that tend to surface over time. Fogging inside the lens is a frequent nuisance, a symptom of some compromise in the sealing or a micro-scratch that invites moisture to enter. Fogging erodes the clarity of the beam and invites reduced distance visibility, which can be a safety concern in inclement weather or at night when fast reaction times are needed. The path to remedy is rarely a quick wipe and go; it often requires a careful cleaning of the lens surface to remove internal condensation, followed by attention to the seal around the lens and the edge of the housing. If the lens has shrunk or the seal has degraded, replacement becomes a practical consideration. In many cases, the longer-term solution is not simply to reseal but to refresh the entire unit with a housing and lens assembly that maintains the vintage appearance while offering improved sealing performance and modern lens clarity.
Bulb failures are another recurring theme for older headlight assemblies. The light source in these systems can be HID or halogen, depending on the original equipment configuration and the era’s typical choices. Over time, HID ballasts and igniters may fail or drift, while halogen filaments inevitably burn out. Replacing a burnt-out bulb is a straightforward, necessary maintenance task, yet it is not always a simple swap in a tight, densely engineered assembly. Accessing the bulb in a pop-up system requires careful opening of the housing or front cover, and the replacement process must be performed with clean hands to avoid contaminating the bulb or the inner lens surface. When dealing with HID setups, attention must be paid to the ballast, ignition circuitry, and grounding paths. A misstep in wiring or alignment can result in flicker, misalignment of the light field, or complete failure to illuminate. Even when components appear mechanically sound, the electrical system that powers them can develop intermittent faults that surface in cold or damp conditions, reminding the owner that headlights are an integrated system rather than a collection of separate parts.
Lens cracking and physical damage, though less common than fogging, remain a persistent threat. The fragile nature of an optical surface, combined with incidents of road debris or improper handling during maintenance, can create cracks that propagate with vibration. Cracks alter the beam pattern and may invite further moisture ingress, compounding the problem. When cracks become visible, many owners weigh the option of repairing the lens versus replacing the entire assembly. Repair can sometimes involve polishing or resin-fill work to restore surface integrity, but long-term durability often favors a new or refurbished unit—especially when the original design has proven difficult to source or reproduce accurately. In the latter case, a well-made aftermarket replacement can offer a value proposition: an assembly that aligns with the original form, fits without modification, and maintains the intended beam geometry, while providing improved clarity or structural resilience.
Electrical faults extend beyond the bulbs themselves. The wiring harness that snakes through a headlight assembly can suffer wear, especially where it travels near opening mechanisms or along the vehicle’s chassis, where heat, vibration, and moisture converge. A broken wire, a cracked insulation sleeve, or a corroded connector can lead to intermittent headlights, flickering, or total failure to illuminate. Diagnosing these issues requires a patient, methodical approach: visual inspection of the harness, a continuity check with an ohmmeter, and, where possible, a test of the control module that governs any adaptive lighting or daytime running light functions. In a century of automotive electronics, the risk is always that a small fault in a sub-system might cascade into a total headlight failure, which is why meticulous testing and careful reassembly are vital.
The search for replacement parts has evolved alongside the needs of enthusiasts who wish to restore the original aesthetic while benefiting from improved performance or greater availability. Given the scarcity of factory parts for this legacy design, aftermarket components have become increasingly prominent. A global network of manufacturers now produces headlight assemblies and components that can meet or exceed original specifications, often with modern manufacturing processes such as precise CNC machining, die casting, and precision assembly. The result is a spectrum of options: exact replicas designed to fit the stock harness and mounting points; refurbished units rebuilt to higher tolerances; and upgraded assemblies that swap in contemporary lighting technologies while preserving the classic exterior silhouette. For the restorers who want to retain the car’s historical look, a crucial decision is choosing among these options with a clear eye on fitment, beam pattern, color temperature, and long-term reliability. The modern aftermarket world, while offering more choices, also demands a careful evaluation of quality control measures, delivery performance, and post-sale support. A successful purchase is one that aligns with the owner’s goals—preserving authenticity, improving light performance, or balancing both—without compromising safety or regulatory compliance.
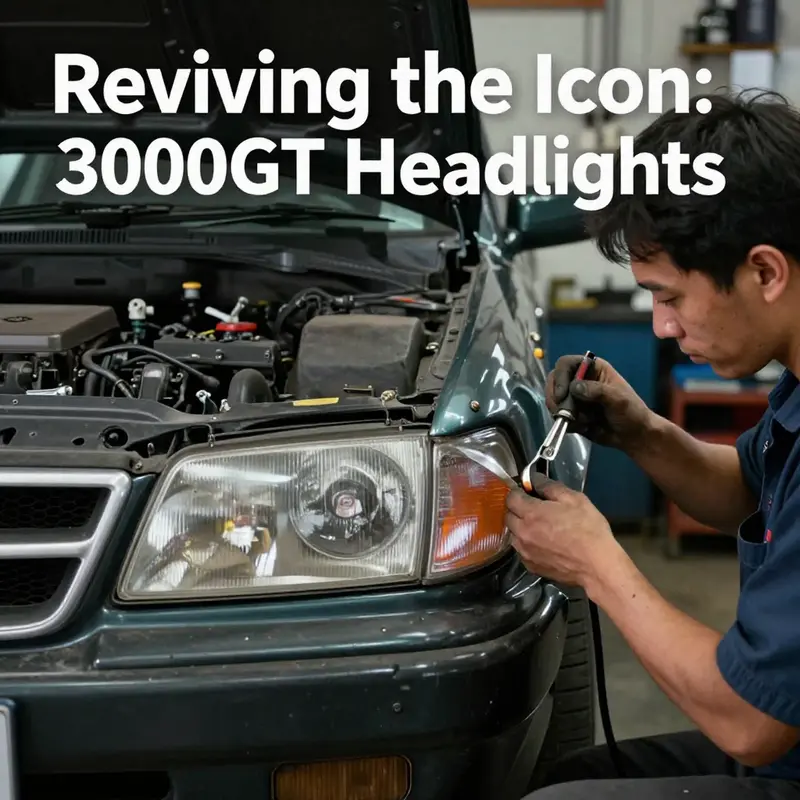
For those hands-on builders who relish the tactile experience of a repair project, the DIY route remains a compelling path, even for a system as intricate as the original headlight assembly. Basic upkeep—like replacing a burnt-out bulb or cleaning fogged lenses—can be within reach for a determined enthusiast with the right tools and a patient approach. The process begins with removing the headlight unit from the vehicle, which often requires a careful sequence of fasteners and careful disconnecting of electrical plugs. The interior of the housing should be inspected for moisture or signs of seal deterioration, and any residue on the reflector surfaces should be carefully cleaned using products that are safe for plastic and coated aluminum surfaces. When resealing, it is critical to select a sealant that can withstand automotive temperatures and exposure to automotive cleaners, a choice that will keep humidity out for months or even years. If the lens shows micro-scratches or hazing that detracts from light transmission, there are dedicated restoration kits that can improve clarity without removing the lens from the housing. The key here is to avoid introducing new distortions or micro-scratches during cleaning and to protect the lens surface from further damage by using a soft microfiber and gentle polishing compounds designed for optical plastics.
Of course, the most consequential maintenance decision often concerns alignment. Pop-up headlights are not merely a matter of mechanical clearance; they are a finely tuned optical system. A misaligned unit can cast uneven light, creating glare for oncoming drivers and reducing the illuminated distance ahead. Alignment checks should be conducted in a controlled environment, ideally with a dedicated wall or screen where the beam pattern can be observed and measured. If the beam is high, it may indicate that the unit is angled too far upward; if it’s low or left-right skewed, the mounting points or the hinges may be out of spec. In many classic cars, a precise alignment demands both a physical adjustment of the headlight housing and a calibration of the electrical systems that control adaptive features, if present. While some owners may perform a basic alignment using a level and a simple target at a fixed distance, more rigorous alignment is best left to professionals who have access to the proper equipment and a controlled workspace. The investment in time and care for proper alignment is repaid through brighter nights, safer night driving, and a preserved beam pattern that respects the original optical intent.
When considering replacement parts, the balance between authenticity and practicality becomes central to a thoughtful restoration plan. Original equipment look and mounting geometry may be preserved with refurbished or OEM-approximate units that mirror the factory setup as closely as possible. Yet there is also room for improvements, such as upgrading to more efficient light sources that maintain the vintage aesthetic. The choice is not simply about brightness; it’s about color temperature, beam cutoff, and the consistency of the light pattern with the vehicle’s overall lighting scheme. For many enthusiasts, a well-executed upgrade—whether to a brighter, cooler LED-derived illumination or to a modern HID alternative—can significantly improve night visibility while preserving the period-chic appearance. However, any upgrade should be evaluated against safety standards and local regulations, as some jurisdictions have strict requirements about light color, intensity, and beam characteristics.
Sourcing considerations for replacement parts require a measured approach. In a market where factory availability has dwindled, it is common to encounter a mix of OEM-equivalent and upgraded options from various regions. The emphasis should be on selecting parts that come with clear specifications, consistent quality control measures, and reliable post-sale support. Buyers should scrutinize on-time delivery rates, responsiveness of service teams, and the ability to customize parts to fit the exact model year and trim level. The process of evaluating suppliers becomes a practice in due diligence, where documentation, warranties, and return policies can influence the overall project’s success as much as the part’s physical fit. For the dedicated enthusiast, this is not merely a procurement matter; it is a step toward ensuring long-term reliability of a critical safety component in a vehicle that is already celebrated for its distinctive design and performance heritage.
Within the broader conversation about maintaining the 1999 headlight system, it is useful to consider the role of the owner’s community and the exchange of practical knowledge. Online forums, build diaries, and photo-driven guides offer a wealth of experiential wisdom that can illuminate the subtleties of a factory-original restoration. This knowledge network helps owners understand common failure modes, the typical lifespan of various components, and the best sequence for a restoration project. It also provides a venue for comparing the feel of an original unit versus a faithful aftermarket replacement, an important consideration for anyone who cares about authenticity. Yet, as with any specialized repair, the value of professional assessment cannot be overstated. When there is doubt about the integrity of the headlight housing, the alignment of the beam, or the functional status of any integrated modules, a qualified technician can diagnose and remedy the issue with a level of precision that a homeowner, however meticulous, may not achieve on their own.
In the end, the maintenance and repair of the 1999 headlight system is less about chasing perfection in a single snapshot and more about sustaining a living balance. It is the balance between keeping the original identity of a performance-focused classic and allowing it to function safely and reliably on today’s roads. The journey is iterative: assess, repair or replace, test, adjust, and revisit as needed. The headlights may be a relic of a specific era, but their care has to be forward-looking, embracing advances in materials and manufacturing while honoring the authentic geometry and feel of the vintage design. The result is a car that continues to project its legacy with clarity, not just in the light that pours onto the road but in the confidence that comes from knowing a complex and cherished system remains in good health.
For hands-on readers seeking a concrete example of where to begin with a period-correct restoration, consider the path toward sourcing an exact-fit headlight assembly that preserves the original mounting points and electrical interface. An example set that reflects the historical design and provides a framework for installation can be found here: 95-99-mitsubishi-3000gt-sl-vr4-clear-driver-passenger-side-headlights-glass. This resource offers a sense of the scale of components involved and a reference point for matching original geometry, color, and fitment with modern materials. While the exact choice of parts can vary, the underlying discipline remains consistent: measure twice, fit once, and verify the light pattern with a careful eye toward safety and road presence.
As a closing thought, the story of the 1999 headlight system is a reminder that classic performance hardware can endure only when care and curiosity remain active. The ownership arc—from diagnosing foggy lenses to aligning a pop-up mechanism with a steady hand—embodies a broader lesson about maintaining effortful engineering in an era of rapid change. The headlights are not merely the source of illumination; they are touchpoints of history, crafted to illuminate the road ahead while quietly telling a story about a time when automotive design married mechanical elegance with the promise of high-speed capability. In tending to these units, enthusiasts do more than preserve a set of optical devices; they preserve a link to a time when innovation wore a more mechanical face and the road itself felt like a stage for engineering courage. The work is meticulous, the rewards tangible, and the legacy secure for another season of night drives that feel a little more cinematic because the beam still finds its way with that distinctive, enduring character.
External resource: https://www.alibaba.com/showroom/automotive-lighting-systems.html
Final thoughts
As the automotive market evolves, understanding the specifics of 1999 Mitsubishi 3000GT headlights empowers business owners to better serve their customers. From replacement options that maintain authenticity to modern aftermarket upgrades enhancing performance, the right decisions can significantly influence customer satisfaction. Moreover, regular maintenance ensures the longevity and reliability of these iconic headlights, ultimately preserving the vehicle’s legacy. By focusing on these areas, businesses can not only meet customer expectations but also foster an enduring appreciation for this classic model.