
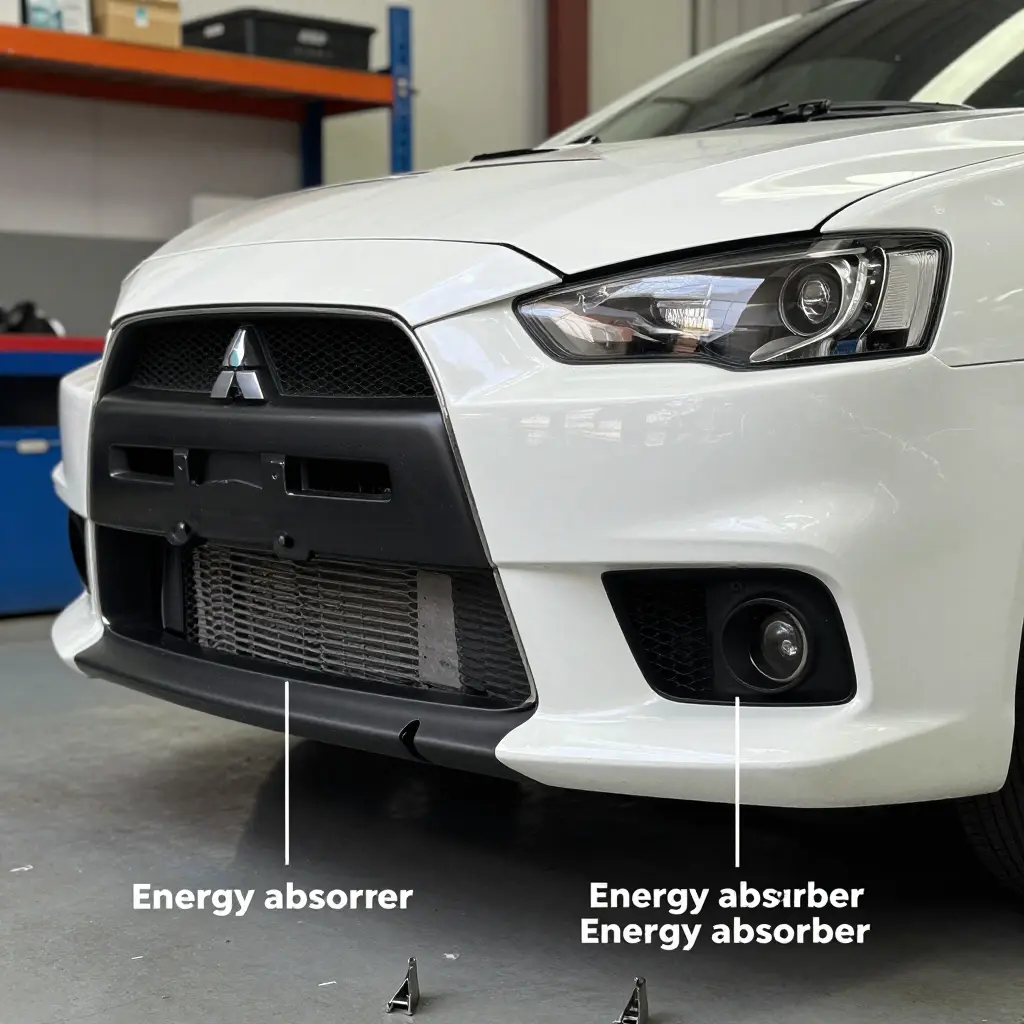
2016 Mitsubishi Lancer Front and Rear Bumpers: Why the Energy Absorber and Mounting Clips Decide Fitment After a Low-Speed Impact
On a 2016 Mitsubishi Lancer, the painted fascia you see from the outside is a cosmetic shell. It carries almost none of the impact load. The parts that decide whether that cover sits flush and square are hidden behind it.
After a low-speed impact, technicians replacing 2016 Mitsubishi Lancer front and rear bumpers treat the visible cover as the last link in the chain, never the first. Panel gaps, panel height, and the way the fascia locks to the body are set by the energy absorber and the mounting clips underneath. Get those two components wrong, and even a perfect OEM cover will fight every bolt hole.
The assembly behind the skin
A Lancer bumper system is a stack of parts that have to work together:
- Energy absorber – a molded foam or engineered-resin block that deforms to manage impact energy.
- Reinforcement beam – the rigid bar that transfers load into the unibody on supported configurations.
- Mounting clips and retainers – the small fasteners and tabs that locate and lock the cover.
The cover only looks correct when every part beneath it is correct.
This guide follows the repair in the order the parts matter – how the energy absorber manages impact energy, how the mounting clips locate the bumper, and how to choose parts that fit like the factory. You can browse the full range of 2016 Mitsubishi Lancer front and rear bumpers to see how these assemblies are listed and matched.
How the Front Energy Absorber Controls Bumper Alignment
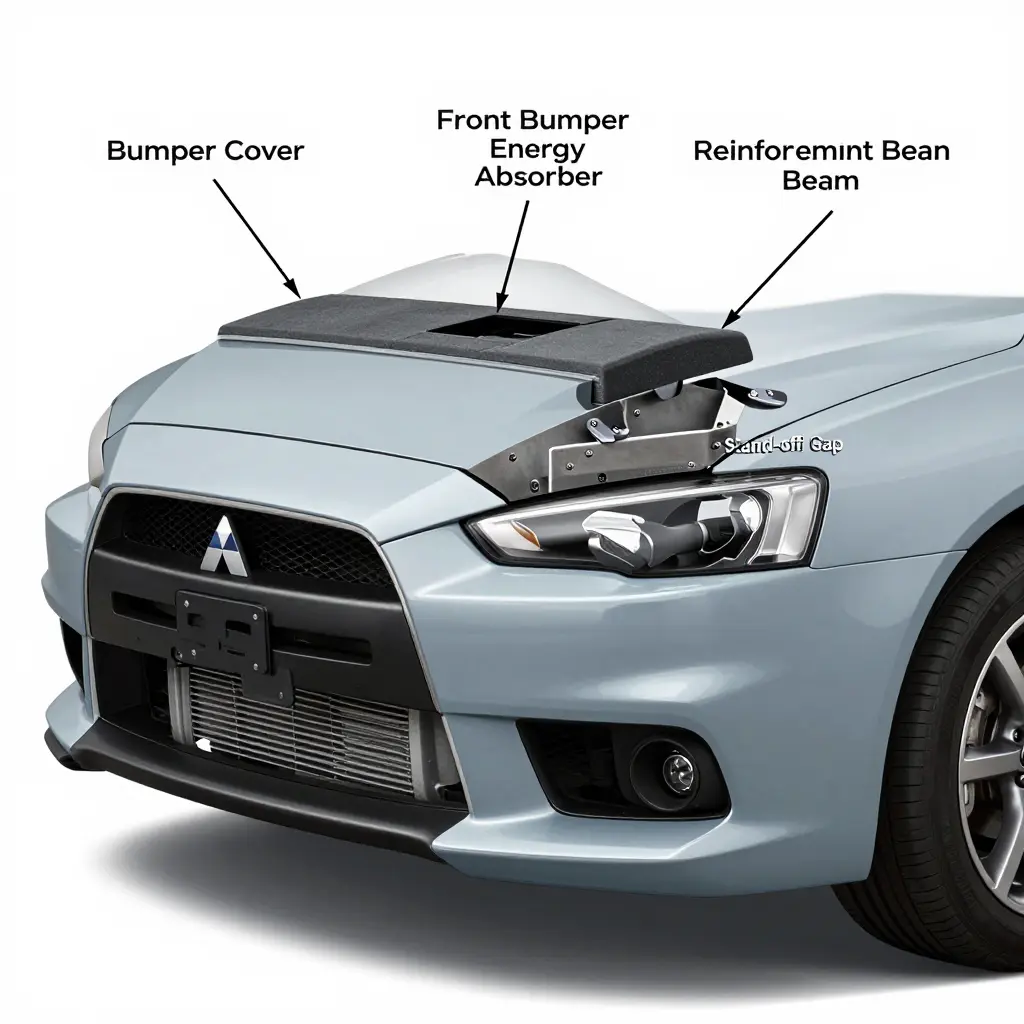
On the 2016 Mitsubishi Lancer, the part most owners overlook until a bumper refuses to line up is the front bumper energy absorber. It is the molded foam block or crash box that mounts directly between the bumper reinforcement beam and the bumper cover. Most people assume it only soaks up impact energy. It also sets the geometry of the whole front end.
The absorber does two jobs at once. It compresses during a low-speed impact to dissipate energy before it reaches the reinforcement beam. It also establishes the stand-off gap – the front-to-back distance between the beam and the cover. That gap is what positions the cover’s edges so they seat correctly in the upper mounting channel and meet the fenders and headlights with even, consistent panel gaps.
Why a Damaged Absorber Breaks Your Bumper Fit
The absorber is a one-time-use component. Watch for these three failure states after any minor collision:
- Compressed absorber: Once the foam or crash box has been crushed, it never springs back. The cover sits too close to the beam, the stand-off gap collapses, and the bumper pulls tight against the grille and fenders.
- Cracked absorber: A fractured absorber loses its structural shape, so it no longer supports the cover evenly. The bumper sags on one side, and panel gaps open up unevenly across the front fascia.
- Missing absorber: With nothing to set the stand-off distance, the cover drops back against the beam, sags at the corners, and pops out of its mounting channel. Clips that once held firm no longer have a supported surface to grip.
In every case, the symptom looks like a “bad bumper,” but the real culprit is the crushed or absent absorber underneath it. For a full walkthrough of how the front and rear assemblies fit together on this chassis, see our 2016 Mitsubishi Lancer bumper fitment guide.
The Rule for Technicians and Owners
Always inspect and replace the front bumper energy absorber after any low-speed impact, even a parking-lot bump that left the cover looking fine. A new absorber restores the correct stand-off gap, re-seats the cover in its mounting channel, and brings panel gaps back to factory spec. Skipping this step guarantees a bumper that never aligns, no matter how many clips you replace.
Rear Energy Absorber: The Hidden Support Behind the Rear Cover
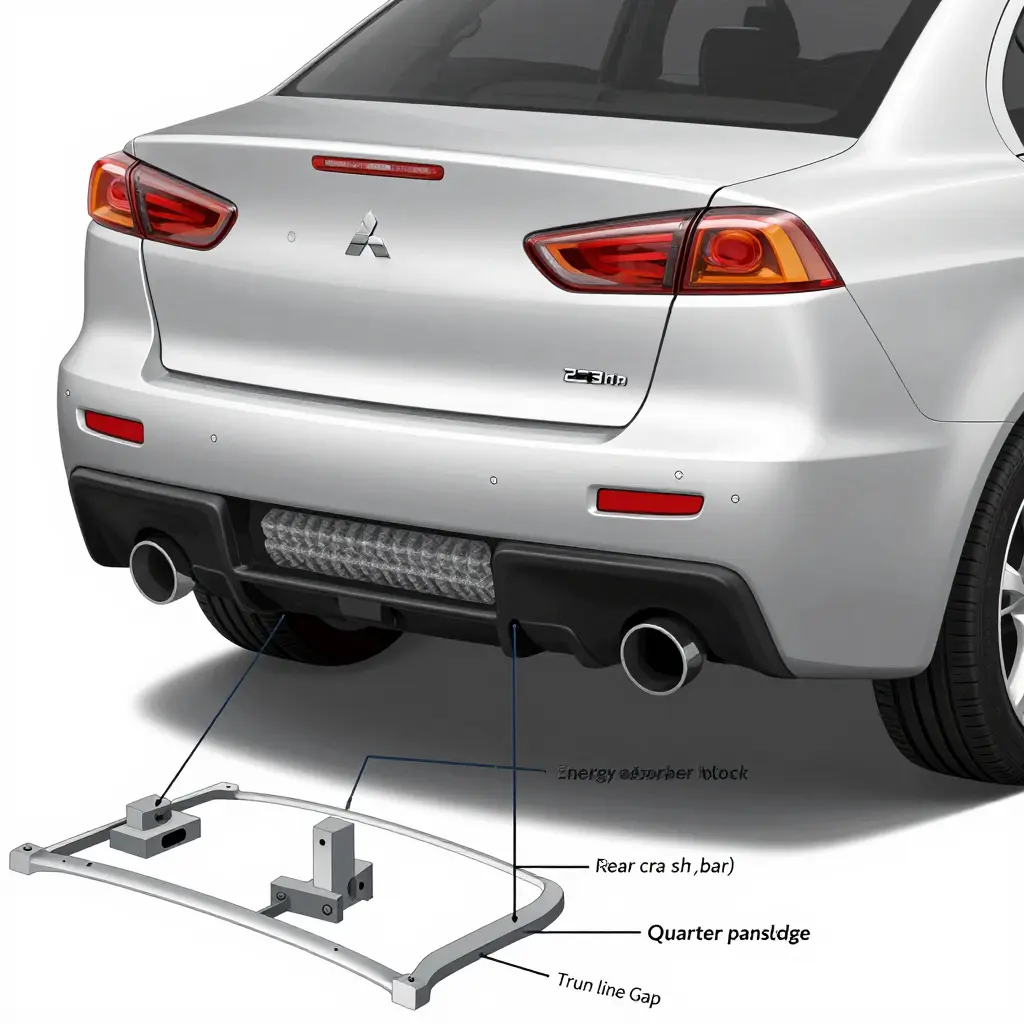
The rear bumper energy absorber is the foam or polymer block that sits between the rear reinforcement bar and the outer bumper cover. On the 2016 Mitsubishi Lancer it mounts directly to the rear crash bar, spanning the tail panel just above the exhaust cutout. Most technicians never see it until the cover comes off.
Its job is more than cushioning. The absorber holds the rear cover out to its correct profile, keeping surface tension even and vertical height aligned with the quarter panel and trunk lid. Without a properly seated absorber, the cover sags, sits low, or bows inward.
How Low-Speed Impacts Distort Fitment
When a low-speed rear impact hits, the absorber compresses and deforms first, and that deformation is rarely even. The crushed block pushes the surrounding clip towers out of position, so the cover no longer locks into its correct reference points.
The result is the classic symptom: uneven gaps along the quarter panel and trunk line, even when the cover itself looks undamaged. Chasing those gaps with shims or brute force rarely works — the underlying absorber and clip towers are the real cause.
Rear vs. Front Absorber Behavior
Compared to the front unit, the rear absorber is shorter and flatter, managing a smaller crush zone. Both are molded foam, and neither returns to its original shape once it has been crushed; the rear unit’s flatter profile and tighter packaging simply leave the cover less room to hide the damage. That difference is why rear bumper fitment often requires a new absorber, not just a new cover.
For replacement assemblies and trim, review our 2016 Mitsubishi Lancer front and rear bumpers listing.
How the Front Bumper Stack Is Built
The front bumper on a 2016 Mitsubishi Lancer is not a single molded part, it is a stack of layers, each doing a specific job. Read the schematic below from the body outward:
- Body panel – the fixed structural mounting point.
- Reinforcement beam – the rigid steel crossmember that takes the brunt of the load.
- Energy absorber – the deformable foam block that crushes and spreads force.
- Stand-off gap – the critical air space between the absorber and the cover.
- Bumper cover – the painted outer shell that simply rides on top.
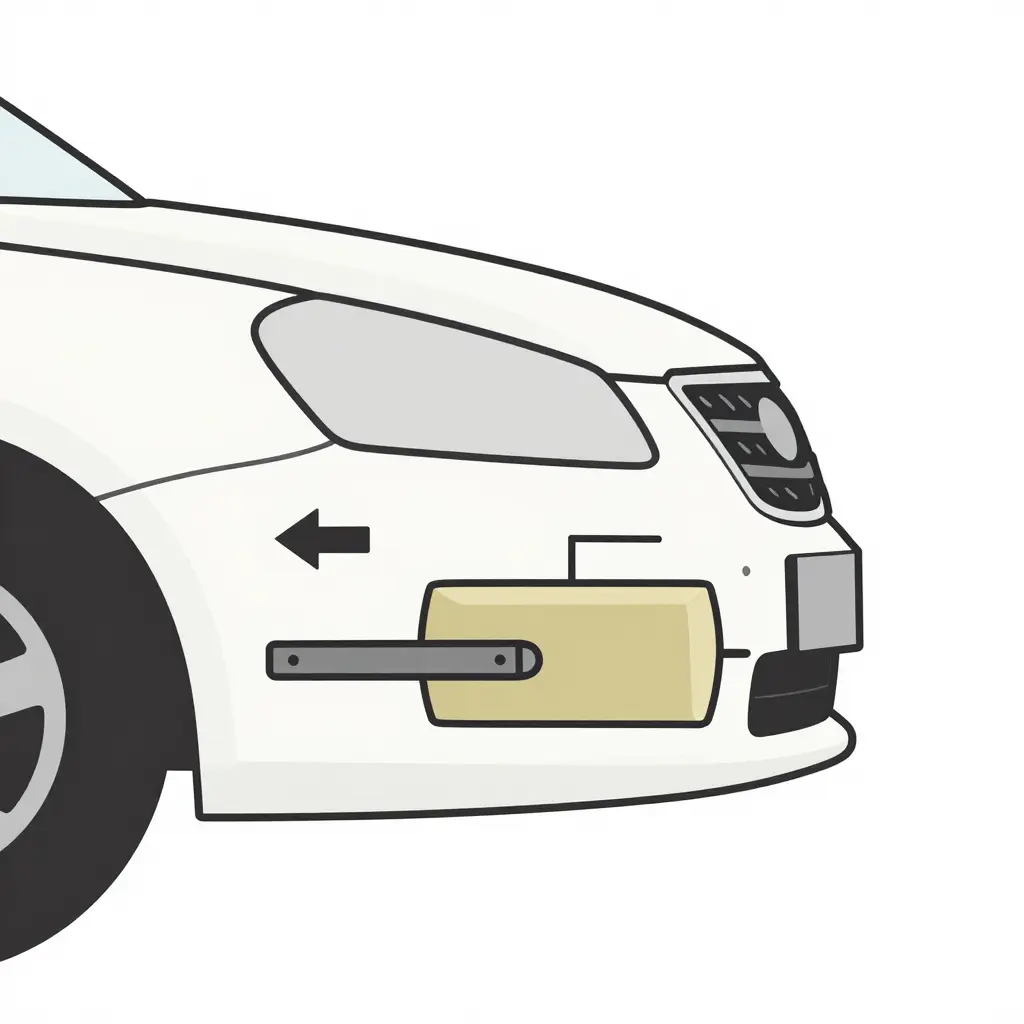
The cover does not position itself. The energy absorber sets the stand-off gap, and that gap is what keeps the cover sitting flush against the fenders, hood, and headlights. If the absorber is crushed, missing, or the wrong part, the cover walks rearward or droops, and no amount of clip adjusting will pull it back into alignment.
That is also why the correct absorber profile matters so much when you source replacement panels. You can review the factory-correct assemblies for the 2016 Mitsubishi Lancer front and rear bumpers to confirm the absorber and mounting clips match the year-specific body before you start reassembly.
Technician’s note: Seat the energy absorber on the beam before you clip the cover. Restoring the gap first, then the cover, is the only sequence that gives you repeatable, factory-tight panel gaps.
Mounting Clips and Retainers: The Real Reason a Bumper Lines Up or Does Not
A replacement bumper cover rarely fails to fit because the cover itself is wrong. It fails because the small hardware that locates and retains it has been compromised. On the 2016 Mitsubishi Lancer, the front and rear covers are positioned by bumper mounting clips and locked down by bumper retainer clips that work in concert with the fender, the fascia carrier, and the inner support brackets. Understand these fasteners, and you understand fitment.
The clip families used on the 2016 Lancer
- Side retainer (slider) clips. Along each fender edge, molded slots in the cover accept a slotted retainer clip that slides over a bracket tab. These clips pull the cover flush against the fender and set the critical panel gap. They are directional – a clip seated at the wrong depth shifts the entire side of the bumper.
- Push-type trim retainers. These press-fit clips (often a two-piece pin-and-grommet design) anchor the upper and lower cover edges to the fascia carrier and splash shields. They hold the cover tight against the carrier so it cannot drum or flutter at speed.
- Bolt-on retainer brackets. At the corners and center, threaded clips or captured nuts on metal brackets provide hard mounting points that carry load. These do the heavy retaining; the plastic clips do the fine locating.
- Molded clip towers and tabs. The cover itself has integral towers and tabs that the fasteners bite into. They are the weakest link after any impact.
How the clips create a flush panel line
Clips do two jobs: locate and retain. The side slider clips and tab-and-slot interfaces locate the cover, fixing it in three dimensions so the gap to the fender, hood, and adjacent fascia stays consistent. The push retainers and bolt brackets then retain it, clamping the cover against the carrier and brackets so the panel cannot creep. When every clip is intact and correctly seated, the cover snaps into a predictable line.
Why a broken, stretched, or reused clip never seats
Clip retention depends on interference and spring tension. A clip pried off once has already yielded, and its legs no longer grip with original force. Reused bumper mounting clips let the cover drift outward, producing uneven gaps and a cover that “pops” after a bump. A stretched bumper retainer clip no longer clamps the carrier, so the panel never pulls tight. Fitment is not adjustable around worn clips; it is restored by replacing them with the correct components for your 2016 Mitsubishi Lancer front and rear bumpers.
Clip-specific failure modes after a low-speed impact
- Sheared tabs. Impact force snaps the molded tabs that carry the clips, so the cover has nothing to bite into.
- Cracked clip towers. Stress cracks in the molded towers release tension, letting the clip rotate and the panel sag.
- Dried-out plastic retention. UV exposure and age make the clips brittle, so they crack instead of flexing on removal.
Before you quote the repair, remember what the customer actually sees is the cover – but what decides whether that cover sits flush is the hardware underneath. Use this scan-ready matrix to decide what stays and what goes. For a full breakdown of the assemblies involved, see the 2016 Mitsubishi Lancer front and rear bumpers reference set.
| Component | OEM vs Aftermarket | Typical Failure After Low-Speed Impact | Fitment Risk if Reused | Recommendation |
|---|---|---|---|---|
| Front energy absorber | OEM matches crush geometry and density; aftermarket foam varies by supplier | Compressed, split, or permanently deformed; loses springback | High – swollen absorber pushes the cover outward, opening panel gaps | Replace every time; do not attempt to reshape |
| Rear energy absorber | OEM tuned to rear beam profile; aftermarket often generic | Collapsed cells, cracked foam, distorted mounting face | High – misaligns quarter panel and trunk seams | Replace; verify part number against VIN |
| Push-type clips | OEM holds tension; budget aftermarket tabs snap | Shear tabs, flattened barbs, zero clamping force | Severe – cover will not stay attached to fender or bracket | Use new OEM clips; treat as single-use |
| Screw grommets | OEM grips bolt threads; cheap units strip in the square hole | Stripped threads, spinning grommet, stripped retaining seat | Moderate to high – loose or rattling bumper edges | Replace if threads are marred or the grommet spins |
| Clip towers/brackets | OEM molded to body line; aftermarket tabs frequently off | Cracks at the tower base, bent tabs, broken locators | Critical – a 1-2 mm shift ruins overall panel alignment | Replace or repair properly; never bend back into shape |
The pattern is consistent: the visible cover is only as straight as the hidden parts holding it. When in doubt, replace the absorber and the fasteners, not just the skin.
Common Fitment Problems After a Low-Speed Impact
A low-speed impact rarely leaves a Lancer bumper needing nothing more than a fresh set of clips. The cover usually survives the hit intact. The parts behind it – the energy absorber and the mounting clips – are what deform, and their damage is what produces the fitment complaints that surface in the bay days later.
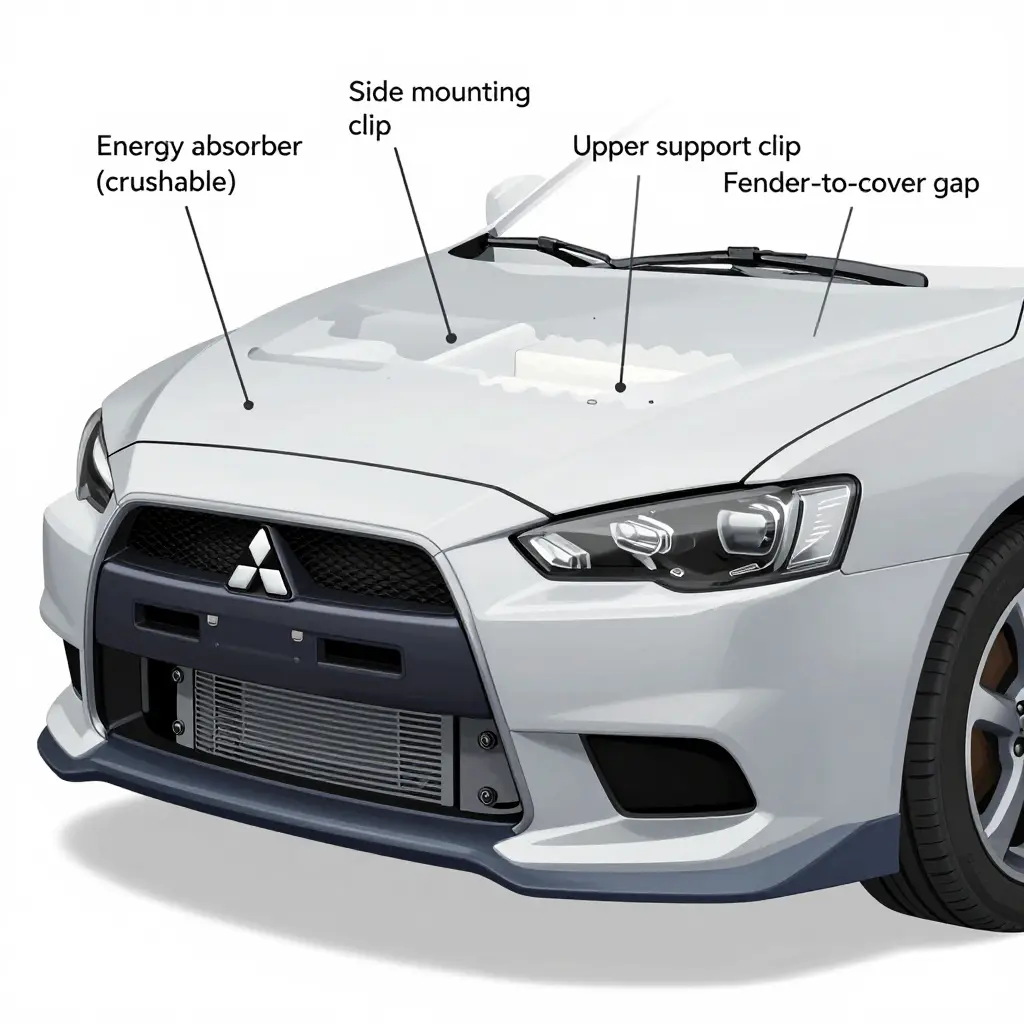
Uneven Fender-to-Cover Gaps
The most frequent complaint is an uneven bumper gap that tapers from tight on one side to wide on the other. This is almost never a defective cover. A compressed or twisted energy absorber pushes the cover outward on the struck side, while a cracked mounting clip on the opposite fender lets that corner relax inward. The result is a wedge-shaped gap that no amount of pushing will close.
Sagging Corners and Protruding Edges
Sagging corners trace directly to failed mounting clips. The side clips carry most of the cover’s weight along the fender line; when their tabs shear, gravity pulls the corner down and the edge protrudes past the fender. Likewise, a protruding top edge over the headlight usually means a mushroomed energy absorber is holding the cover proud of its reference surface.
Rattles and Misaligned Shut Lines
Rattles are the acoustic signature of loose clips – the cover moves against the fender or support bracket at speed. Misaligned trunk or headlight shut lines point to a deformed absorber that has shifted the entire cover outboard, distorting every adjacent panel gap. For shops sourcing replacement rear panels, our reference on 2008-2015 Lancer Evo X rear bumpers shows how these mounting interfaces are laid out.
The Diagnostic Takeaway
Before ordering a cover, inspect the energy absorber for compression and every clip for cracked tabs. Reusing a deformed absorber during a Lancer bumper replacement guarantees the same defects return – uneven gaps, sagging corners, and rattles included.
The Exploded View: How a Push-Type Bumper Clip Actually Locks
The diagram below breaks down the three-part stack that holds a 2016 Mitsubishi Lancer bumper cover in place. Reading top to bottom, every layer has one job, and fitment only happens when all three seat against each other in the correct order.
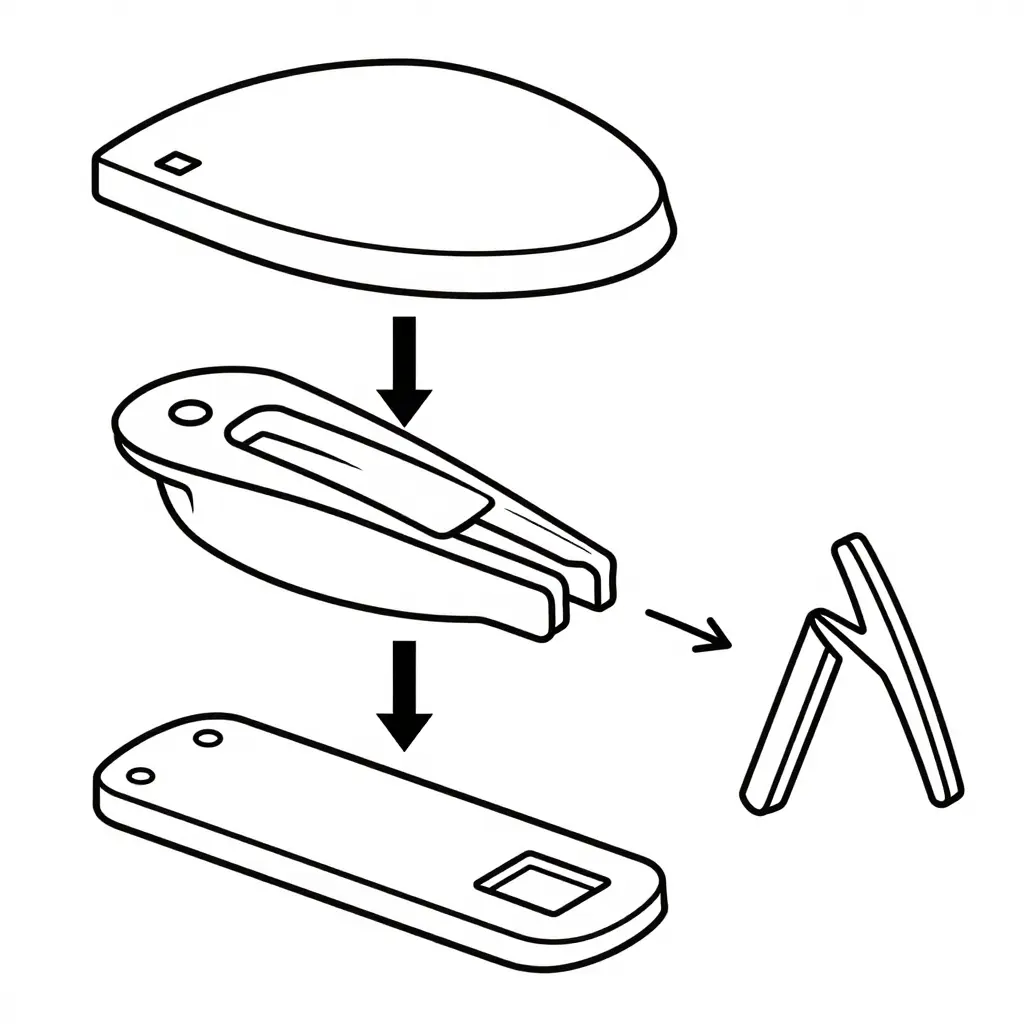
What Each Layer Does
- Bumper cover tab – The flexible polypropylene lip that carries the clip hole. It is designed to flex slightly on impact, not to carry structural load.
- Push-type mounting clip – The plastic fastener with a wide flanged head and slotted expansion barbs. Pressed in, the barbs compress, pass through the bracket hole, then spring back out to trap the assembly.
- Body bracket – The stamped steel or molded bracket with a rectangular retention hole. Its hole diameter and thickness set the exact expansion the barbs must achieve.
The Engagement Principle
The downward arrow in the diagram is the whole story. As the clip is pushed in, its slotted barbs squeeze inward, slide through the bracket hole, and then flare back out behind the bracket face. That flare is the retention – the clip cannot back out because the expanded barbs are wider than the hole. The cover tab is trapped between the clip flange and the bracket, so the panel sits flush with a predictable, repeatable gap.
Why a Broken or Stretched Clip Fails
A low-speed impact rarely destroys the bracket – it overloads the clip. Overextension stretches the plastic, and once the barbs lose their spring memory, they no longer flare wide enough to catch the bracket. The result is exactly what the inset on the right shows:
| Failure Mode | Mechanical Cause | Visible Symptom |
|---|---|---|
| Stretched barbs | Plastic past yield point; no elastic recovery | Cover stands off; gap will not close |
| Cracked clip body | Impact shear through the shaft | Clip falls out; cover flaps |
| Reused worn clip | Detent surfaces rounded off | Pops loose under vibration |
| Wrong clip spec | Barbs too short for bracket thickness | Never fully seats |
Either way, the cover looks “misaligned,” but the real problem is a fastener that can no longer generate retention force. That is why technicians replace clips – never reinstall them – after any impact that loads the mounting line. Pairing fresh clips with a correctly seated cover is the difference between a factory flush fit and a bumper that never quite lines up.
For a complete replacement set that restores correct clip geometry and panel gaps, see these 2016 Mitsubishi Lancer front and rear bumpers.
OEM vs Aftermarket Absorbers and Clips: What Decides Success
When a 2016 Mitsubishi Lancer takes a low-speed hit, the bumper cover is only the visible layer. The real story happens behind it, where the energy absorber and the mounting clips control whether the new cover returns to its original fitment geometry. Get these two parts right and the panel gaps, headlight margins, and hood-to-bumper lines snap back into place. Get them wrong and you fight rattles, uneven gaps, and covers that never quite sit flush.
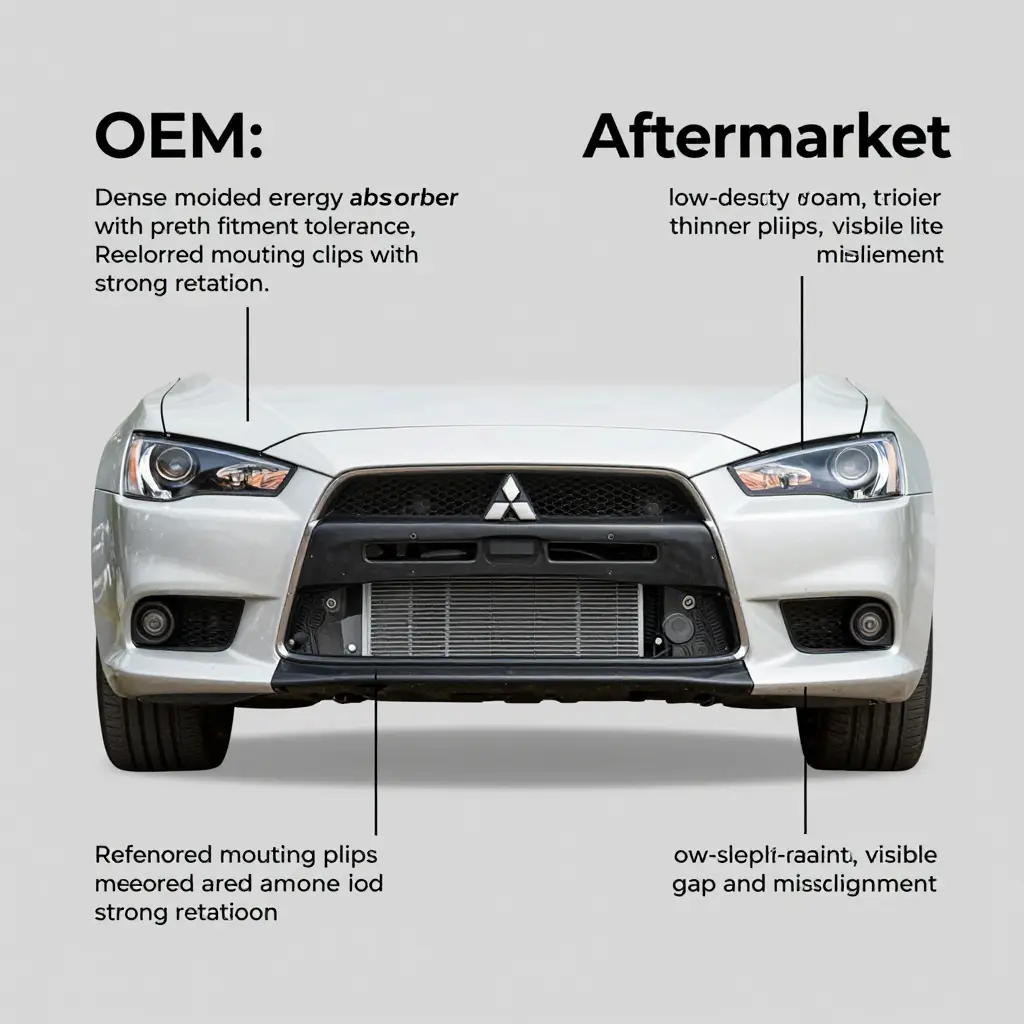
Tolerance: The Geometry Contract
OEM absorbers are molded to a tight dimensional tolerance measured in fractions of a millimeter. That precision holds the cover at the exact standoff the body engineers designed, so clips engage along a predictable plane. Generic aftermarket equivalents are often reverse-engineered from a scan or cast from a worn mold, which means tolerance drift. Even a few millimeters of variance changes how the cover flexes under load and where the mounting tabs line up.
Material Density: The Energy Story
An absorber’s job is to crush and dissipate energy without transferring it to the rebar or chassis. OEM-spec foam is density-graded so it compresses at a controlled rate. Cheaper aftermarket foam tends to run lighter and softer, or inconsistently dense, so it deflects too early and stops supporting the cover. That is the root of the sagging, wavy aftermarket bumper fitment problems shops see every week.
Clip Retention: Where Covers Come Loose
Mounting clips are small, but they are the difference between a factory-tight panel and a flapping edge. OEM OEM bumper parts use clips with defined retention force and a precise barb geometry that grips the slot without crushing it. Economy clips often use recycled or brittle plastic that loses retention after one removal, which is why a reused generic clip set can pop free at highway speed.
| Factor | OEM-Spec | Generic Aftermarket |
|---|---|---|
| Tolerance | Tight, mold-verified | Scan/reverse-engineered, variable |
| Foam density | Density-graded, consistent | Often light/inconsistent |
| Clip retention | Defined force, durable plastic | Lower force, brittle |
| Fitment outcome | Factory geometry restored | Gaps, rattles, sagging |
When Aftermarket Is Acceptable
Aftermarket is a legitimate choice when the part is a verified OEM-spec reproduction, when the vehicle is a non-structural driver and originality is not a goal, or when budget dictates a staged repair and you accept the fitment risk. It is not acceptable when clips are reused, when the absorber is uncertified foam, or when the car demands factory-correct panel alignment, such as an Evo.
Recommendation Framework
- High-value or performance cars: Buy OEM-spec absorbers and clips. Restored geometry, no comebacks.
- Daily drivers, budget repair: Accept a certified OEM-spec aftermarket absorber only if the clips are OEM or equivalent.
- Salvage/temporary: Aftermarket is fine, but document the fitment risk for the owner.
- Always: Replace the clips with the cover. Never reuse fatigued retainers.
If you are rebuilding an Evo X, start with the correct OEM rear bumper assemblies for the Lancer Evo X and matching fasteners so the repair closes up clean. Pairing a factory-fit cover with a carbon rear diffuser also demands the same OEM-level tolerances, because aftermarket add-ons amplify any underlying misalignment. Choose OEM-spec where geometry matters, and reserve aftermarket for where the trade-off actually makes sense.
FAQ: Energy Absorber and Mounting Clip Fitment
Do I need to replace the energy absorber after a low-speed impact?
Usually yes. The energy absorber is a single-use, crushable foam or honeycomb component engineered to deform and dissipate kinetic energy, so once it is crushed it cannot recover its original shape or density. Even a minor parking-lot tap can compress it enough to leave a permanent flat spot, which then throws the bumper cover out of alignment. Compare the old unit against a new one – if you can squeeze it by hand where it should feel rigid, replace it.
Can I reuse the original mounting clips?
Only if they are undamaged and still hold their locking tension. Bumper mounting clips are designed as replaceable wear items; the plastic tangs fatigue and snap under impact loads, and heat cycling makes them brittle over time. A clip that has been removed once often loses a significant portion of its retention force, which leads to rattles, gaps, and a cover that pops loose at speed. Treat clips as consumable: inspect every one, discard any with cracks, whitening, or bent tabs, and keep a full set of new bumper mounting clips on hand before you start.
Why does my new bumper cover not sit flush?
A cover that will not sit flush almost always points to one of three culprits: a deformed or missing energy absorber, worn or incorrectly seated bumper mounting clips, or a bent reinforcement bar or bracket. If the absorber is crushed, it no longer holds the cover at the correct standoff distance, so the panel dips or gaps at the seams. Mismatched or partially engaged clips pull the cover tight at some points and let it float at others. Measure the gap at each mounting point along the absorber before you blame the cover itself.
Will a missing energy absorber affect airbag or safety performance?
Not the airbags. The energy absorber is part of the bumper’s low-speed energy management, not the airbag trigger system; on this car the impact sensors are mounted separately and do not rely on the absorber, so it does not set deployment timing. It still matters for safety and repair cost. The absorber helps control how impact forces reach the reinforcement bar and body over the first few inches of a collision. Removing it, or fitting a crushed one, sends more of that force into the reinforcement bar and unibody and leaves the front-end components unprotected, so the next low-speed hit costs more to repair. Never delete the absorber just to make a cover fit.
Are front and rear absorbers interchangeable between Lancer years?
No – front and rear energy absorbers are model- and year-specific, and they are not interchangeable between the front and rear of the same car, let alone across model years. The 2016 Lancer uses absorbers contoured to match its specific bumper cover and reinforcement bar geometry, and those dimensions shifted across the Lancer and Evolution generations. Cross-fitting a different year’s absorber will throw off the cover’s standoff distance and clip alignment, so always match the absorber to your exact year, trim, and bumper position.
How many clips does a 2016 Lancer front bumper use?
The 2016 Mitsubishi Lancer front bumper typically uses roughly 10 to 14 bumper mounting clips across the upper, lower, and side attachment points, though the exact count varies by trim and whether the car carries factory aero or fog-light bezels. Because clips are inexpensive and easy to lose, order a complete set rather than trying to reuse the originals. If you are rebuilding the front or rear, our 2016 Mitsubishi Lancer front and rear bumpers selection pairs cleanly with fresh mounting hardware.
Conclusion
After a low-speed impact, it is tempting to treat the bumper cover as the whole story: if the painted shell looks straight, the repair must be done. The mechanical reality says otherwise. The visible cover is the cosmetic mask, while the energy absorber and the mounting clips are the structural system that actually controls whether a 2016 Mitsubishi Lancer front and rear bumpers assembly seats, aligns, and protects as designed.
A few points decide the outcome:
- Absorber function – The energy absorber compresses to manage impact force. Once crushed or fatigued, it loses that capacity and prevents the cover from sitting at the correct depth and height.
- Clip retention – The mounting clips and their receptacles govern the panel gaps, the flush fit along the fenders, and the cover’s ability to stay attached at speed. Stretched or broken clips mean a loose, rattling, or misaligned panel.
- Failure symptoms – Uneven gaps, sagging corners, a spongy or hollow feel, and repeated clip pop-outs are diagnostic signs of hidden damage, not cosmetic quirks.
- OEM vs aftermarket guidance – Genuine absorbers and clips match tolerance and mounting geometry. Low-cost substitutes often vary enough in material and dimension to reintroduce the very fitment problems you are trying to solve.
Final Recommendation
Do not force a cover into place. If an impact has occurred, inspect and, where compromised, replace the energy absorber, clips, retainers, and brackets before final assembly. Forcing panels over damaged hidden hardware will only mask the problem, stress the cover, and compromise crash performance and panel alignment. A correct repair starts from the inside out: verify the substructure, renew the concealed components, then install the cover to the factory fit. That approach saves time, avoids comebacks, and restores the vehicle the way it was engineered to be built.