
Painting plastic auto parts is integral to automotive aesthetics and functionality, making it essential for businesses in the aftermarket industry. A high-quality finish not only improves the visual appeal but also enhances durability against environmental factors. This comprehensive guide delves into each crucial step of the painting process, from surface preparation to curing, helping business owners deliver exceptional results. Each chapter outlines strategies and best practices that ensure successful painting, setting a standard for excellence in your automotive services.
Laying the Groundwork: Mastering Surface Preparation to Secure Durable Paint on Plastic Auto Parts
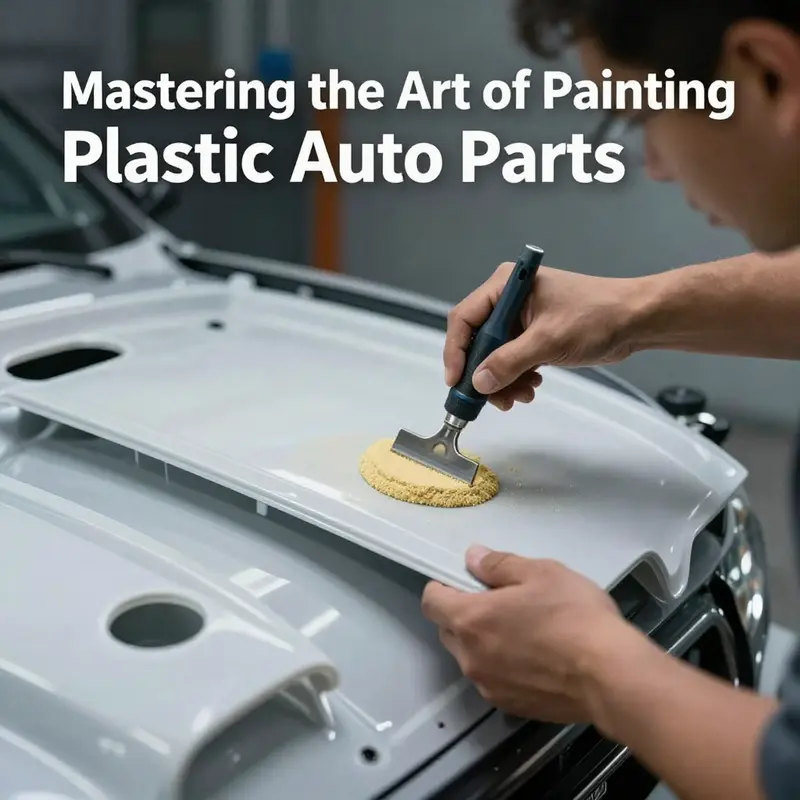
Surface preparation is the quiet prologue to every durable, high-quality paint finish on plastic auto parts. It is the decisive phase where adhesion begins, where the surface finally agrees to hold pigment, clear, and the miles of sun and road that follow. In the arena of automotive plastics, failure to prepare is often visible—peeling edges, micro-bubbles, or a finish that dulls or wears away long before the vehicle is in its prime. The challenge is not merely to cover a plastic part with color, but to coax a bond strong enough to resist the environment, solvents, heat, and the routine wear of driving. This requires an approach that is patient, methodical, and tuned to the nature of plastic itself. The goal of surface preparation is simple in words and exacting in practice: clean, abrade, condition, and conform the surface so that the primer can anchor a film that remains intact for years.
The first act in this process is cleaning and degreasing, which sounds straightforward but carries a depth of nuance. Plastics carry a range of contaminants—from mold release agents used in manufacturing to everyday oils transferred from hands and tools. Left on the surface, these residues act like a slick barrier, repelling primers and eventual paints. The recommended path begins with a mild detergent or a specialized plastic cleaner that is designed to break down oils without leaving a residue. Rinse thoroughly and dry completely before moving forward. If stubborn grease or silicone-like residues persist, a dedicated degreaser or a modest amount of isopropyl alcohol can be applied with a clean cloth. The objective is not to scrub away material or roughen the surface aggressively, but to remove contaminants until the surface feels clean and uniform to the touch. In practice, a clean surface will often pass the “wipe test”—a quick pass with a lint-free rag should leave no grease marks or smudges behind.
Following cleaning, a light mechanical abrasion is typically performed. The purpose of this step is not to remove material but to create a network of microscopic scratches that give the primer something to grip. Fine-grit sandpaper, in the range of 800 to 1200 grit, provides the right balance between roughness and preservation of the surface. The key is to abrade just enough to disrupt the upper layer of the plastic surface without deep scratching or gouging that would later telegraph through the paint. After sanding, wipe the surface again with a tack cloth or a lint-free rag to remove all dust. Dust left behind on the surface can become a seed for inclusions, leading to an uneven finish or micro-scratches that catch the light unattractively after painting.
When the component is made from polypropylene (PP) or other low-energy plastics, the surface dynamics shift noticeably. PP and similar materials resist wetting and bonding, so the simple cleaning and light abrading are not enough to guarantee adhesion. For these substrates, the process must include a PP-specific adhesion promoter or primer. This promoter chemically bonds to the plastic surface, altering its energy profile so that subsequent coatings adhere more reliably. The application of this promoter occurs after cleaning and before any primer or base coat, and it must be allowed to dry according to the manufacturer’s instructions. The promoter is not a decorative step; it is a functional treatment that lays a foundation for all layers that follow, especially when the part is soft, flexible, or exposed to environmental extremes.
Another layer of discipline in preparation is the inspection and environmental control that frames the mechanical work. After cleaning, abrading, and promoter application on compatible substrates, a careful inspection of the surface should follow. Look for uniform dullness, absence of shiny spots that indicate uncured residues, and a consistent texture across the entire area. Any remaining gloss can be a sign of incomplete cleaning, while a completely matte finish may signal over-abrading, which could compromise the surface integrity if the material has very soft or thin sections. If irregularities are detected, it is prudent to revisit the cleaning and abrading steps in those regions, perhaps using a finer abrasive to even the texture without removing material. The goal is a surface that reads as uniform under a bright light, a surface that invites the next layers to adhere as if they were part of the same substrate.
The environmental context in which preparation occurs matters as much as the mechanical steps themselves. Temperature and humidity influence how cleaners dry, how solvents evaporate, and how the first adhesion promoters interact with the surface. A clean, dust-free space with stable temperatures in a moderate range helps prevent dust attraction and maintains consistent drying times. Post-cleaning handling should be minimized; even the best-prepared surface can lose its readiness if touched with bare hands or exposed to fresh contaminants before priming. In practice, this means scheduling preparation in a controlled area and ensuring that tools, rags, and solvents used in this stage are kept clean and ready so that every pass over the part preserves the surface integrity.
The role of primers—whether standard plastic primer or flexible adhesion-promoter primers—begins to unfold only after the surface has been prepared in this disciplined way. The primer is a bridge between the plastic and the color or clear coats, and its performance is only as good as the surface it bonds to. For common plastics such as ABS and many rigid materials, a standard plastic primer is often sufficient. In contrast, soft or challenging plastics, including PP and polyethylene, require a flexible primer or an adhesion-promoter variant designed to chemically bond to the plastic. The primer should be applied in thin, even coats, typically 2–3 passes with careful attention to avoid runs or sags. The objective at this stage is a uniform, matte appearance that reads as a ready surface rather than as a painted layer in progress. Any heavy or wet coats at this juncture risk trapping solvent or creating an uneven foundation that becomes visible once the color coat is applied.
As the process advances from drying to readiness for color, the discipline of the surface preparation continues to reveal itself in subtler ways. A properly prepared surface respects the chemistry of the subsequent coatings. It provides a predictable substrate for the color layer, reduces the risk of adhesion failure, and sets the stage for a uniform film thickness. The primer’s function, once it has been allowed to dry according to specification, is to promote a consistent bond across the entire area. Poor preparation at this stage can render the primer ineffective, leaving the paint vulnerable to micro-lift, peel, or haze in areas prone to flexing or exposure. The chain of causality is straightforward: preparation determines adhesion, adhesion determines durability, and durability determines the long-term clarity and resilience of the finish.
The narrative of preparation also includes safety and the ethics of quality control. Protective gear—gloves, eye protection, and respiratory protection—should accompany every step from cleaning to priming. Ventilation is crucial when solvents are involved, and an understanding of the specific product data sheets is essential to ensure safe handling. Quality control is not a single moment but a sequence: verify cleanliness, confirm the absence of residue, confirm the uniformity of the abrade pattern, confirm promoter or primer coverage, and confirm that drying times align with environmental conditions. This chain of checks helps ensure that the surface is truly ready for the color layer and, ultimately, for the final clear coat that seals and enhances the finish.
In practice, the culmination of surface preparation is a surface that feels uniformly matte, with no sticky residues or glossy patches and with a texture that invites even paint deposition. A well-prepared surface will respond predictably to the color application: the spray pattern maintains a consistent deposition rate, the solvent flash-off occurs in a controlled manner, and the subsequent layers can flow to a smooth, level film rather than forming islands of inconsistent thickness. The careful balance here is to avoid overthinking the steps while paying close attention to the small signs of readiness. A good rule of thumb is to treat every prepared surface as the first moment of the process—the moment when the part finally makes a confident commitment to the finish that follows.
This chapter’s exploration of surface preparation shapes the subsequent chapters on priming, color application, and clear coating. It is the backbone of durability and appearance, the foundation that translates the labor of sanding and cleaning into a paint film that not only looks good but endures. To reinforce these ideas, it is useful to adopt a conservative mindset: never skip a step for speed, never rely on a single wipe or a single pass of solvent to carry the finish through. True finishing quality emerges when the surface is treated as a living interface—the point where plastic, primer, and pigment meet and decide together how long the finish will last.
For readers seeking a broader, practical reference on surface preparation that aligns with these principles, the following resource offers a thorough, technical overview: https://www.spraypainting.com/surface-preparation-for-plastic-auto-parts/.
Priming for Perfection: How Plastic-Specific Primers Forge Durable Auto-Part Finishes
The quiet hero of any durable paint job on plastic auto parts is not the color you choose but the primer that sits beneath it. Priming is the hinge that turns a bare polymer into a surface that can hold color, resist chipping, and withstand the sun, heat, and weather that vehicles endure daily. Plastics behave very differently from metal. Their surface energy is lower, they tend to shed coatings that aren’t specifically engineered to bite into them, and their chemistry can flex with temperature changes in ways metal does not. If you want a finish that stays true for years, you start with primer that is designed for plastic, not a generic metal primer that merely sits on top of a painted shell and hopes for adhesion. The priming stage is not a single brush stroke but a carefully choreographed sequence of preparation, chemistry, and technique that creates a foundation strong enough to carry the color coat through its life, while also accommodating the inevitable flex and expansion that automotive plastics experience in service.
Begin with the premise that adhesion is the key. To get there, you must first address the surface energy and the tiny imperfections that would otherwise trap air, oils, or mold-release films between the plastic and the coating. The cleaning step is more than a wipe-down; it is a ritual that breaks the bond of any residues that would sabotage adhesion. A degreasing solvent or a dedicated plastic cleaner is your first ally. You want to remove dirt, oil, and any mold-release agents that might cling to the surface right out of the mold. After cleaning, a thorough rinse and a dry followed by a wipe with isopropyl alcohol or a recommended degreaser helps ensure the surface is as clean as possible before any chemistry occurs. In the end, cleanliness is a precondition for any primer to do its job well.
The next critical moment is the decision to sand and, if necessary, how aggressively to do it. Light abrasion with a fine grit—typically 600 to 800 grit—can disrupt the surface just enough to increase the surface area and create micro-scratches that give the primer more to grip. The goal is not to go through the plastic or leave heavy scratches that would telegraph through the subsequent paint layers. After sanding, a tack cloth or a lint-free rag removes the dust. This may seem meticulous, but the smallest speck of dust can become a focal point for a defect years later. Some primers work on non-sanded plastics, but many plastics, especially those used in cosmetic parts like bumpers and interior panels, respond best to a light sanding that invites the primer to bite in and form a strong mechanical key. For polypropylene, which is notorious for poor paint adhesion because of its very low surface energy, a dedicated adhesion promoter primer is often non-negotiable. You apply the promoter after cleaning and before any other coating, and you let it cure per the manufacturer’s instructions so that the surface is chemically prepared to bond with the subsequent layers.
With the surface properly prepared, the primer itself becomes the next act in this chemistry orchestra. Plastics require primers formulated specifically for them. Standard plastic primers work well for common plastics like ABS, while flexible or adhesion-promoter variants are essential for more challenging substrates such as PP or polyethylene. These primers are designed to chemically bond to the plastic, typically using solvents and functional molecules that can etch or otherwise modify the polymer’s surface at a microscopic level. This chemical modification is what makes the paint stick where it would otherwise peel, chip, or craze.
The application of primer is a science as much as an art. Thin, even coats in a controlled environment are the rule, not the exception. A clean, well-ventilated area is essential, and many enthusiasts and professionals prefer a spray booth or a dedicated paint area that minimizes dust and humidity. The primer should be applied in multiple light coats—commonly two to three—each coat allowed to flash off for a brief period before the next coat lands. This flash-off time is not a waste; it is the window where the solvent begins to evaporate, the film begins to set, and the surface becomes tackier in a controlled way that reduces the risk of sags and runs. Heavy, wet coats create a heavy film that pulls and sags as it cures, which is a visible defect that is overcome only by sanding back and re-priming. The finish you’re aiming for is uniform, matte, and free from texture that would show through the color layer later.
The exact curing regime for primer cannot be universal because manufacturers tailor primers to their chemistry and the substrates they’re designed to serve. In many scenarios, a typical approach is to allow primer coats to dry to a measured tack or dry film that is not sticky to the touch before blasting through with the next coat. Then, after the final coat, the part is allowed to cure in a dust-free environment for a designated period, which can range from a few hours to a full day depending on ambient temperature, humidity, and the primer’s chemistry. Some workflows extend curing to 24 hours to ensure the primer has achieved maximum bonding strength and that the surface has stabilized before color is introduced. This waiting period is not an optional luxury; it is the stage that ensures the subsequent color coat does not suffer from lifting or intercoat defects.
There is a practical rhythm to testing the primed surface as well. Before committing to color, run a simple adhesion check on a small, inconspicuous area. A light scratch test with a fingernail or a deliberate attempt to flex a tiny region can reveal whether the primer is performing as intended. If the primer lifts, flakes, or cracks when you test, it is a signal to reassess the prep work, the compatibility of the primer with the substrate, or the cleanliness level. Addressing a problem at this stage avoids the more dramatic consequence of color peeling later on. The principle is straightforward: if the foundation isn’t solid, the top layers won’t be either.
As you advance toward the color coat, the primers you’ve chosen—and their preparation—play a decisive role in the final gloss, color depth, and durability. A well-prepared primer layer yields a flatter, more uniform appearance when the color is applied. It reduces the risk of micro-coatings that trap solvents or moisture, which in turn can cause solvent pop, micro-scratches, or a hazy look after final curing. Moreover, a properly primed surface handles thermal expansion and contraction well, helping prevent cracking or blistering that can occur with plastic’s natural flexing in sunlight and heat. The science behind this is not just about adhesion; it is also about creating a harmonized surface that can age gracefully while resisting UV degradation and surface wear.
In telling this story of priming, it’s worth acknowledging the practical choices you face in the shop or garage. The primer you select should be aligned with the plastics in your project, and you should follow the manufacturer’s instructions with fidelity. Some projects demand a standard plastic primer for general plastics, while others require a flexible or adhesion-promoter variant when the part is soft or subject to movement. If you are painting a component that will see a lot of flex or impact, such as a bumper or a vehicle’s interior trim that experiences heat and movement, the flexible promoter or adhesion-promoting primer becomes particularly valuable. It bonds to the plastic and remains resilient as the substrate expands and contracts with temperature shifts.
As a practical note, the priming stage is also where you begin thinking about environmental control and safety. Temperature and humidity influence drying times and the film’s integrity. The sweet spot for many primers sits in moderate temperatures with humidity that doesn’t cause excessive solvent evaporation or slow drying. Guarding against dust and airborne contaminants is essential; even a single hair or fiber can mar a primer’s surface, which would later manifest as a defect in the final paint. The safety practices you adopt during priming—protective gloves, eye protection, and a respirator in a well-ventilated area—are not mere formalities. They protect you and ensure the coating system behaves predictably rather than unpredictably.
The decision to connect this priming chapter to the broader painting journey is deliberate. Priming is the bridge between surface preparation and the color transformation that follows. It is the stage that determines how well color will adhere, how evenly it will lay down, and how robust the overall finish will appear after exposure to sun, rain, and wear. The synergy between surface preparation, the chosen primer, and the technique of application forms a chain of cause and effect. If any link is weak, the entire paint system can fail to deliver long-term satisfaction. Conversely, when all elements are aligned—clean surface, proper sanding, a plastic-specific adhesion primer, properly controlled spray technique, and an appropriate cure—the result is a finish that looks integrated with the part and resilient in operation.
For readers who want a tangible reference point during the priming stage, consider exploring examples of plastic components being prepped and primed for color in a real-world scenario. A well-prepared hood, bumper, or interior panel—parts that routinely command attention in a finished vehicle—can serve as a reminder of the critical sequence: clean, sand, prime, cure, and then proceed to color with the confidence that the foundation will support a durable, professional outcome. If you are painting a hood or other large assembly and want to see how a complex form responds to primer and subsequent color, you can look at a practical example such as the Evo X hood in phantom black. That reference provides a useful glance at how a properly prepared plastic surface can take a deep, uniform color when the primer has been correctly chosen and applied.
In this narrative about priming, the key takeaway is that adhesion is earned, not granted. Plastics demand primers that operate on a chemical or mechanical level to create a bonding platform. They require careful surface preparation that removes any barrier to bonding, and they rely on a measured, staged application that builds a clean, uniform foundation. The ultimate goal is to reach a surface that not only accepts the color but does so evenly and durably. When you master priming, you unlock a smoother path to a professional finish that resists the usual trials of time and environment, and you position the project to move confidently into color and clear coat with a predictable, enduring result.
Applying the Color Coat to Plastic Auto Parts: Technique, Materials, and Process Control
Applying the Color Coat to Plastic Auto Parts: Technique, Materials, and Process Control
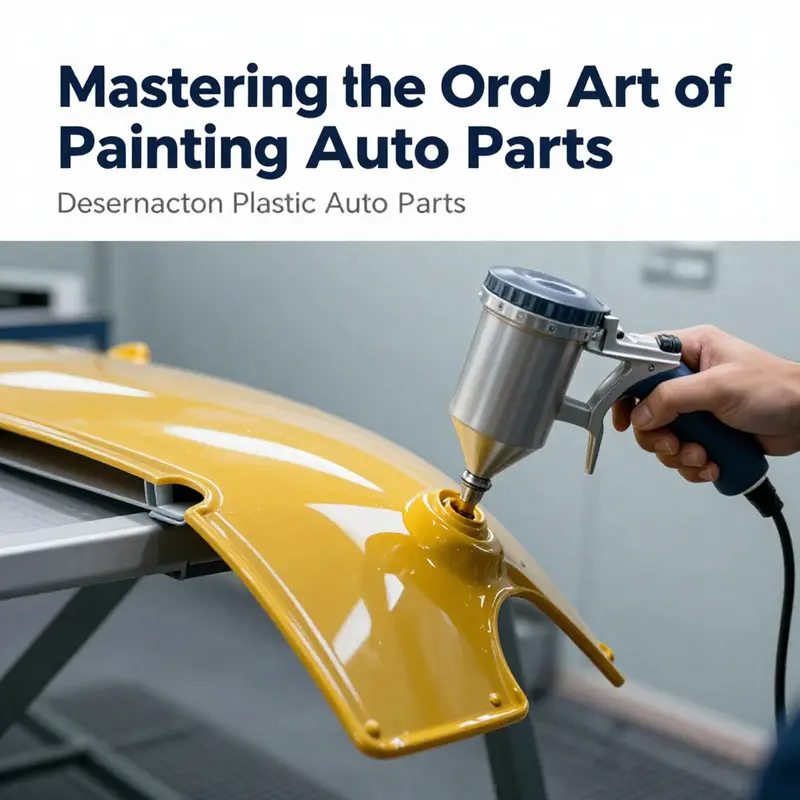
Painting plastic components demands a disciplined approach. The color coat is more than appearance; it must bond, flex, resist UV, and survive road debris. Plastic substrates differ from metal in surface energy, thermal tolerance, and flexibility. That means technique, material choice, and process control matter equally. This chapter focuses on the practical steps and decisions that produce a consistent, durable color finish on plastic auto parts.
Start with the right mindset: the color coat is built, not sprayed in a single pass. Each thin layer contributes to coverage, color depth, and long-term performance. Before any paint reaches the part, you should confirm that primer and adhesion steps are complete and compatible with your topcoat chemistry. When painting bumpers, grilles, or other plastic trim, remember that some plastics, like polypropylene, need a specific adhesion promoter applied at the primer stage. That promoter changes the surface chemistry to accept color coats. If you are working with a part such as a rear bumper manufactured from PP, consider how prior treatments affect the color coat; for reference see a common PP bumper example here: Lancer Evo X rear bumper (PP material).
Choose a paint system suited to plastic substrates and to the environmental goals of the project. Modern shops typically use either water-based or solvent-borne high-solids coatings. Water-based varnishes reduce VOCs and often require careful control of ambient conditions. High-solids products deliver thicker wet-film volume per coat, which can speed production but demand precise flash-off management to avoid runs. Whatever system you select, match the color coat chemistry to both the primer and the clear coat. Incompatibility at this stage is expensive and time-consuming.
Mixing and material preparation are simple tasks that frequently cause problems when skipped. Follow manufacturer mixing ratios for pigment-to-reducer and any catalyst closely. Mix thoroughly and allow a brief induction time if recommended. Strain material through a paint strainer before loading the spray gun to remove agglomerates. For metallics and pearlescents, additional mixing cycles and proper thinning are critical to keep pigment in suspension and ensure even laydown.
Spray technique controls finish quality more than most people expect. Hold the gun six to eight inches from the surface, and use smooth, overlapping passes at a consistent speed. Think in terms of thin passes that wet the surface evenly. Avoid heavy, wet coats that sag on vertical faces. For complex contours, adapt your spray path to follow the geometry, keeping the gun perpendicular to the surface as much as possible. Maintain consistent gun angle and motion to reduce mottling and orange peel.
Flash-off time between coats is essential. Allow the solvent to evaporate enough to prevent solvents from being trapped under subsequent layers. Typical flash times for many color coats range five to ten minutes at moderate temperatures, but consult product guidance. Flash too little and solvents build pressure under the finish. Flash too long and intercoat adhesion can suffer, especially with water-based systems.
Robotic and electrostatic application methods are common in production because they increase consistency and reduce overspray. Electrostatic spray imparts a charge to the paint particles, which are attracted to the grounded plastic part. The effect is excellent wraparound and minimal wastage. However, electrostatic systems require grounding strategies and sometimes surface treatments to ensure adequate attraction on low-conductivity plastics. Robotic systems add repeatable motion and precise film build control. For hobby or small-shop work, manual HVLP or LVLP guns remain standard, but technique must be disciplined to match the consistency of automated systems.
Film build management deserves emphasis. Target a dry film thickness that achieves opacity without brittle layering. Low-temperature curing systems aim for modest film builds per pass; high-solids products deposit more material, so reduce the number of coats accordingly. Keep a record of wet-film thickness with each pass, and know the dry-film target for the overall color layer. Over-building the film can lead to cracking or poor flexibility on soft plastics. Under-building leaves the substrate visible and reduces UV protection.
Pigment selection and effect control influence both appearance and durability. Solid colors rely on pigment concentration for coverage. Metallic and pearlescent finishes depend on orientation and laydown to reveal their effect. Apply metallics with uniform, parallel passes to allow the flakes to align. Back-spray and heavy overlapping can hide the effect. Pearlescents often require a specific sealer or mid-coat to lock the effect before clear coating. Remember that effect coatings can magnify imperfections, so sanding and primer quality must be impeccable.
Temperature and humidity influence atomization, drying, and adhesion. Ideal conditions are moderate temperatures and controlled humidity. High humidity alters solvent evaporation and can cause defects like fisheyes or poor leveling, especially in water-based systems. If environmental control is limited, slow down your passes, increase flash time, and test on a scrap piece before committing to the whole part.
Masking and edge control matter for parts that mate to other trim. Use soft-edge masking techniques to avoid hard ridges that show through the finish. Where edges meet unpainted surfaces, apply light feather coats instead of abrupt transitions. For parts that will be assembled, consider the sequence of painting versus assembly to prevent overspray contamination and to protect mating surfaces.
After the final color build is complete and has flashed appropriately, evaluate for defects before clear coating. Look for runs, dust nibs, or uneven metallic orientation. Correct small defects with light sanding using very fine grit. Remove all sanding dust with a tack cloth and a final wipe with a recommended solvent. Only apply clear coat to a clean, tack-free surface.
Curing choices for the color coat affect the clear coat and the overall durability. Many plastic-compatible color coats cure at lower temperatures than automotive metal systems. Controlled heat curing below the deformation threshold of the plastic is common. Typical temperatures for plastic parts remain below 130°C. Follow the paint maker’s cure schedule to attain proper hardness and adhesion without warping the substrate. Ambient cure may be adequate for some coatings, but it requires longer handling times.
Finally, consider the long-term performance of the color layer in concert with the clear coat. The clear coat provides the majority of UV protection and chemical resistance. However, the color coat must be chemically compatible and properly cured for the clear to adhere and perform. Advanced clear coat technologies now include UV stabilizers and nano-additives that significantly extend service life. Using such clear coats over a well-applied color layer preserves gloss and prevents color fade for years.
The color coat is the visible promise of quality on a painted plastic auto part. Achieving it requires attention to material compatibility, disciplined spray technique, and environmental control. When each layer is applied with intention, the result is a finish that looks factory-made and endures the road. For deeper technical guidance on UV protection and advanced clear coat additives used with plastic parts, consult the technical review at Plastics Technology: https://www.plasticstech.com/uv-protection-in-clear-coats-for-plastic-auto-parts
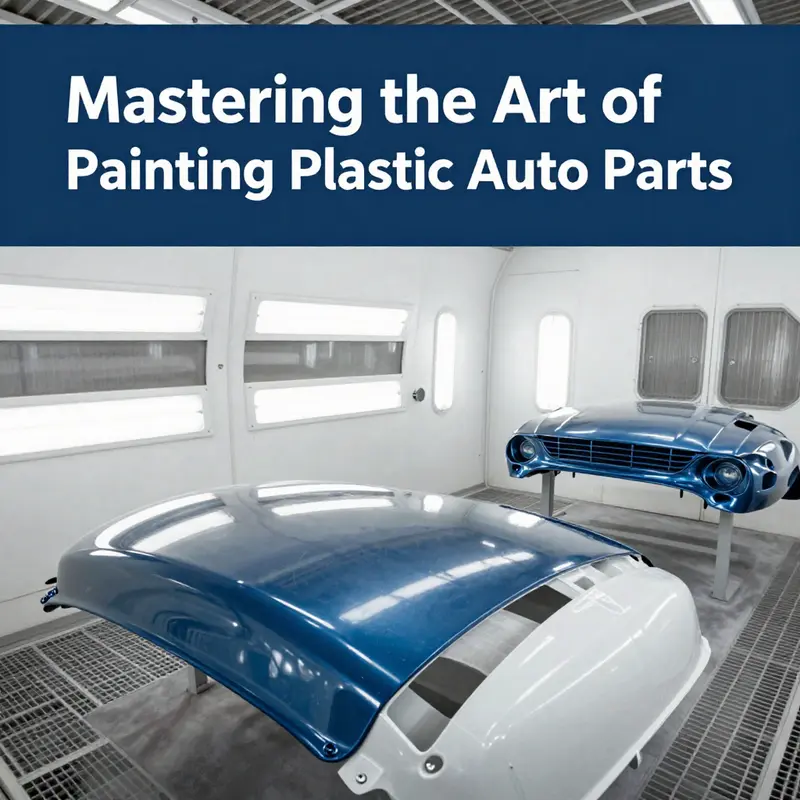
Guardians of Gloss: Mastering Clear Coat on Plastic Auto Parts
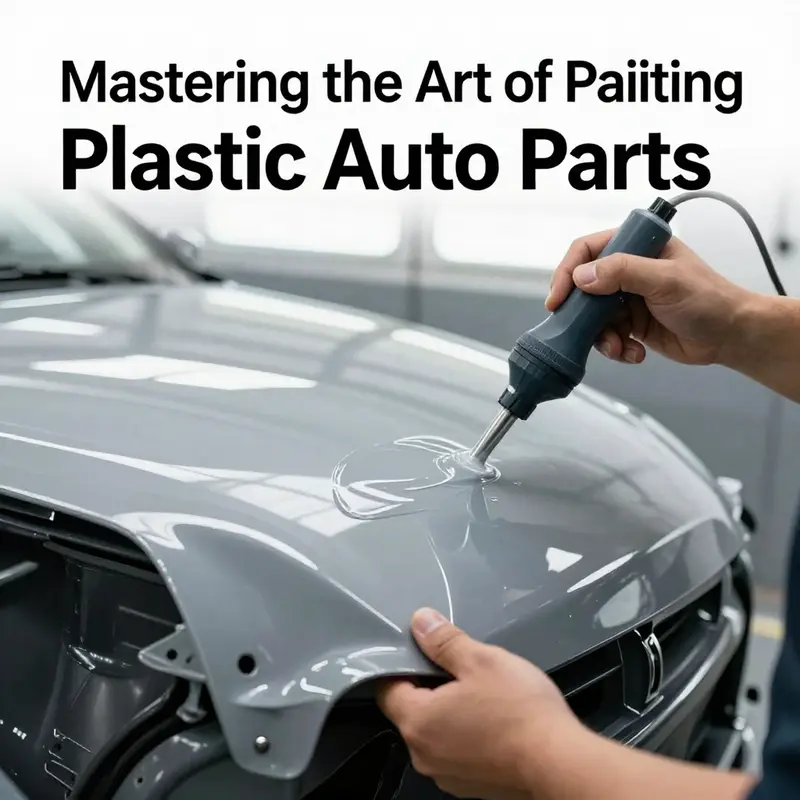
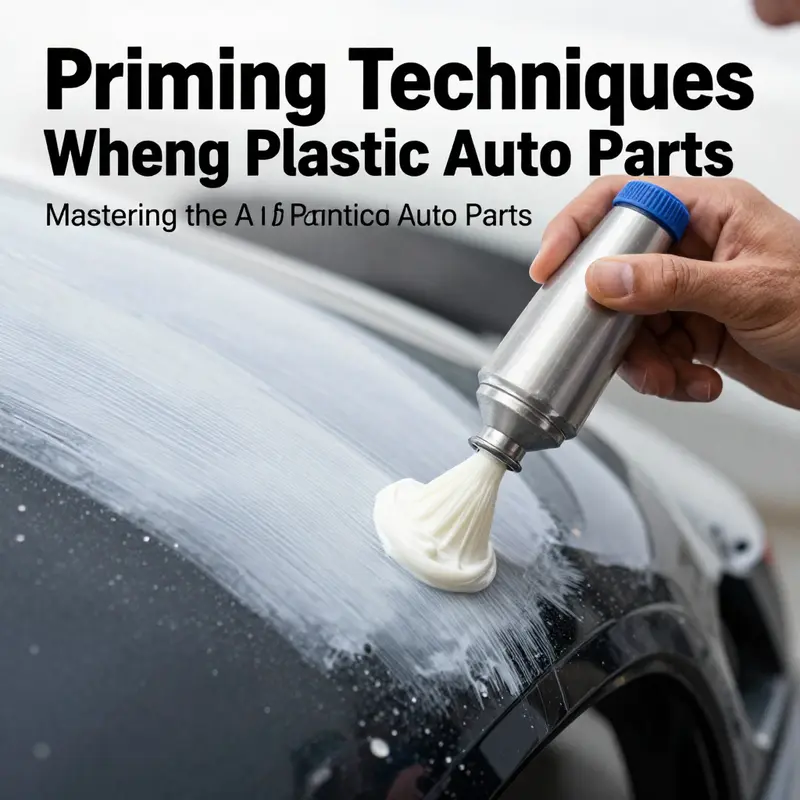
Clear coat is the final shield that protects a painted plastic surface. On plastic parts, adhesion challenges, heat sensitivity, and polymer variability require a careful, methodical approach rather than a cosmetic layer. The goal is a durable, UV resistant film that respects the substrate and remains flexible with temperature changes. Start with surface preparation: clean thoroughly with a plastic-safe cleaner to remove oils, mold release agents, and dust. For stubborn residues, wipe with isopropyl alcohol on a lint-free cloth. Lightly abrade the surface with 800-1000 grit to create micro keys, then wipe away dust with a tack cloth. For PP plastics, use an adhesion promoter designed for polypropylene to improve bonding.
Next, apply a primer formulated for plastics, usually two to three thin coats with short dry times, aiming for a uniform matte surface that accepts the clear coat without texture. When selecting the clear, choose an automotive grade two-part system compatible with the primer. Mix thoroughly, rest briefly to release trapped solvents, and spray in a clean, dust-free booth. Maintain a steady gun distance (about 20-30 cm) and use smooth, overlapping passes to build the film without runs. Apply two to three light coats, allowing five to ten minutes between coats for flash-off. Target a wet film thickness that yields the desired depth without excessive build.
After final coverage, allow a longer cure at room temperature or with controlled heat if needed. A gentle bake (60-80 C for 20-30 minutes) can accelerate hardness but monitor parts to prevent distortion. Once cured (typically 24 hours or more), finish with a fine polish to enhance gloss. Throughout, control environmental factors such as temperature around 20-25 C and humidity around 50-70 percent to ensure consistent film formation. Finally, inspect for adhesion and hardness on a spare panel before committing to the final part.
Reference notes: consult industry guidelines on painting plastics and primer compatibility.
Finish First: Mastering Curing and Drying for Durable Painted Plastic Auto Parts
Curing and drying are the quiet, final arbiter of a painted plastic surface. They decide not only how glossy a panel looks the moment it leaves the booth, but how well the finish holds up to UV exposure, temperature swings, and everyday wear. In the choreography of painting plastic parts, curing is the stage where chemistry meets physics. It depends on controlled heat, precise light exposure, and careful timing as much as on pigment, resin, and primer. When done correctly, the result is a film that resists dulling, cracking, and delamination even after years of sun, road salt, and engine heat. When done poorly, the flaw may be invisible at first, only to reveal itself in a few weeks as hazing, microcracking, or soft adhesion in areas that experience the most flex. The difference is a matter of environment, sequence, and a willingness to respect the cure as a process, not a momentary finish step. In practice, curing begins the moment the last coat leaves the gun and continues through a carefully managed sequence of conditions that allow the coating to cross from liquid to fully cured solid with the right balance of flexibility and hardness.
One of the most impactful shifts in modern curing strategies is the growing use of UV systems, either as a primary or a supplementary method to traditional thermal drying. UV curing can dramatically shorten turnaround times, a boon in high-volume shops and OEM lines where booth capacity is a bottleneck. A dual-cure approach–combining UV exposure with a controlled hot-air bake–offers a remarkable advantage in curved or shadowed regions of a part. The UV lamp can reach tight recesses and complex geometries that heat alone struggles to dry, while a thermal component ensures deeper cure in areas that receive less UV light due to geometry or shadowing. This combination reduces volume shrinkage during curing and enhances the uniformity of the film, which translates into fewer defects such as solvent pop or uneven gloss. In practice, this means planning the cure so that UV exposure is synchronized with a post-UV bake, rather than replacing it entirely. The aim is to achieve a robust cross-linking balance that gives chemical resistance, mar resistance, and dimensional stability without making the surface overly rigid.
The environment plays a starring role in curing performance. Temperature and humidity are the quiet drivers of cure speed and film properties. A moderate ambient temperature, typically in the range of 20 to 25°C, supports steady evaporation of solvents and consistent chemistries without overdriving the film too quickly. Humidity matters too because it influences surface moisture, evaporation rates, and the integrity of the clear coat film. Low humidity can help prevent solvent-related defects that show up as fisheyes or cratering, while excessively high humidity can slow flash-off and encourage moisture-related defects. The dew point is a useful mental metric here; when the surface temperature approaches ambient dew point, condensation can begin on the film, compromising adhesion and gloss. For this reason, many refinish spaces aim for a controlled environment where humidity sits around 40 to 70 percent and temperature remains within a predictable band. The story of curing isn’t simply about heat; it is about maintaining a stable environment long enough for the coating to reach the transmission point between solvent evaporated and fully cross-linked.
In choosing coatings for plastic substrates, the chemistry of cure emerges as a central theme. Clear coats, often one-pack systems or multi-part formulations, interact with the underlying primer and the plastic substrate in distinct ways. The presence of UV-curable components adds another layer of complexity. The degree of cure can be measured by the reduction of UV-curable double bonds within the coating, a chemical fingerprint that signals that the film has moved beyond surface drying into true cross-linking. Temperature-influenced cure and lamp-to-surface distance are both critical levers; too little energy and the film remains under-cured and susceptible to chemical attack and scratching. Too much energy or a path that concentrates heat in a small area can lead to thermal distortion, orange peel, or solvent pop if the solvent has not flashed off fully. The practical upshot is that operators must respect the cure window established by the coating manufacturer and be prepared to adjust based on the geometry of the part and the performance of the substrate.
A well-executed cure also hinges on the sequence of application and the timing between coats. After applying the color and allowing an appropriate flash-off period, the clear coat is laid down in thin, even layers. Each coat should be allowed to progress through its flash-off stage before the next pass, a step that reduces the risk of solvent entrapment and runs. In UV or dual-cure systems, the application plan often allocates a brief post-flash period, followed by targeted UV exposure to fixed regions that benefit most from rapid cure. The cadence between coats matters because too-rapid build-up can trap solvents beneath a dense top film, while too-slow layering can invite dust settling and slower production cycles. The ideal approach yields a film that feels slightly tacky to the touch after the final flash-off, then cures steadily under heat and light to a smooth, hard, and protective layer.
Time itself is a variable that cannot be ignored. The drying time before handling is only part of the story. The true test of curing extends into the post-application phase, when panels rest in a dust-free environment for a minimum interval defined by the coating system. Some practices call for a 24-hour air-dry before handling, followed by a controlled bake at moderate temperatures, often in the 60 to 80°C range for a brief 10 to 30 minutes. This baking step accelerates cross-linking, increases surface hardness, and improves resistance to chipping and UV exposure. Yet, the risk of overbaking remains. Excessive bake times can soften or warp plastics, encourage cracking at bonding lines, or degrade previously cured layers if the substrate has internal stress. The art lies in balancing speed and durability—achieving the fastest possible cure without compromising the substrate or the integrity of the coating film.
Quality during curing is not only about the coating; it is also about the air that surrounds the process. Particulate control and dust reduction are essential, especially in the early stages when solvents are still evaporating and solvents leave a more volatile film on the surface. A clean booth or a clean room with minimal air turbulence helps prevent contaminants from settling onto the surface during flash-off and curing. The operator’s PPE—gloves, respirators, and eye protection—remains essential not only for safety but for a contaminant-free environment. Even small exposures to dust, fingerprints, or oil from skin can create surface defects that are magnified after cure, affecting gloss and color uniformity. The discipline of curing, then, extends beyond the paint film to the entire workspace: proper ventilation, clean tools, and careful handling all contribute to a durable finish.
In practice, the ultimate goal is a finish that responds consistently across varied environments. A cured coating should resist UV degradation, stand up to cleaning solvents, and maintain its gloss without microcracking or delamination under flex and heat cycling. Achieving that requires more than a fixed bake profile or a single pass of UV energy. It requires a holistic approach: a well-prepared substrate, an adhesive-friendly primer, a color coat applied with controlled flash-off, and a clear topcoat guided by a robust curing protocol. It means planning for shadowed regions and geometry that challenge light exposure, and recognizing that some parts of a panel will need a slightly different cure strategy. The more the process accounts for these realities, the more the finished part embodies both the science of coatings and the art of refinement.
For practitioners seeking practical references, a part-focused overview can be helpful as a companion to this discussion. See the evo-8 bumper page for a real-world example of how a complex, contoured surface behaves through curing and finishing in a typical shop setting. The page serves as a reminder that the principles discussed here translate to tangible results on the parts that roll onto the lot and into customers’ hands. evo-8 bumper page
Beyond the immediate steps, a disciplined approach to curing also encourages ongoing experimentation within safe boundaries. Each part’s geometry, each coating system, and each environmental condition offer a unique set of variables. Keeping a simple log of cure times, temperatures, humidity, and observed outcomes helps teams refine their protocols without sacrificing consistency. Over time, a shop can build a practical playbook that accommodates different plastics, from ABS to softer PP formulations, and yields a reliable, repeatable finish. The most durable plastically finished parts are the ones whose curing story is predictable, traceable, and aligned with the manufacturer’s guidance—where the final gloss, adhesion, and hardness reflect both precise chemistry and thoughtful process control.
External resource: for a complementary, in-depth treatment of curing and drying practices in automotive plastic finishing, consult the industry guidance at https://www.eagle-nat.com/tips-for-painting-automotive-plastic-parts/ to broaden your understanding of environmental controls and curing technologies beyond the shop floor. This external reference offers practical context that can inform adjustments to booth conditions, bake profiles, and UV exposure planning in real-world refinishing operations.
Final thoughts
Successfully painting plastic auto parts requires attention to detail in each phase of the process, particularly in surface preparation and proper curing. Business owners must prioritize quality materials and techniques to ensure a durable, professional finish. By following the methods outlined in this guide, professionals in the automotive industry can elevate their services, meet customer expectations, and maintain a competitive edge. Ultimately, investing in the right practices today will yield significant rewards in service quality and customer satisfaction tomorrow.