

Introduction: Why 3000GT Carbon Fiber Hood Fitment Comes Down to Latch Alignment
The 1994-1999 Mitsubishi 3000GT is a heavy, wide-track grand tourer, and its steel hood is one of the easiest places to save weight. That is why the 3000GT carbon fiber hood is a common upgrade on both the SL and VR-4. Replacing the factory panel with a 1994-1999 Mitsubishi 3000GT Pit Fighter carbon fiber hood removes mass from the nose, lowers the center of gravity, and quickens front-end response.
Carbon fiber is also stiffer than steel for the same weight, but hand-laid aftermarket hoods rarely match OEM tolerances. The gaps may look close, yet the latch, hinges, and mounting points seldom line up on the first attempt.
Two things decide whether the panel fits and stays shut: latch alignment and hood pin placement.
Latch alignment sets whether the hood sits flush, closes cleanly, and stays latched at speed. Hood pin placement determines how the panel is anchored and whether it can lift or vibrate under load. Miss either one and a good carbon hood will still rattle, sit crooked, or come loose on the road.
Getting it right comes down to a fixed order that turns a rough-fitting panel into reliable real-world fitment: measure the mounting points, adjust the latch and hinges, set the hood pins, then verify the result on the car. Done properly, a 3000GT carbon fiber hood can fit as securely as the steel panel it replaced.
Why the 3000GT Carbon Fiber Hood Demands Precise Fitment Work
Swapping the factory steel hood for a carbon panel on a 1994-1999 3000GT looks like a bolt-on job. It is not. Trading stamped steel for a cured carbon laminate changes how the panel behaves under load, and the factory latch was designed around that steel.
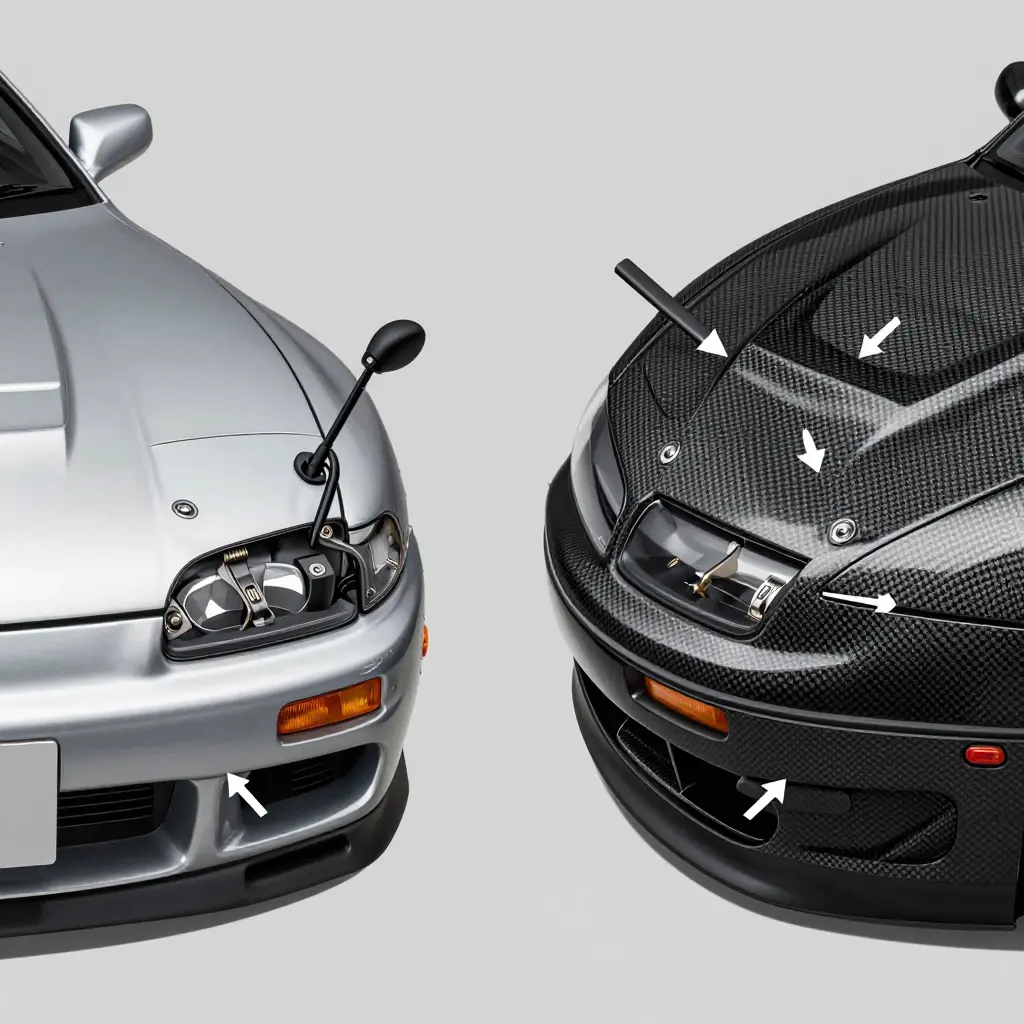
Steel flexes; carbon fights back
An OEM hood is thin-gauge steel with some give. It twists slightly as the hinges cycle and settles into the latch as the body flexes. A carbon fiber hood built over a honeycomb or fiberglass core is much stiffer. That rigidity is why people buy it, but it also means the panel no longer helps the latch close. Every millimeter of misalignment has to come out with shims, slotted hinges, and patience.
Two latches, double the alignment demand
The 1994-1999 3000GT uses a primary latch with a striker bar plus a secondary safety catch. On a stock hood, the softer steel lets the striker drop into the primary jaw even when it sits slightly off center. A stiff laminate pushes that energy straight into the striker instead of deflecting around it. If the striker sits even a few millimeters high or low, the secondary catch may never engage.
Hinge geometry and stress transfer
Factory hinges are positioned for a panel that flexes across its span. A rigid laminate does not absorb those forces; it passes them to the mounting points and the striker. The same hood that fits one 3000GT can bind on another. Adjustable or slotted hinges become necessary rather than optional.
Latch alignment is safety, not cosmetics
A misaligned latch is not a styling flaw. If the primary jaw and striker do not fully seat, or the safety catch fails to hook, the hood can lift at speed and hit the windshield. Correct seating spreads load across the latch and the hinge, which keeps the panel locked under hard braking and cornering.
For owners installing a 1994-1999 3000GT carbon fiber hood, that means setting aside time for actual fitment work instead of bolting the panel on and driving away.
Why Latch Alignment Decides Real-World Fitment
Bolting a carbon fiber hood onto a 1994-1999 Mitsubishi 3000GT is only half the job. Once you drop the prop rod and let the panel fall, the latch becomes the load-bearing interface between hood and chassis. Latch alignment means positioning the striker and latch assembly so the hood closes on the center-line, pulls down evenly, and stays put after hundreds of open/shut cycles. Get it wrong and the hood sits high at one corner, chatters at speed, or refuses to pop without a fight. If you are still shopping, start with a panel built to factory datum points like this 3000GT Pit Fighter carbon fiber hood; good fitment begins before the first bolt.
The Striker and the Latch Assembly
The hood striker is the U-shaped loop bolted to the underside of the hood, usually on a slotted bracket. It travels down into the hood latch assembly, the spring-loaded jaw mechanism mounted on the radiator support core with a secondary safety catch. Between them sits the center-line reference: the vertical plane running down the middle of the car. Both striker and latch should be centered on that line so the closing force stays symmetrical instead of pulling the light carbon panel to one side.
Two adjustments control the interface:
- Vertical adjustment – raising or lowering the striker (or the latch body) changes how deep the striker drops into the jaw, which sets the hood’s closed height and how readily the safety catch engages.
- Lateral adjustment – sliding the striker side to side on its slotted mount corrects left/right panel shift and centers the striker in the latch mouth.
Measuring Striker-to-Latch Engagement
Smear a little grease or machinist’s blue on the striker, close the hood, then reopen it. The witness mark shows where the striker contacts the jaw. You want it landing at the base of the jaw with full contact, not riding on the tip. Confirm the secondary catch holds when you gently lift the closed hood. If the mark sits high, lengthen the striker; if it misses sideways, adjust laterally before touching anything else.
Checking Fender and Cowl Gaps
Even 3000GT hood gap starts at the perimeter. Use a gap gauge or a folded piece of card stock and check the seam at four points: both front corners, both cowl corners, and along each fender edge. Factory panels usually run a consistent gap. Carbon panels often run slightly wider because of thicker clear coat and mold tolerances. Slide a straightedge across the fender-to-hood seam to catch high or low corners that a simple gap check misses. Carbon skins can flex enough to change gaps when you lean on them, so measure with your hands off the panel.
Re-Shimming the Hinges
If the rear of the hood sits low and the front striker is already correct, tune the rear first. Loosen the hinge-to-hood bolts and add or remove washers as shims at the hinge mounting points. Each shim makes a small vertical change at the rear edge, so work in fine increments and recheck the cowl gap after every move. Once the rear edge is right, fine-tune the front with the striker instead of stacking shims, which keeps stress off the thin carbon laminate.
Carbon Fiber Flex and Pin-Bushing Play
Carbon is stiff, and that stiffness works against you at the latch: a steel hood gives a little and lets the striker find the jaw, while a carbon panel transmits the same load straight through. Add worn hood-pin bushings, which introduce free play, and the striker can land in a slightly different spot each time you close the lid. That is why carbon fiber hood fitment needs a firm, low-clearance pin setup: fresh bushings cut the wobble, and a properly tensioned latch keeps the striker from bouncing out of the jaw at high speed. The goal is repeatable closure – the hood should catch on the same center-line and settle into the same gaps every time.
OEM vs Aftermarket 3000GT Carbon Fiber Hood Fitment Factors
Before trusting a fresh panel to stay shut at speed, it helps to know where an aftermarket carbon hood diverges from the factory steel original. The table maps the six fitment factors that drive latch alignment and hood pin placement on 1994-1999 3000GT models, so you know where to spend adjustment time.
| Fitment Factor | OEM Steel Hood | Aftermarket Carbon Fiber Hood | Adjustment Required |
|---|---|---|---|
| Panel rigidity | Lower stiffness; flexes into the latch | Higher stiffness; transmits load to the striker | Shim hinges; add pins |
| Latch striker tolerance | Holds factory tolerance | Varies more from hood to hood | Adjust or file striker slot |
| Hinge bolt pattern | Matches OE holes exactly | Close, but sometimes drifts | Slot or ream bolt holes |
| Hood pin necessity | Not required | Strongly recommended | Drill and fit pins |
| Gap consistency | Uniform from the factory | Varies panel to panel | Sand edges; shim corners |
| Safety retention | Latch alone is sufficient | Latch plus pins preferred | Add secondary pins |
Treat any row with a note in the right column as a checkpoint. Nail the hinge and striker first, then set your pins only after the panel sits clean, so latch alignment and hood pin placement work together instead of fighting each other. For a comparison point, this 1994-1999 Mitsubishi 3000GT Pit Fighter carbon fiber hood shows how a production aftermarket panel is built around these tolerances.
Hood Pin Placement Principles for the 1994-1999 3000GT Carbon Hood
A carbon hood changes how the front of a 3000GT stays attached at speed. Latch alignment gets you most of the way to a clean install; hood pin placement handles the rest. Set the pins right and the hood seats flat, closes with a solid click, and stays put at triple-digit speeds. Set them wrong and you add twist, flex, and a latch that fights you every time you shut the lid.
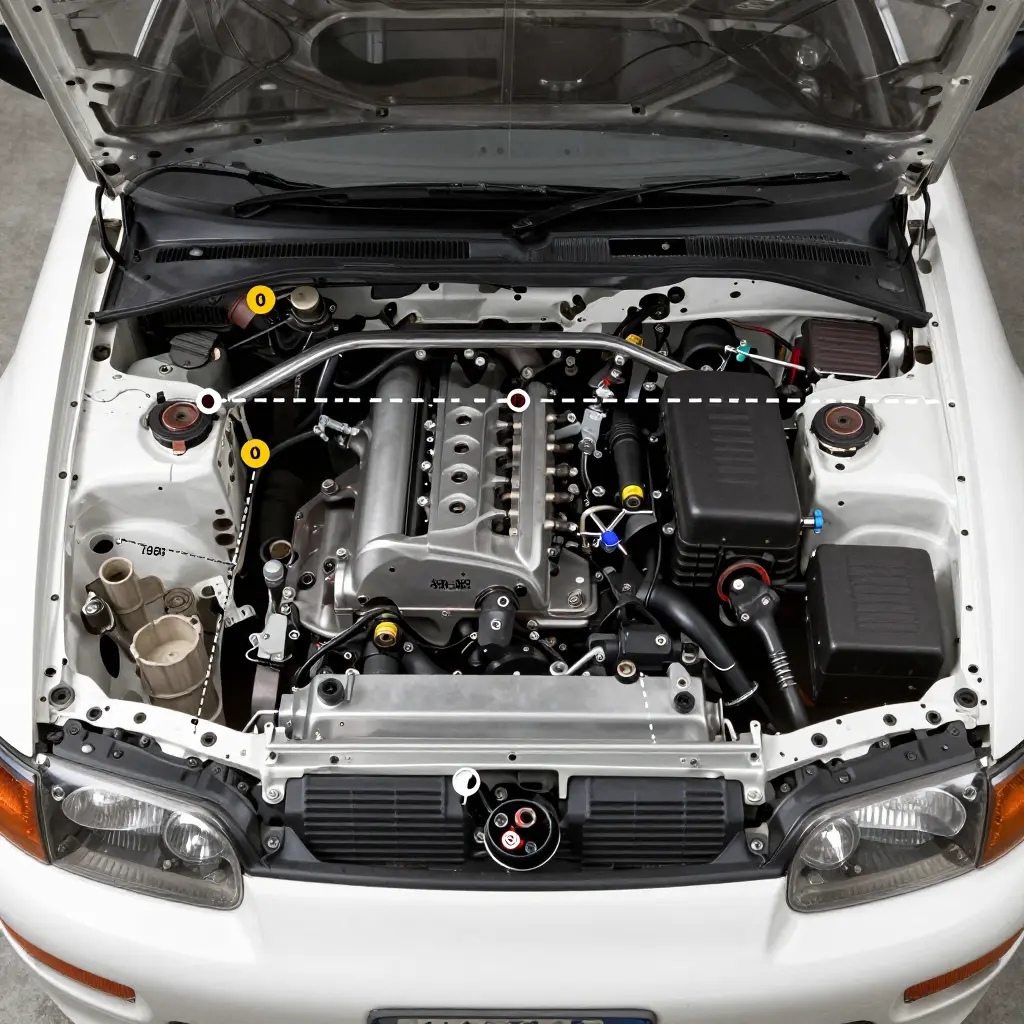
Hood Pins Are Secondary Retention, Not Decoration
Factory hoods rely on a single center latch backed by a secondary catch. That catch is the safety net, engineered for stamped steel with predictable weight and stiffness. On a 3000GT carbon hood the equation changes. Hood pins act as a mechanical backup that keeps the panel from flying open if the latch releases or the primary catch fails. Treat them as a redundant system, never as the only thing holding the hood down.
Why Carbon Panels Need Pins More Than Steel
Carbon fiber is stiff and light, which is the problem. A light panel has less inertia to resist aerodynamic lift, and thin carbon skins flex at unsupported spots. That flex loads the latch in directions it was never designed for, wearing the striker until it lets go. Secondary retention spreads the load across two fixed points so the latch sees a steadier force.
Where to Mount: Radiator Support and Frame Rails
On the 1994-1999 3000GT, the strongest anchors sit along the radiator support and the forward sections of the frame rails. Aim for structural metal underneath, not cosmetic sheet. Mounting near the radiator support keeps the pins short and the load path direct, while tying into the frame rail geometry resists side-to-side movement. Avoid soft areas, and never drill into anything that only looks structural.
| Mounting Zone | Why It Works | Watch Out For |
|---|---|---|
| Radiator support | Short load path, minimal flex | Thin cosmetic sheet metal nearby |
| Forward frame rails | Resists lateral movement | Uneven drilling between sides |
| Center latch (retained) | Primary secure point | Never rely on it alone |
The Geometry of Pin-to-Hole Alignment
Alignment matters more than anything else here. The pin should pass through the hood hole at a true 90 degrees, with the hole slightly oversized to allow for panel movement. If the pin binds against one edge, closing the hood forces the panel sideways, and that sideways force is what bends latches. Check alignment with the hood closed under its own weight, then check again after a few heat cycles, since carbon and metal expand at different rates.
How Misplacement Twists the Hood
Pins mounted unevenly create uneven clamping. One corner pulls tighter than the other, and the hood bows or twists to release the tension. That twist throws off latch alignment, defeats the secondary catch, and can crack carbon at the mounting point over time. For reliable 3000GT carbon hood fitment, measure twice, mount symmetrically, and confirm the panel sits flat before you commit. For a closer look at a well-fitted aftermarket panel, check out this 3000GT Pit Fighter carbon fiber hood.
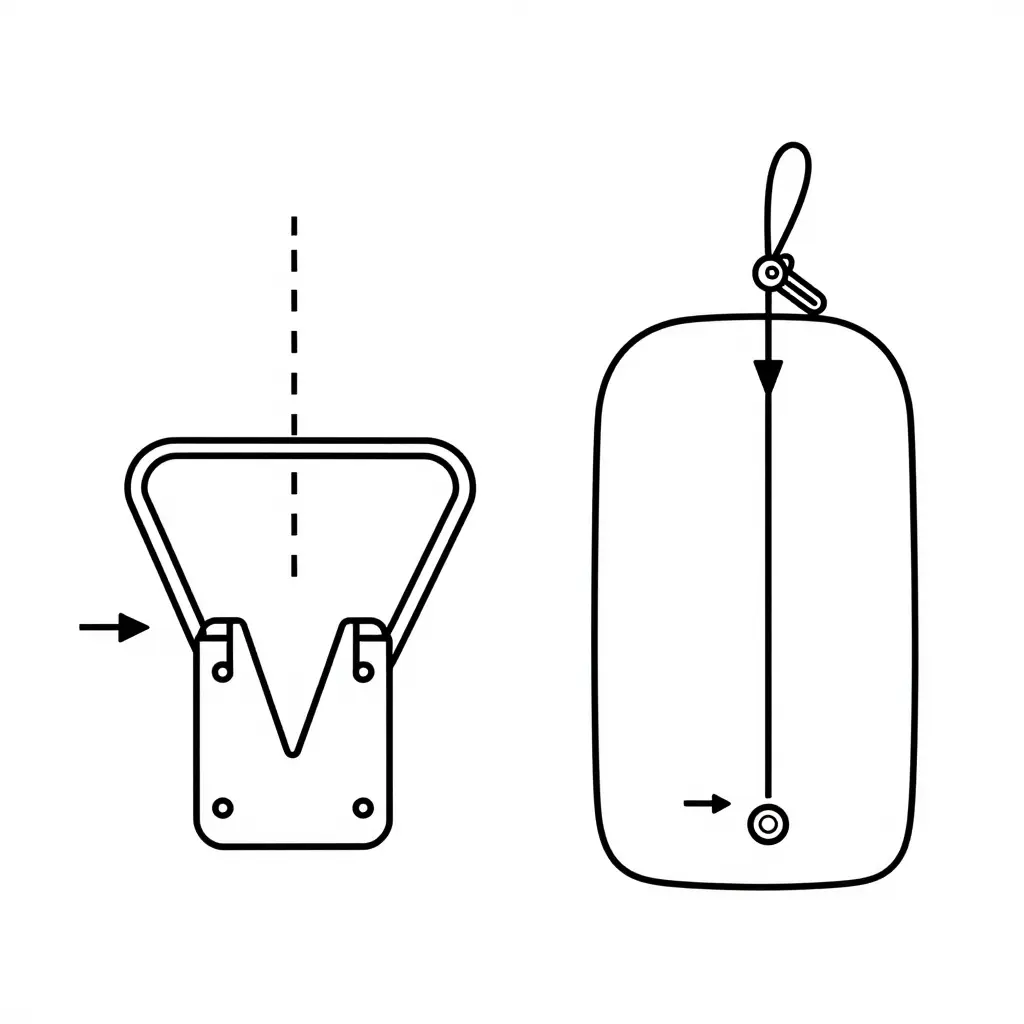
Pre-Installation Checklist for 3000GT Carbon Fiber Hood Latch Alignment and Hood Pin Placement
Latch alignment and hood pin placement are the two jobs that make or break real-world fitment, so slow down and follow a fixed order. Every measurement you take during prep is one you won’t have to chase after the hood is bolted down. If you are installing a 1994-1999 Mitsubishi 3000GT carbon fiber hood, work through this sequence before you tighten anything.
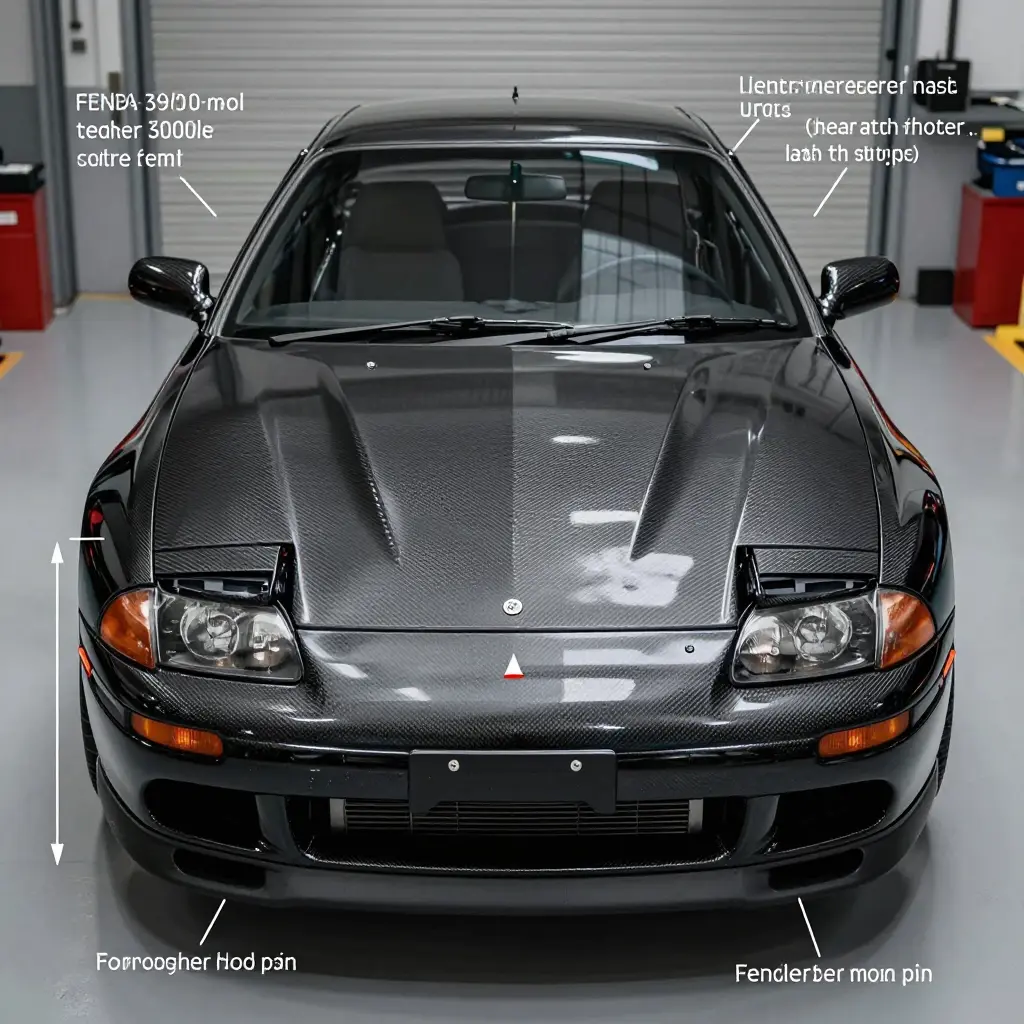
- Verify the hinge bolt pattern. Lay the factory hinge over the new carbon fiber hood mounting pads and confirm the 3000GT hinge bolt pattern matches, because a mismatch here forces shimming later.
- Dry-fit the hood. Set the panel on the hinges and let it rest closed without engaging the latch, so you can judge overall fitment before committing to any drilling.
- Set the center-line. Run a tape strip or chalk line from the cowl to the nose and mark the true center, giving every later latch alignment and hood pin placement move a fixed reference.
- Adjust the latch striker. Shift the striker until it enters the hood catch dead-center and at the correct height, since an off-center striker is what causes a hood that pops or refuses to release.
- Check the fender-to-hood gaps. Measure the fender-to-hood gaps on both sides and front-to-back, then equalize them by nudging the hinges rather than bending the carbon panel.
- Drill and position the hood pins. Mark all four pin locations from the underside, start with a small pilot bit, and confirm each hood pin placement clears the radiator support before opening the holes to final size.
- Torque hardware to spec. Snug the hinge bolts, striker screws, and pin nuts to the recommended torque in stages, avoiding the over-tightening that cracks carbon fiber flanges.
- Perform a final closure test. Cycle the hood open and shut several times, listen for interference, and re-check latch release and pin engagement at the ride height the car actually sits at.
Treat this checklist as the actionable takeaway from the latch alignment and hood pin placement sections: measure first, commit second, torque last. A carbon fiber hood rewards patience far more than force.
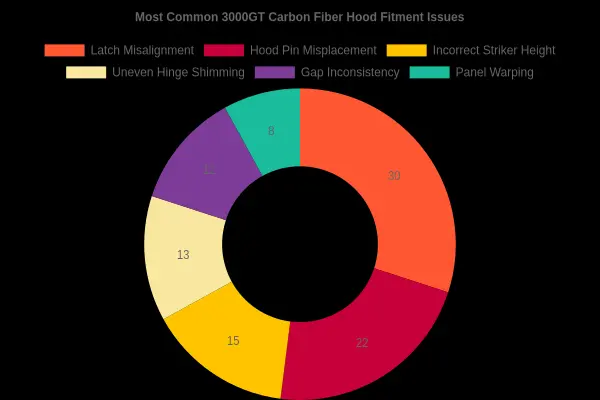
Most Common 3000GT Carbon Fiber Hood Fitment Issues
The doughnut chart above breaks down the root causes behind real-world 3000GT carbon fiber hood fitment complaints. Latch alignment (30%) and hood pin placement (22%) account for the majority of issues owners and shops run into, with incorrect striker height (15%), uneven hinge shimming (13%), gap inconsistency (12%), and panel warping (8%) making up the rest. Roughly half of all fitment headaches trace back to two adjustment points, which is why dialing in the latch and pins first saves hours. If you are installing a fresh 1994-1999 Mitsubishi 3000GT Pit Fighter carbon fiber hood, start with those two zones before chasing smaller gaps elsewhere.
Real-World Fitment Variables Across 3000GT Trims and Years
No two 1994-1999 Mitsubishi 3000GTs left the factory with identical body tolerances, and nearly thirty years later those tolerances have drifted further apart. Even a perfectly molded 1994-1999 Mitsubishi 3000GT carbon fiber hood can bolt cleanly onto one car and fight you on the next. The culprit is rarely the hood itself – it is the variables underneath it.
Base, SL, and VR-4 Trims Behave Differently
The base and SL models share a single front-clip design across the 1994-1999 run, so their mounting geometry is fairly predictable. A VR-4 carbon hood sits above a more complex front end, with active aero hardware on cars so equipped and a different bumper structure. A modified or repaired VR-4 can shift its radiator support just enough to change latch alignment. The VR-4 is also heavier and rides on stiffer springs, so hinge fatigue shows up differently than on a base or SL car.
The Stealth Platform Wildcard
The Dodge Stealth – the 3000GT’s platform twin – uses the same hinge and latch mounting points but a slightly different front fascia. Parts interchange in theory, yet aftermarket hood fitment across the two platforms depends on which fascia, hinges, and striker plate are actually bolted to your car.
The Four Variables That Decide Whether It Fits
- Hinge wear. Sagging hinges drop the rear edge first, opening up hood gap tolerance at the cowl.
- Prior collision repair. A replaced or straightened front clip moves the latch striker, which then fights the latch.
- Frame straightness. Bent frame rails twist the mounting plane, and no latch tweak can correct that.
- Aftermarket latch hardware. Hood pins, quick-latches, and non-OEM strikers change exactly where the hood must sit.
Why One Car Fits and Another Doesn’t
Identical hoods fail on one chassis because the tolerance stack – hinge play, plus frame deviation, plus latch geometry – accumulates differently from car to car. A never-hit car with factory hinges accepts an aftermarket hood almost immediately. A repaired car may need shims or fresh hinges first.
Diagnose Before You Adjust
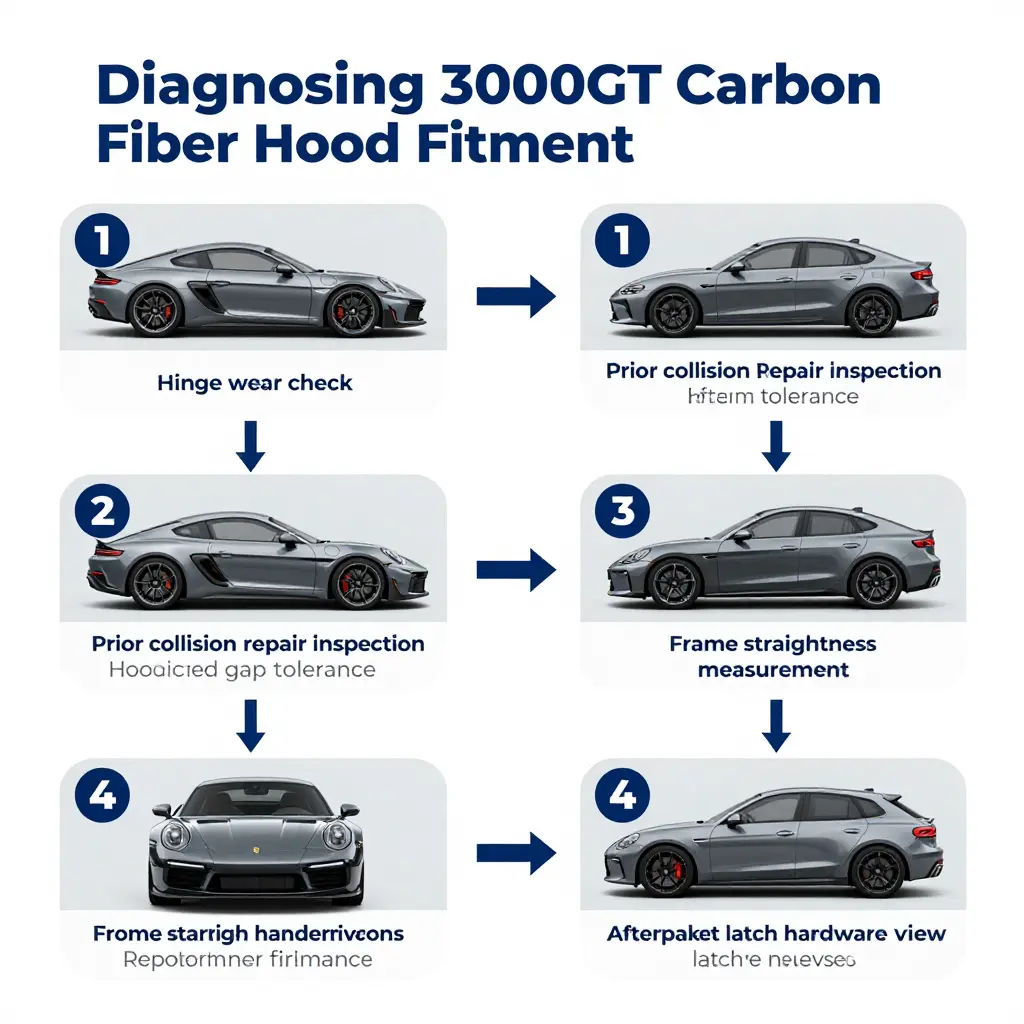
Check hinge play by lifting the front edge and watching for vertical travel. Measure frame straightness at the rails with a plumb and tape. Inspect both inner fenders for paint mismatch, weld seams, or overspray that hint at old repair. Confirm your latch and pin hardware matches OEM specs. Only after these checks should you adjust hood pins or reset the latch – a hood that measures right but still won’t close usually has a frame problem, not a hood problem. Fix the car, then fit the panel.
FAQ: 3000GT Carbon Fiber Hood Latch and Pin Fitment
Getting a lightweight panel to close cleanly and stay put comes down to how well the latch and pins work together. Here are the questions 3000GT owners and shops ask most often.
Do carbon fiber hoods need hood pins?
Not always, but most 3000GT owners should run pins on any carbon panel. A factory latch relies on the stiffness of steel to stay engaged, and carbon does not flex the same way, so high-speed lift or a single missed engagement can let the hood pop or twist. Pins lock the front corners down and protect both the panel and your windshield.
Can I reuse the factory latch on my 3000GT carbon fiber hood?
Yes, you can usually transfer the OEM latch and hinges, but only if the hood was molded to factory mounting points and you verify latch alignment first. Many owners prefer a latch-and-pin hybrid, where the factory latch handles daily latching and the pins provide redundancy. If you are choosing a panel, start with a well-reviewed option like this 1994-1999 Mitsubishi 3000GT Pit Fighter carbon fiber hood, which is molded to factory latch points. Never force a hood that has to be dropped from height to close.
Why does my hood sit uneven after install?
Uneven gaps usually trace back to hinge shims, worn hinge bushings, or a slightly twisted panel rather than the hood itself. Adjust the hinges one side at a time, then fine-tune the striker height and pin position to pull everything level. Because carbon has less give than steel, small factory misalignments become far more visible once the new panel is bolted on.
How much gap variance is acceptable?
Aim for an even gap around the hood that matches your fenders. Any gap that grows or shrinks noticeably from one corner to the next points to a hinge or latch problem. Fix the geometry first, then chase the gap with shims.
Can hood pin placement affect latch alignment?
Yes. Hood pin placement determines where the front of the panel settles, so pins installed too far forward, inward, or unevenly will twist the hood and pull the latch out of alignment. Measure from fixed body points on both sides, drill once, and confirm the striker still centers in the latch before you tighten everything down. Getting pin placement right up front saves hours of re-alignment later.
The Bottom Line: Alignment Is Everything
On a 1994-1999 Mitsubishi 3000GT carbon fiber hood, latch alignment and hood pin placement determine real-world fitment and safety. Not the weave, not the finish, not the spec sheet. Those two contact points decide whether the panel sits flush, closes with a reassuring click, and stays put at speed.
Everything above points to the same method. Measure the factory hinge-to-latch geometry before you touch a bolt. Dry-fit the hood, then check panel gaps on all four sides. Center the latch so it engages without side load, and set the pins to control fore-aft and lateral movement under load. Verify with slow, deliberate test closes, and re-torque once the panel has settled.
If you take one thing away: fitment is an adjustment process, not a bolt-on guarantee. Even a well-made hood needs patience at the latch and pins to behave like an OEM panel. Treat those two zones as the heart of the install, and the rest follows.
For owners who want a proven starting point, this Pit Fighter carbon fiber hood for the 1994-1999 Mitsubishi 3000GT is a solid reference for comparing geometry, hardware, and mounting points.
Align it, pin it, verify it, then drive.
Related Resources
Still weighing your exterior options? These related pages offer context for fitment, alignment, and styling decisions on the 1994-1999 Mitsubishi 3000GT.
- Advan Velpar design carbon hood for the 1991-1993 3000GT – This earlier edition of the same platform uses comparable latch geometry and hood-pin mounting points, making it a useful reference when you are judging cross-year fitment on the 3000GT.
- Monster GT style carbon fiber hood for the 2006-2012 Eclipse – Latch alignment and pin placement challenges are not limited to one chassis, so this works as a comparison if you are chasing clean panel gaps on a different Mitsubishi.
- Clear driver and passenger side headlight glass for the 95-99 3000GT SL and VR4 – Because these lenses sit flush against the hood’s leading edge, refreshing them helps you verify front-end panel alignment and overall exterior fitment once a hood swap is complete.