
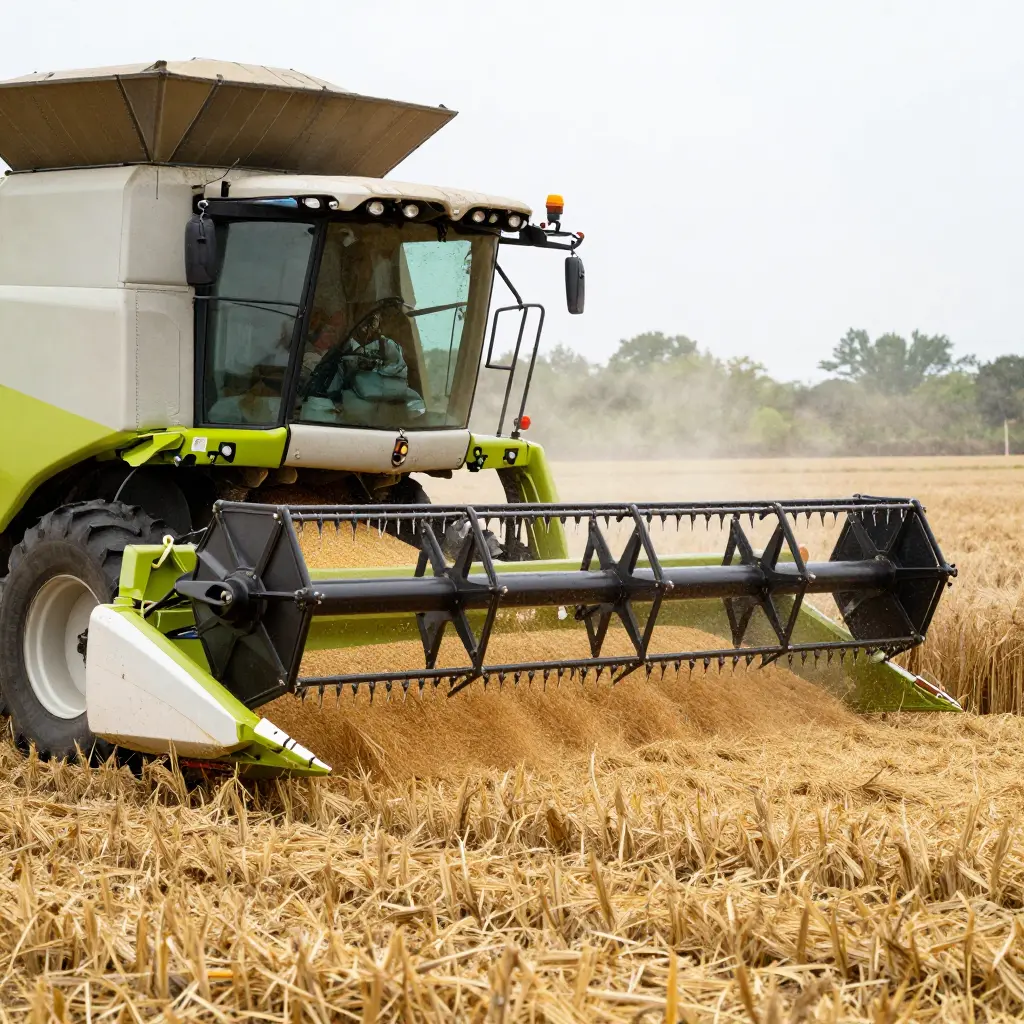
Grain loss in a combine is largely controllable — until the crop gets wet. A wet harvest throws off the drum speed settings operators depend on. The threshing drum, the rotating cylinder that beats grain free of the stalk, only works when its speed suits the moisture and toughness of the crop passing through it. Add water, and that match falls apart.
What grain loss actually means
Grain loss is any grain that leaves the machine without being captured. It escapes through the straw walkers, gets blown out the back with the chaff, or stays trapped in heads that never threshed cleanly. A few percent on a single pass doesn’t look like much. Spread across a whole field, it’s a real chunk of the paycheck.
The terms that matter
- Threshing drum — the rotating cylinder that separates grain from the rest of the plant.
- Drum speed — how fast that cylinder turns, usually measured in RPM, and the lever operators reach for first.
- Threshing — knocking grain loose from stalks and heads.
- Wet harvest — a harvest run where crop moisture sits above the normal range: damp straw, tough heads, heavier material flowing through the machine.
Why this matters in wet conditions
A dry crop behaves predictably. A wet one doesn’t. Moisture changes how the crop resists impact, how grain releases from the head, and how much material the machine has to push through. Settings that worked last week can start throwing grain out the back.
What this article covers
The mechanics of threshing come first, then why moisture changes separation, why fixed drum speed fails once conditions shift, and how to adapt mid-field. No single setting cures this. Understanding the system behind the loss is what keeps grain in the tank when the weather won’t cooperate.
Threshing Drum Mechanics and the Role of Drum Speed
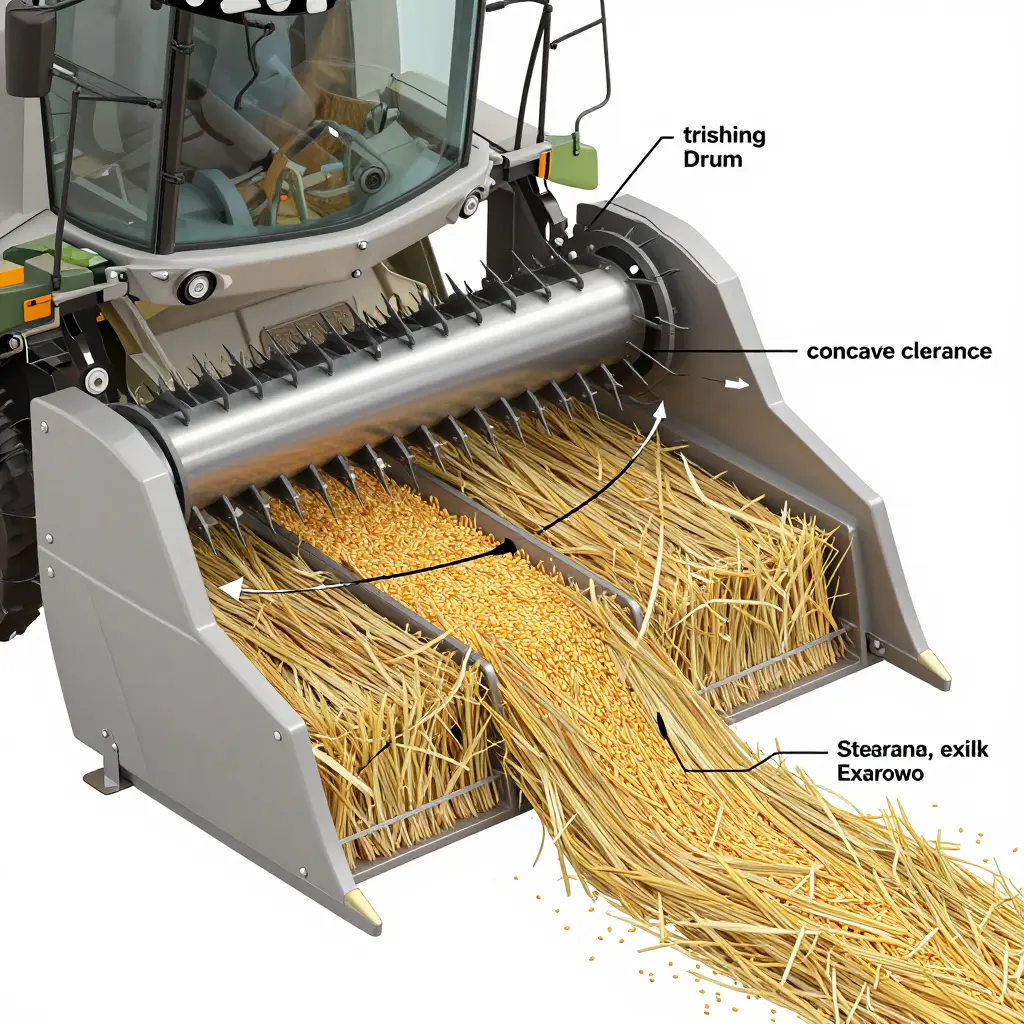
The threshing drum (called a rotor on rotary machines) is a fast-spinning cylinder fitted with rasp bars that beats and rubs the crop against a curved grate. How the drum, the concave, and the moving crop mat interact decides where grain ends up, so it is the first place to look when diagnosing loss.
The Three-Part Interaction
- The drum (rotor): rotates at high speed, and its rasp bars strike the crop mat, knocking grain kernels free from the heads.
- The concave: a curved grate wrapped beneath the drum that traps the crop mat in a narrow channel and adds a stripping, rubbing action against the rasp bars.
- The crop mat: the continuous layer of grain and straw fed between drum and concave. Grain drops through the concave openings while straw travels rearward; this is grain separation in its simplest form.
Why Drum Speed Sets the Energy
Drum speed, measured in RPM, determines how hard the machine works the crop. Two effects scale with rotational speed:
- Impact energy rises with the square of velocity, so a modest gain in drum speed delivers a disproportionately larger beating force to each head.
- Centrifugal force and rubbing intensity grow with speed as well, driving more aggressive grain release from the head.
The Balancing Act: Under- vs Over-Threshing
Operators tune drum speed and concave clearance together, because either one alone can push the process toward failure:
- Under-threshing: too low a drum speed or too wide a concave clearance leaves grain locked in the head, which is then lost out the back.
- Over-threshing: too high a drum speed or too tight a clearance cracks kernels and shatters straw, cutting grain quality and overloading the cleaning shoe.
| Setting | Low drum speed / Wide clearance | Balanced range | High drum speed / Tight clearance |
|---|---|---|---|
| Impact energy | Weak | Controlled | Excessive |
| Grain separation | Poor – grain left in head | High | High but distorted |
| Grain condition | Intact | Intact | Cracked |
| Straw condition | Long, intact | Manageable | Over-fragmented |
| Main risk | Under-threshing | Minimal loss | Over-threshing |
Every balance point above assumes dry, brittle straw. Once a wet harvest changes how the crop mat behaves inside the drum, settings that normally deliver clean separation can quietly stop working.
How Wet Harvest Conditions Change Threshing Dynamics
Threshing advice is usually written for a dry crop, and it works because dry grain and dry straw behave in a predictable, almost brittle way. A wet harvest breaks that assumption. When the crop carries extra water, the same machine, at the same settings, is suddenly working against material that no longer wants to be separated.
The root cause is elevated moisture content, which in a damp field can sit above the normal range and reach 18–25%. That water changes the physical character of the whole crop mat, not just the grain.
The Key Physical Changes
- Kernels turn plastic and tough instead of snapping free from the head.
- Straw and stems become leathery and fibrous, resisting shatter.
- Surface moisture raises adhesion, gluing grain to chaff and to itself.
- The crop mat loses its ability to flow and tumble freely.
Why the Threshing Drum Behaves Differently
Inside the threshing drum and concave, damp straw no longer fractures cleanly. Dry straw breaks into short, loose pieces that fall away and release their grain almost immediately. Wet straw instead bends, wraps, and smears across the concave bars. It forms clumps and ropes that ride around the drum rather than passing through, so the gap that worked in dry conditions suddenly feels choked and overloaded.
Adhesion compounds the problem. With moisture on every surface, grain clings to chaff and to unthreshed heads, so the material refuses to sift through the concave openings. Friction rises, and impact energy is absorbed by the wet mass instead of being used to knock kernels loose. The crop simply resists separation.
The Bottom Line
Moisture changes toughness, adhesion, friction, and flow all at once, so the drum speed that strips a dry crop cleanly can no longer drive acceptable grain separation. Grain is released more slowly, sifts more poorly, and much of it leaves the machine still locked inside the straw. Matching threshing performance to wet conditions means rethinking speed and clearance together, not tweaking one dial in isolation.
Drum Speed Settings Across Harvest Conditions: A Side-by-Side Comparison
One fixed drum speed cannot serve every field, every day, and every crop. The settings that keep grain in the tank on a dry afternoon become harmful when the same machine rolls into a damp or wet harvest. The ranges below show how far the target moves as moisture climbs.
Every adjustable parameter shifts together. Raising drum speed to handle tougher, wetter straw also means opening the concave, and you trade one loss type for another. There is no free lunch, only a different place for the grain to go.
| Harvest Condition | Typical Crop Moisture Content | Recommended Drum Speed Range | Concave Clearance | Expected Grain Loss Level | Dominant Loss Type |
|---|---|---|---|---|---|
| Dry crop | 12-14% | 800-1000 RPM | 8-12 mm | Low (0.5-1.0%) | Cylinder / threshing loss (over-threshing) |
| Damp crop | 15-18% | 1000-1150 RPM | 12-18 mm | Moderate (1.5-3.0%) | Separation loss |
| Wet harvest | 20-25% and above | 1200-1350 RPM | 18-25 mm | High (3-5% and up) | Cleaning loss (with separation loss rising) |
Reading the Pattern
Three things stand out. First, the required drum speed climbs by roughly 400-500 RPM from a dry crop to a wet one, a massive jump for what looks, on the surface, like the same job. Second, the dominant loss type migrates as conditions change: a dry crop tends to lose grain through aggressive cylinder action, while a wet harvest loses it at the cleaning shoe because damp, heavy material will not separate. Third, wet-harvest losses run several times higher than dry-crop losses even when an experienced operator dials everything in.
That last point is the argument. A fixed drum speed calibrated for dry grain is not a neutral starting point in a wet field; it is a recipe for a plugged cylinder, mangled straw, and grain pouring out the back. The settings have to move because the crop moved first.
Why Drum Speed Settings Fail in a Wet Harvest
When the field turns wet, the first instinct in the cab is to bump up the drum speed. It is one lever, and it promises a quick fix. In practice, that is often where grain loss gets worse. Drum speed is a single-variable lever pointed at a multi-variable problem.
The Failure Chain, Step by Step
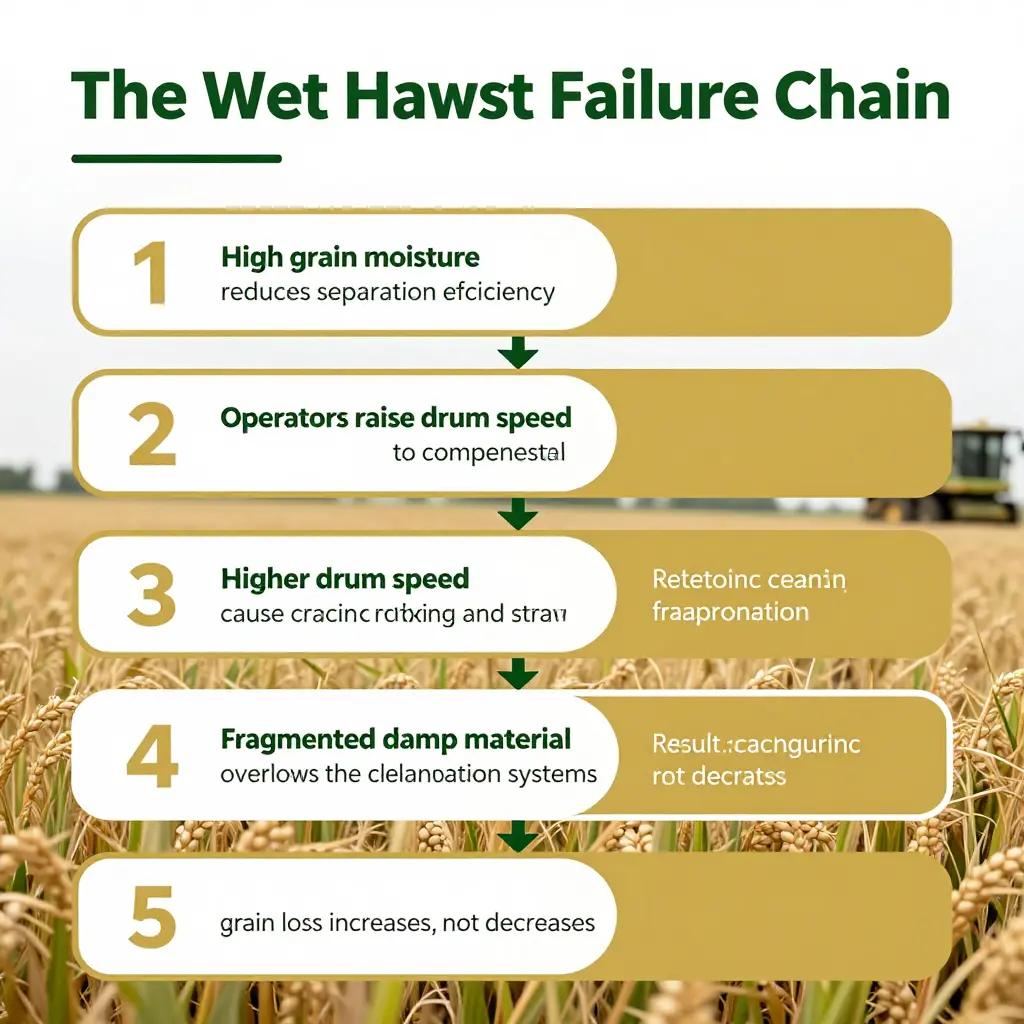
Step 1 — Moisture cuts separation efficiency. Damp grain is heavier, stickier, and slower to fall through the concave. Higher moisture reduces separation efficiency, so less grain is separated where it should be.
Step 2 — Operators push drum speed higher. To recover the lost throughput, operators raise drum speed. This is the classic compensation move, and it is where the trap closes.
Step 3 — Cracking and fragmentation. A faster drum hits harder. Grain cracks, and straw shatters into short, damp fragments that no longer travel cleanly over the walkers and sieves.
Step 4 — The cleaning system is overloaded. Those wet fragments carry loose grain with them and blanket the sieves. Airflow cannot loft this mat, so the cleaning and separation systems choke on material they were never designed to handle.
Step 5 — Loss goes up, not down. Grain ends up riding out the back on straw instead of falling into the tank.
One Lever, Many Variables
Drum speed never acts alone. The variables that actually govern separation are moisture, feed rate, concave clearance, and airflow, and they move together.
| Variable | Effect in a Wet Harvest |
|---|---|
| Moisture | Raises stickiness, lowers separation efficiency |
| Feed rate | Crowds the concave when combined with damp material |
| Concave clearance | Must widen to let wet grain through without cracking |
| Airflow | Must increase to lift heavier, damper chaff |
| Drum speed | Only one input – cannot offset the other four |
Change drum speed alone and you leave concave clearance too tight for damp grain and airflow too low for heavy chaff. The machine is no longer tuned to the crop; it is tuned to one dial.
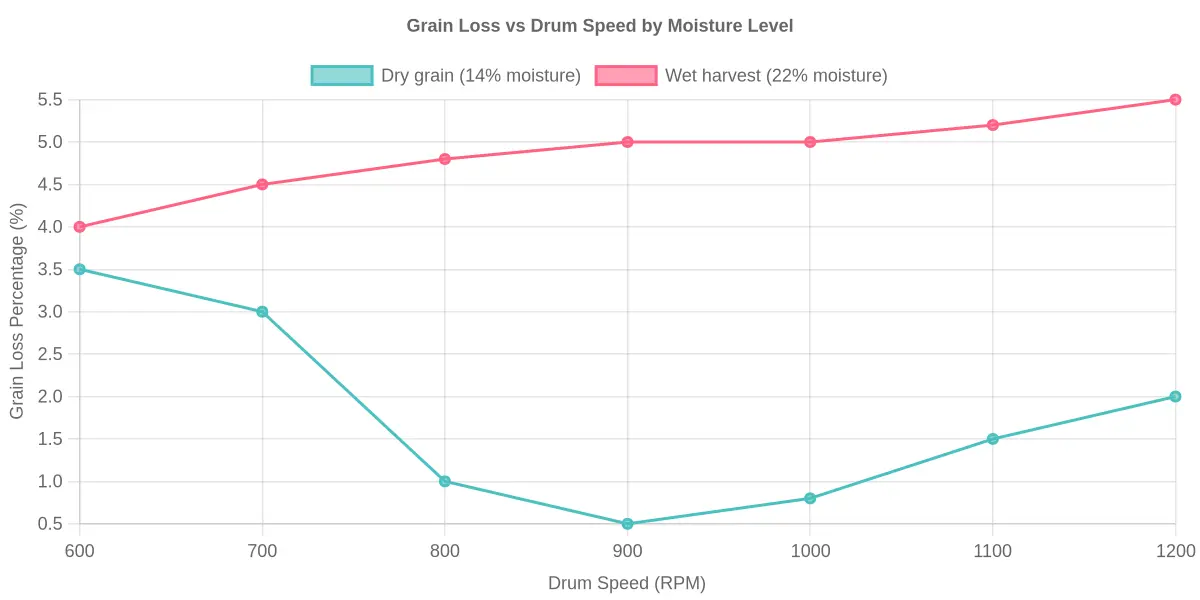
In dry grain, loss falls to a low point and then climbs gently as speed rises. In a wet harvest, loss starts high and keeps climbing with every extra RPM, the opposite of the intended fix.
The Structural Limitation
The problem is not operator error so much as a structural limitation of fixed settings. A control philosophy that treats drum speed as the answer assumes grain behaves the same across moisture levels, which it does not. Relying only on drum speed means fighting a system designed to reward balance, not brute force. Real gains come from adjusting drum speed together with concave clearance, airflow, and feed rate, treating the machine as a system rather than a single lever.
Grain Loss Climbs as Moisture Rises
Hold drum speed fixed and push through wetter crop, and total grain loss does not nudge upward gently; it vaults.
| Crop Moisture Content | Total Grain Loss (%) |
|---|---|
| Low (~12%) | 1.5 |
| Moderate (~18%) | 2.8 |
| High (~24%) | 5.5 |
| Very High (~30%) | 8.7 |
Between low and moderate moisture, loss roughly doubles; from moderate to very high, it more than triples. That steepening curve is the story. A fixed drum speed that performs beautifully in dry grain simply cannot separate grain from damp, heavy straw, so the losses pile up on the ground behind the machine.
This is why chasing a single “magic” RPM number rarely fixes a wet harvest. The moisture itself is driving the outcome.
Common Drum Speed and Combine Setup Mistakes in Wet Harvests
A wet harvest changes how grain leaves the head, how it threshes, and how it separates, yet many operators keep running the setup that worked in dry weather. The result is quiet, steady loss that adds up across every pass. These are the mistakes that show up most often.
-
Raising drum speed without adjusting concave clearance. Cranking up drum speed to strip tougher, wetter heads does nothing if the concave stays tight; you just crack grain and overload the rotor without improving threshing.
-
Ignoring feed rate. Pushing the machine to beat the weather floods the cylinder, so wet material never gets enough time or space to thresh properly.
-
Neglecting cleaning fan airflow. Damp chaff is heavier and clings together, so a fan setting tuned for dry crop leaves the shoe choked and grain riding straight out the back.
-
Overlooking sieve settings. Too-small openings blind over with wet material, while too-large openings dump unthreshed heads straight into the tank.
-
Failing to account for moisture variability across the field. Patches dry out and re-wet in the same afternoon, so a single set of combine settings rarely matches every stretch of crop.
-
Forgetting to recheck settings as the day changes. Dew, temperature, and cloud cover shift moisture hour by hour, and yesterday’s perfect drum speed can become today’s recipe for loss.
-
Skipping ground speed adjustments. Slower travel keeps material moving through the threshing zone at a rate the wet crop can actually handle.
-
Not monitoring the loss sensors or sample pan. Without feedback, small problems turn into field-wide grain loss before anyone notices.
What the mistakes add up to
Each of these compounds grain loss. Stack two or three together and a wet harvest can quietly cost you a measurable share of your yield.
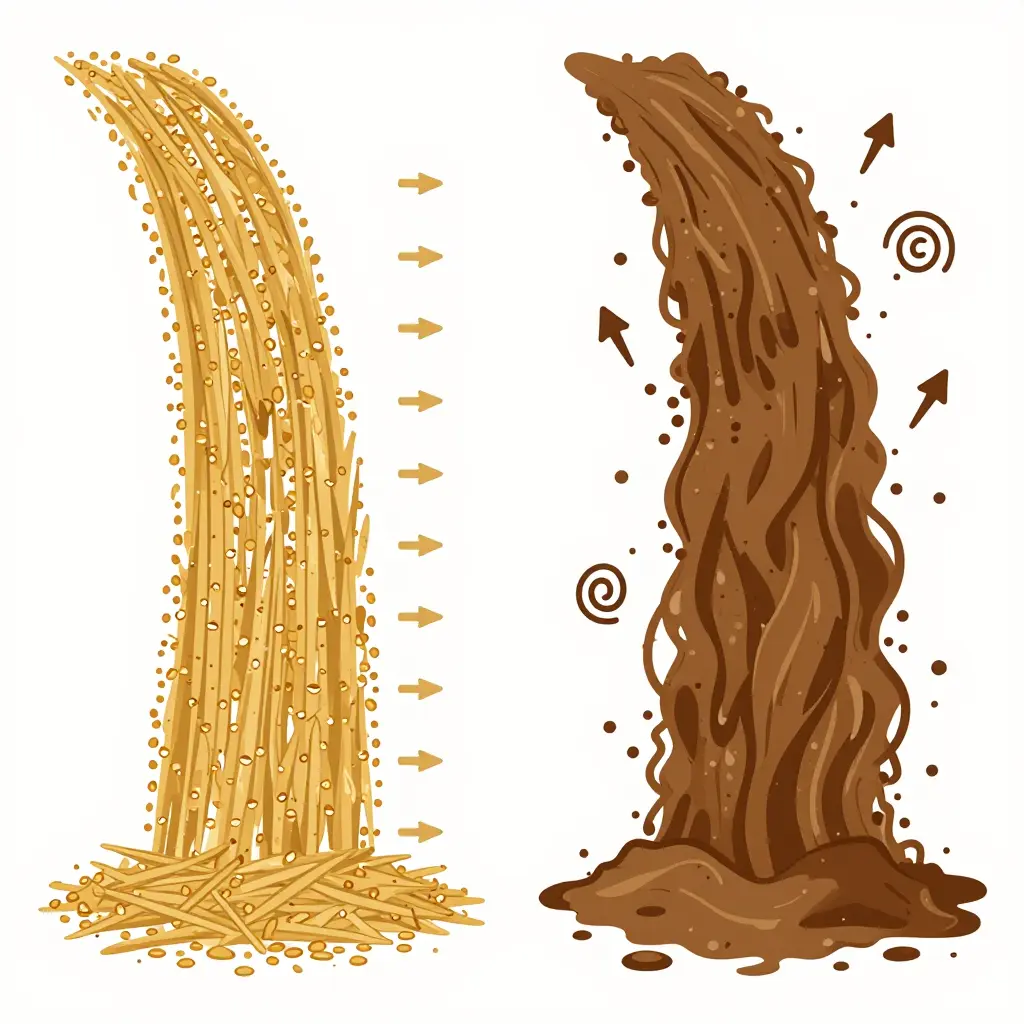
Read the diagram as a before-and-after of material behavior inside the concave and rotor:
- Dry crop flow (left): kernels and straw travel as loose, individually separated particles. The flow arrows stay straight, evenly spaced, and continuous, meaning the material is free to shear, tumble, and drop through the gaps in the concave. Threshing and separation happen almost on autopilot because the grain is already primed to let go.
- Wet crop flow (right): the same material arrives as intertwined, damp clumps. The arrows break apart, loop back on themselves, and swirl, which is what happens when sticky grain and green straw refuse to pass cleanly through the cage. Instead of separating, the mass re-circulates, overloads the rotor, and pushes unthreshed grain out the back.
The takeaway the illustration is making: drum speed controls how hard the machine beats the crop, not how easily the crop wants to release. In a wet harvest the bottleneck moves from impact energy to material flow, so adding more RPM just batters damp clumps that were never going to separate. That mismatch between mechanical force and physical reality is the core reason drum speed settings fail when the moisture climbs.
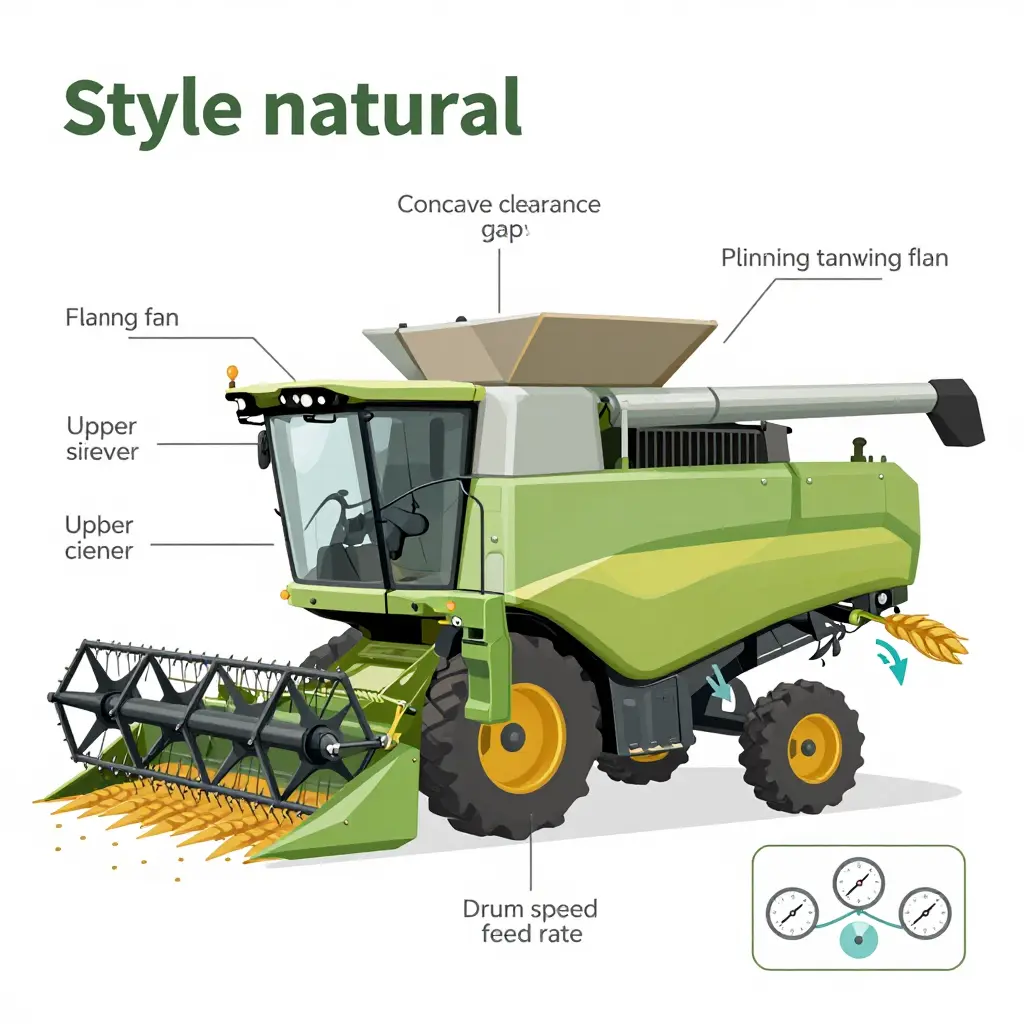
The Multi-Parameter Adjustment Strategy for a Wet Harvest
When the crop comes in damp, many operators reach for one lever: drum speed. Crank it up, the thinking goes, and the wet material will finally let go of its grain. That instinct is one of the most common causes of preventable grain loss in a wet harvest. A combine is not one setting; it is a system of settings that have to move together.
Drum speed is one voice, not the whole choir
Drum speed is one partner in a six-part team: concave clearance, feed rate, cleaning fan airflow, sieve openings, and travel speed all pull in the same direction. Raise the drum and you may thresh harder, but you also fracture kernels and overload the sieves downstream. The goal is never maximum aggression; it is balance.
Why lower speed and wider clearance can save grain
In tough, damp straw, a slower drum paired with wider concave clearance often threshes more gently and cleanly. The wider gap lets the wet mat flow through without pinching, so kernels separate instead of shattering. Raise speed only when heads are still coming through unthreshed; if kernels are cracking and the shoe is choking, the drum is already running too fast.
Damp material is heavier and stickier, so it arrives at the cleaning shoe in a slow, clumpy stream. That is where the rest of the system earns its keep:
| Parameter | Its job in a wet harvest |
|---|---|
| Concave clearance | Opens to reduce pinch and kernel damage |
| Cleaning fan airflow | Increases to lift heavy, damp chaff |
| Sieve settings | Widened so wet grain falls through instead of riding over |
| Feed rate | Reduced for a thinner, more even mat |
| Travel speed | Slowed to match the crop’s capacity |
A logical sequence to diagnose and adjust
Work through the machine in order, changing one variable at a time and checking the grain tank between each move:
- Stop and sample. Walk behind the machine and inspect the ground; check the tank for cracked or unthreshed kernels. Identify what is actually leaving the field.
- Set travel speed and feed rate first. Slow down so the machine is not being force-fed. A thinner mat makes every later adjustment meaningful.
- Open concave clearance in small increments until unthreshed heads disappear or damage eases.
- Adjust drum speed gradually — up if heads are still unthreshed, down if kernels are cracking — watching the tank for tailings and free grain returning to the field.
- Increase cleaning fan airflow to carry the heavier damp chaff out the back.
- Adjust the sieves last, widening them so grain drops cleanly rather than bouncing over into the returns.
- Re-check and repeat. Even a well-tuned system drifts as moisture changes through the day, so re-sample every few passes.
The takeaway
Every one of these knobs talks to the others. Maximizing drum speed alone buries you in cracked kernels and lost yield; balancing the parameters is what protects the harvest. In a wet harvest, the operator who adjusts thoughtfully (fan, sieves, clearance, and feed rate working together) brings more grain home than the one who simply floors the throttle.
Where the Grain Actually Goes
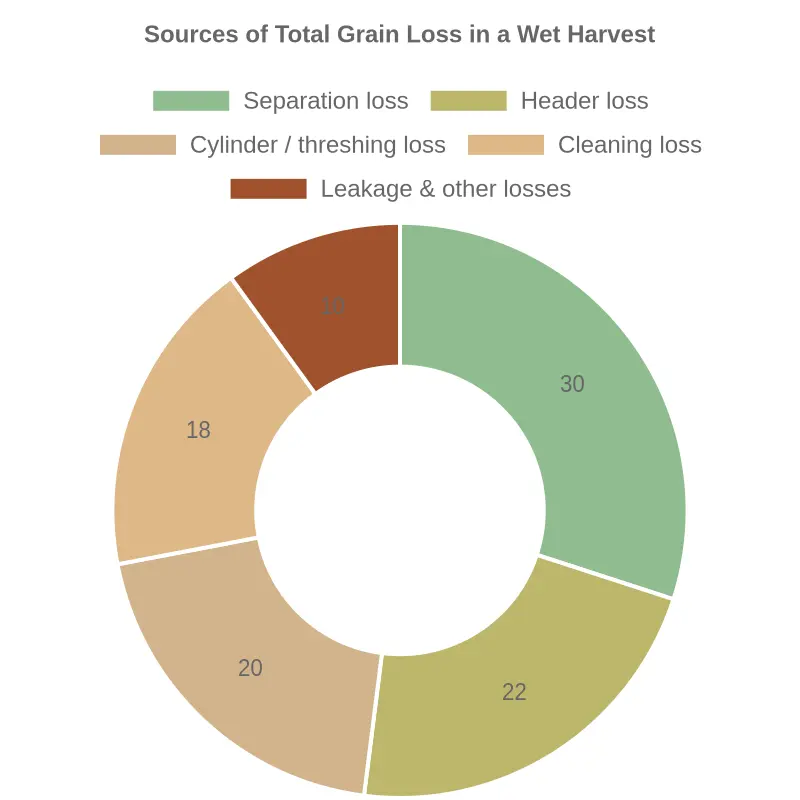
When the field turns wet, the obvious move is to crank drum speed. The doughnut chart below shows why that so often disappoints. Total grain loss is not concentrated in the threshing cylinder at all; it is spread across the whole machine, with separation and header losses together accounting for the largest share.
Reading the Numbers
| Loss Source | Share of Total Loss | What Drives It in Wet Conditions |
|---|---|---|
| Separation loss | 30% | Damp straw carries grain over the walkers and sieves |
| Header loss | 22% | Shatter and stubble losses from a wet, tangled crop |
| Cylinder / threshing loss | 20% | Unthreshed heads slipping through a rushed drum |
| Cleaning loss | 18% | Chaff matting blinds the shoe, blowing grain out the back |
| Leakage & other losses | 10% | Gaps, poorly sealed panels, and handling spillage |
Why One Setting Cannot Fix a System-Wide Problem
Even a perfect threshing job leaves roughly 80 percent of the loss untouched by drum speed alone. Separation, header behavior, and shoe cleaning all respond to their own settings, ground speed, and crop condition. A wet harvest demands a coordinated adjustment across the whole combine, not a single dial turned to its maximum. Treat the drum as one part of the equation, and the rest of the machine gets the attention it needs.
Monitoring Technology and Modern Combine Design for Wet Harvest
A wet harvest exposes every weakness in a machine. Damp straw moves differently, kernels cling to the head, and the threshing system has to work harder to separate grain from material that refuses to let go. That is why the biggest gains in reducing grain loss no longer come from a single clever setting, but from machines that sense, decide, and adjust continuously.
Sensors that measure what operators cannot see
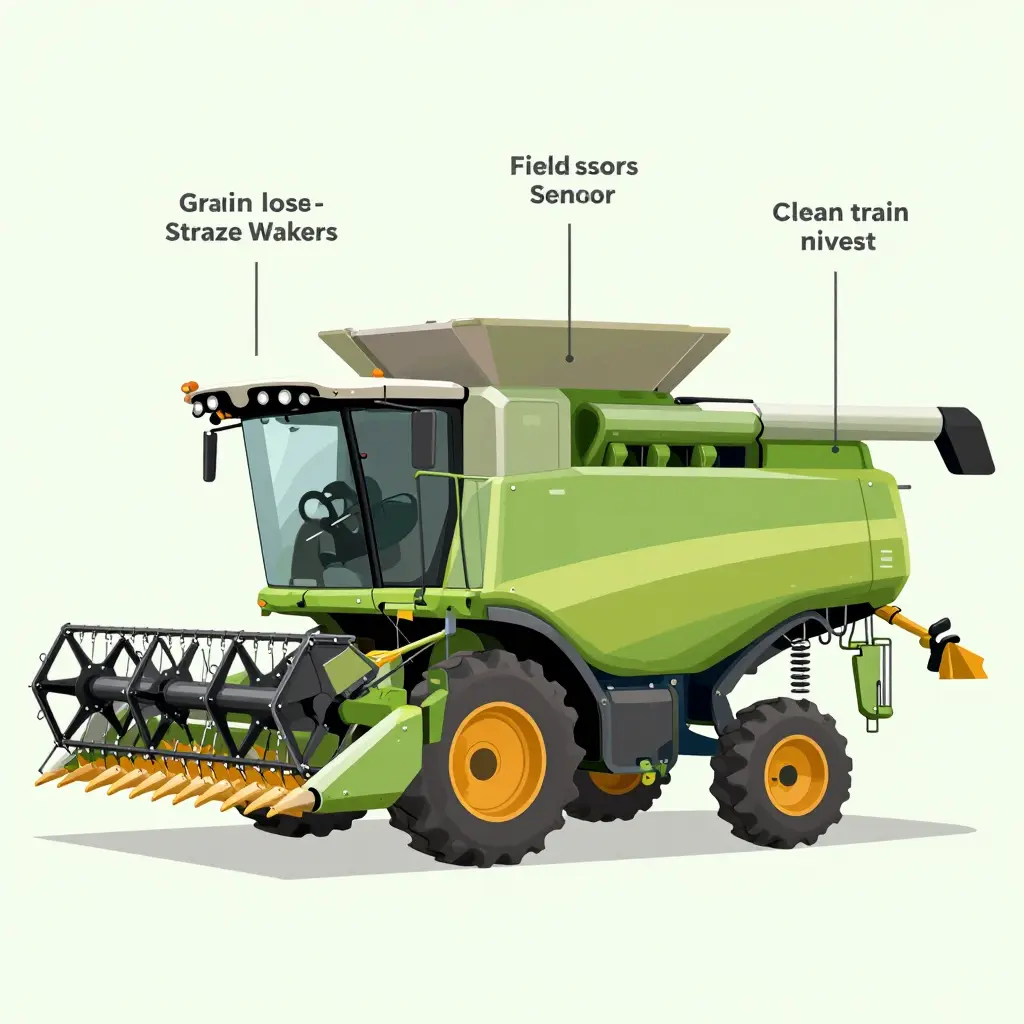
Operators can watch the reel and the header, but they cannot see inside the threshing drum. Yield and loss sensors close that gap. Impact sensors mounted behind the straw walkers and sieves detect grain leaving with the chaff, while yield sensors in the clean grain elevator measure how much actually reaches the tank. Moisture sensors add context, because a crop at 20% moisture behaves very differently from one at 13%.
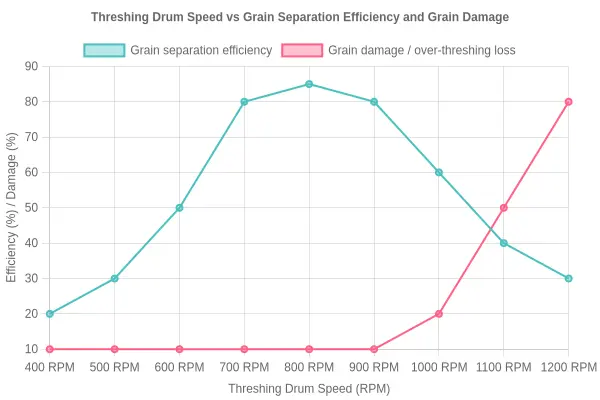
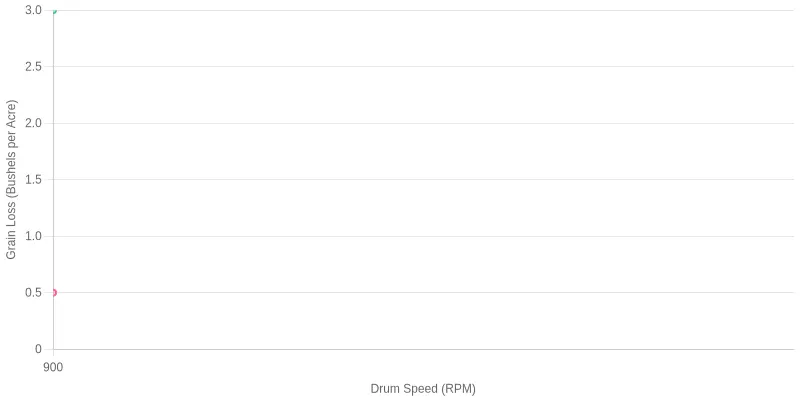
These readings matter because drum speed is a balancing act. Crank it up and you thresh more aggressively, but you shatter grain and lose it out the back. In a wet harvest that safe window narrows fast. The wet-crop curve below climbs steeply once the drum is pushed past roughly 600 RPM, while the dry-crop line stays low and flat across the same range.
Real-time feedback and automatic adjustment
Monitoring only helps when it changes what the machine does. Modern controllers take sensor input and respond within seconds, trimming drum speed, adjusting concave clearance, or altering fan output as load and moisture shift. Instead of the operator reacting minutes after a loss begins, the combine corrects itself. That shortens the gap between “something went wrong” and “we fixed it,” which is exactly where losses quietly accumulate during a long, damp day.
The role of reliable design and R&D
None of this works if the hardware cannot take the abuse. Wet crops load bearings, belts, and rotors harder, so reliable machinery design is not a luxury; it is what makes automation trustworthy. Several manufacturers now offer adaptive threshing control (Claas, for instance, has spent years developing it), and the direction is clear: equipment that treats sensor data as an input to automated decisions rather than a dashboard distraction.
What it means in practice
For farmers, the takeaway is to trust the data as much as the seat-of-the-pants feel for the field, and to let the machine hold a lower, steadier drum speed instead of forcing it through a tough patch. For engineers, it is a reminder that every sensor is only as good as the mechanism it controls. Build a machine that survives a wet harvest and give it honest feedback, and adaptive threshing stops being a promise and becomes a working tool.
Frequently Asked Questions About Grain Loss and Drum Speed in a Wet Harvest
A wet harvest surprises even experienced operators: the machine that ran clean last season suddenly sheds grain out the back. Below are the questions operators ask most often about grain loss, how drum speed and concave clearance interact, and why separation behaves so differently when the crop is damp.
Should I increase drum speed in a wet harvest?
Not automatically. Damp grain and straw resist threshing, so it is tempting to raise drum speed to force the crop apart. But running too fast cracks kernels, pulverizes straw, and overloads the concave, which often increases grain loss rather than reducing it. Raise drum speed in small increments and confirm the change on your loss monitor before going further.
How does crop moisture content affect grain separation?
Wet kernels cling to stalks and chaff, so separation through the concave becomes slow and uneven. Damp material also moves through the machine more slowly, leaving the separator less time and capacity to sift out free grain. That is why grain loss usually climbs in a wet harvest even when the machine is set exactly as it was in dry conditions.
What is concave clearance and how should it change in wet conditions?
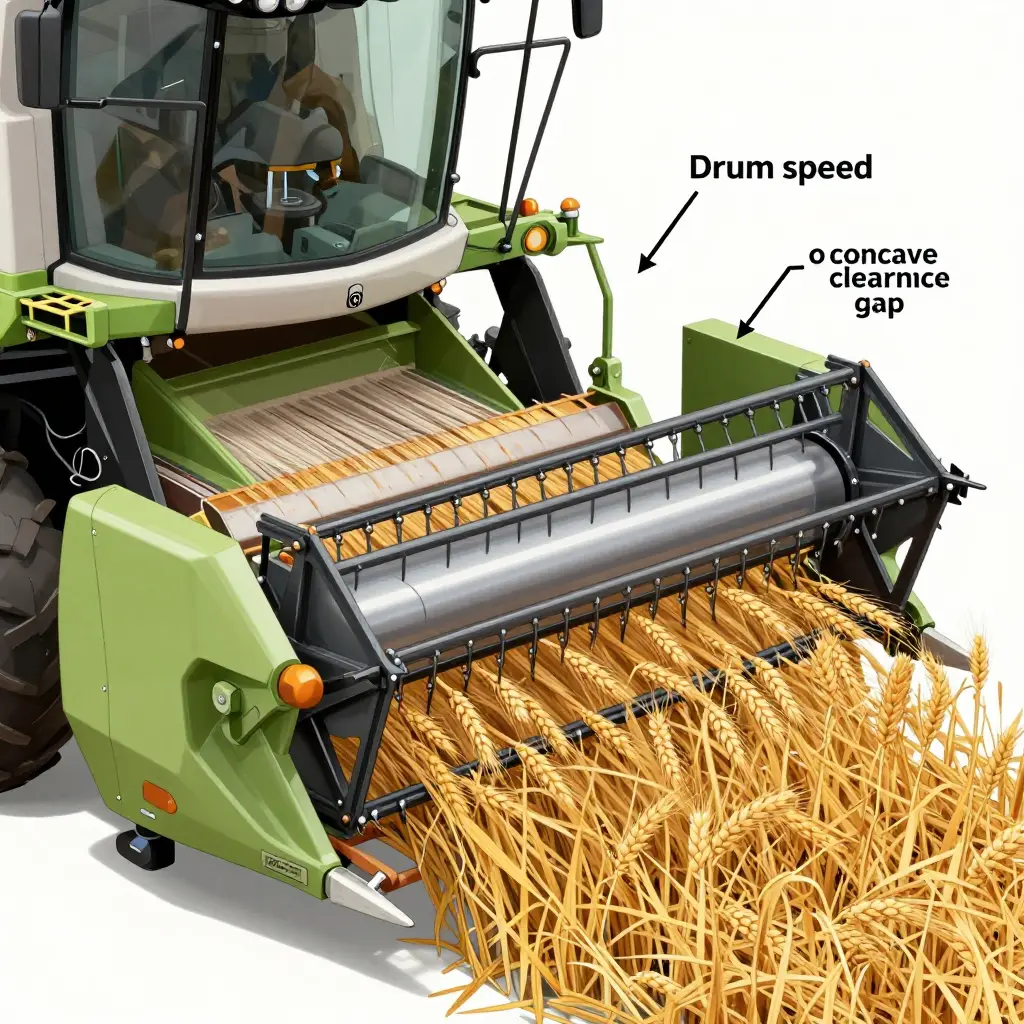
Concave clearance is the gap between the rotating cylinder and the concave grate beneath it. In wet conditions you generally need more clearance, because swollen, damp crop needs room to pass without plugging. Too tight a setting smothers the crop and blocks separation, while too loose a setting lets unthreshed kernels ride out with the straw.
Can grain loss be reduced without new equipment?
Yes. Most losses come from settings rather than worn iron. Adjusting drum speed gradually, opening concave clearance, slowing ground speed, and rechecking sieve and fan settings can cut grain loss significantly on the equipment you already own. Regular maintenance and an accurate loss monitor matter more than a new combine.
How do I know whether my loss is cylinder loss or separation loss?
Check where the grain is actually leaving the machine. Free grain behind the walkers or rotor points to separation loss, while grain still locked inside unthreshed heads points to cylinder loss. Cylinder loss responds mainly to drum speed and concave clearance, whereas separation loss responds to sieve, fan, and ground speed.
The table below summarizes the quick diagnostic:
| Loss type | Where to look | Primary adjustment |
|---|---|---|
| Cylinder loss | Unthreshed heads in straw | Drum speed, concave clearance |
| Separation loss | Free grain behind walkers or rotor | Sieve, fan, ground speed |
| Shoe loss | Grain on ground under machine | Fan, sieve, feed rate |
Does higher drum speed always reduce grain loss?
No. Past a certain point, higher drum speed increases grain loss by cracking grain and overloading the concave with finely chopped material. The goal is the lowest drum speed that still threshes cleanly, paired with concave clearance that lets damp crop flow. Setting both together, rather than chasing speed alone, is what keeps losses low in a wet harvest.
Conclusion: Why a Single Drum Speed Can’t Beat a Wet Harvest
The pattern holds throughout: drum speed settings fail in a wet harvest because moisture rewrites the physics of threshing and separation. When grain and straw carry excess water, they resist impact, cling together, and move through the machine differently than any dry-field chart assumes. Turn the drum up and you shred wet straw; turn it down and grain stays trapped in the heads. Both extremes raise losses instead of lowering them.
The real problem is multi-variable. Moisture shifts threshing, separation, airflow, and material flow at the same moment, so a single-variable adjustment can never compensate for the whole system. Conditions change from pass to pass, which means the best operators treat settings as a moving target rather than a fixed number.
The practical answer is balance: moisture-aware tuning of drum speed, concave clearance, airflow, and feed rate keeps losses within reach, even when the weather refuses to cooperate. The industry is moving toward smarter combines: adaptive settings and real-time monitoring that sense moisture and adjust on the fly, turning operator guesswork into data-driven control. That shift will not change the physics of a wet harvest, but it will finally let machines respond to it.
Related Resources
If the mechanical side of your harvest season has you thinking more broadly about equipment components, dependable replacement parts, and how sourcing decisions shape long-term machine reliability, the following references are worth a look. Each one covers a different category of hardware you may find yourself evaluating.
- Engine blocks and core internals – A closer look at a billet engine block built for high-load applications, a solid example of how upgraded structural components hold up under demanding duty cycles.
- Complete motor assemblies – This drop-in short motor engine assembly shows what a fully matched powertrain package looks like when a proven replacement beats a piece-by-piece rebuild.
- Wheels and fitment – Sizing and offset matter on any machine, and this guide to 17-inch rims for Mitsubishi Eclipse models explains the fitment factors that apply whenever you are matching wheels to a chassis.
- Body and bumper panels – For operators tracking structural and cosmetic parts, this range of front and rear bumpers for the 2016 Lancer illustrates how trim components are catalogued, matched, and sourced.
Keep these references handy as a starting point, and always confirm specifications against your own equipment before committing to a purchase.